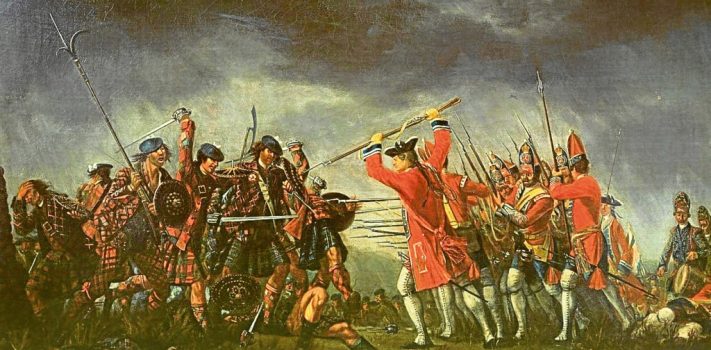
Our mid-year 25%-off sale on the SurvivalBlog Archive CD-ROM ends on May 31st. The latest six year compilation includes my book "Rawles on Retreats and Relocation" in digital format. At the sale price, the CD-ROM is $11.25 and the Digital Download is just $7.50. Be sure to order your copy before the sale ends.
Monday, May 21, 2012
Some months ago, I alerted Survival Blog readers to a small company, in my neck of the woods, called US Tactical Supply that has customer service second to none, as well as having top-notch products, most made in the good ol' USA. As I stated before, if you are looking for cheap knock-off merchandise, or just "cheap" anything - then don't do business with US Tactical Supply - they don't carry junk - simple as that. However, if you are looking for the best-of-the-best in high-quality products, with friendly folks, who are sincerely happy to help you, and appreciate your business, then US Tactical Supply is the place to go.
Anyone who is familiar with doing business with the Department of Defense knows that, you have to carry merchandise that meets or exceeds DOD specifications. US Tactical Supply is a DOD supplier - enough said, eh? Military and law enforcement personnel strive for the best products they can get - they can't afford to have their gear fail them, when they need it the most. So, a lot of the customers who deal with US Tactical Supply are military and law enforcement. As well as savvy survival-minded folks, too.
Kevin Swanson, the President of US Tactical contacted me, and wanted my honest test and evaluation on a new product they are now carrying called the "Stove Tec" - it's a "rocket stove." You can get the skinny on the Stove Tec at their web site as well as being able to watch a short video describing how the Stove Tec works. Now, anyone familiar with survival gear, will readily recognize the Stove Tec emergency stove as a "rocket stove" - there are various makes and models on the rocket stove on the market, as well as detailed videos out there, on how to make a rocket stove yourself. However, all rocket stoves are NOT the same!
The Stove Tec rocket stove is probably the best-made of the bunch if you ask me. Stove Tec (located in Oregon) manufactures several different versions of this little emergency stove, and Kevin Swanson sent me the top-of-the-line model for test and evaluation. And, I'm here to tell you, this baby should last you many, many years of hard use. This is "the" emergency stove you want when the power goes out, trust me!
I received the two-door Stove Tec model, which is the deluxe model. This baby has a metal-lined ceramic door that burns any available wood or flammable biomass material. The combustion chamber isn't just lined with "fire brick" like other rocket stoves - nope, this baby is also metal lined, to help retain the heat for a good long time, as well as to protect the fire brick (ceramic). The deluxe two-door model is the one you want to purchase - the main upper door allows you to feed your fuel into the fire chamber, and the smaller, lower door, allows you to adjust the heat - neat idea, when you want a hotter or cooler fire for cooking, and it allows you to cook longer, too.
The stove top surface - it's double thick cast iron, with six pot supports - you're not gonna have to worry about this part of the stove failing you. You can either place a frying pan or pot right on top the cast iron stove top, or use the include galvanized steel pot skirt to keep your pan or pot slightly above the stove top surface. I found that I liked just cooking on the stove top surface - as did my wife.
The body of the Stove Tec is painted green, and is sheet metal - but there's no need to worry about the sheet metal "melting" on you or a hot fire burning through it - the double layered kiln-fired combustion chamber protects the outside sheet metal. There is always plenty of small tree branches and twigs around our homestead, so finding fuel for the Stove Tec rocket stove was an easy chore, to be sure. We also found that, we could use wadded-up paper to start and burn a pretty hot fire, too. There are heat resistant plastic and steel carry handles on the Stove Tec.
There's a nice metal support that you place in front of the upper door on the Stove Tec, for feeding your small pieces of wood into the fire chamber, so you don't have to sit there and hold the wood - you simply slide it into the fire chamber as it burns, to keep the fire going. It honestly doesn't take much wood at all, to get a super-hot fire going to cook a meal. We have enough wood on our small homestead to last through a lifetime of use cooking on the Stove Tec - honestly!
If you are serious about long-term survival, under harsh conditions, then you need to take a serious look at the Stove Tec rocket stove from US Tactical Supply. When your propane tanks run dry, and you can't get 'em refilled, you'll sure be glad you have the Stove Tec standing by. And, if you're out camping or hunting, you don't need to have a huge cooking fire - that wastes a lot of wood - in order to cook a meal. A mere handful of wood will provide more than enough fuel for cooking a meal, or to fire-up the stove to warm yourself. I don't care if you live in the big city or out in the boonies like I do, you will find the Stove Tec rocket stove to be a blessing when the power goes off, and you need to cook a hot meal. As I stated, it takes very little wood or other material (even charcoal can be used) to get a good, hot fire going in this rocket stove.
Sure, you can find rocket stoves all over the place, but trust me, I've seen a lot of 'em, and they don't even come close to the Stove Tec in quality and features. The Stove Tec sells for $124.95 at US Tactical Supply, and they do have a less expensive model. However, I'd spend a few bucks more and get the deluxe version - you'll appreciate it more.
Whenever I shop around for any survival gear or supplies, I not only look at the best prices I can get, I also look at the quality of the products I'm thinking about purchasing. Cheap is never good! Another thing I look at is the company I'm going to do business with. I can tell you horror stories about some big name companies, that simply have some of the worse customer service you can imagine - even some of the big-name gun companies have customer service that sucks! If you want to do business with a small company, that really cares about customer service, and carries mostly US-made products, then take a look at US Tactical Supply - they are growing, and deserve your business. Don't always think you are getting something cheaper some place else - don't shop around on "price" only - take a look at the company. I enjoy doing business with the little guy, especially when they carry so many US-made products....that's why you'll hardly ever find me in the big box stores - I don't like contributing to the economy in China. I'd rather shop the small, independent stores, that want my business, and are there to stand behind the products they sell. Ever try returning something to one of the big box stores? Yes, it's a pain-in-the-rear at times - an you sure get the impression that they are doing you a favor by allowing you to shop their stores - when it should be the other way around.
In all honesty, I don't know why I hadn't laid claim to a rocket stove before now. Yes, I have a propane cook stove that I use several times per year when the power goes out. But I can't possibly stock enough propane tanks or bottles to last me many years. With the Stove Tec rocket stove, having enough fuel isn't a problem - especially when it burns all manner of fuel. You see, sometimes you can teach an old dog new tricks...and I learned just how much I'm gonna need the Stove Tec rocket stove when the power goes out. I've got mine, now you need to contact US Tactical Supply and get one of your own. You're gonna wonder how you got along without it. And, you'll be surprised at the friendly, helpful folks that answer the phone, too. - Pat Cascio (SurvivalBlog's Field Gear Editor)
Hi,
Thank you for sharing all of your info, but I have to be honest, I am so overwhelmed with it all that if or when this happens I would rather be dead. Who would want to live like this and what would be the reason to live? I wouldn’t have the heart to shoot someone to protect my food and I am a sharpshooter. I just wanted your opinion.
Best Regards, - Deborah C.
JWR Replies: The underlying theme to my writings is to be part of an integrated team. That team might be just a few families living on a cul-de-sac, or it might be a small town. By being competent and confident with firearms, your group will avoid confrontations. Very few bad guys will mess with someone with a capability to immediately drop them at up to 400 yards. And if you don't have the willingness to do so yourself, then team up with someone that does. You can provide other forms of useful and valued support to a group or small community effort. (Agriculture, advanced first aid, mechanics, et cetera.) Not everyone has to be a warrior.
James,
Having just read the letters regarding reloading economics, I noticed the following caveats and had two important points about them:
1. “do not shoot lead bullets in a Glock” because of the polygonal rifling. Polygonal rifling essentially creates rifling engagement angles that are less than 90 degrees, therefore whatever bullet material you use seals the bore better (because it’s easier to deform lead/copper into a rifling groove that has a more obtuse (open) angle) than a sharp 90 degree angle. A standard cartridge fired out of a conventionally rifled barrel will travel faster out of a polygonal rifled barrel because of the superior seal that the polygonal rifling creates and that is why Glock uses those kinds of barrels, bullets perform better out of their barrels. Better seal = higher pressures, higher pressures = higher velocities. It needs to be noted that the HK USP series of pistols also has polygonal rifling as well as the Baby Eagle line and problem some others that I haven’t listed here. Lead is perfectly safe to shoot out of Glocks or HKs, as long as you decrease your powder charge. Polygonally rifled barrels do lead up any more readily than conventionally rifled barrels, in fact, because polygonal rifling seals the bore better the number one cause of leading is reduced, “gas cutting” the increased pressure does not melt lead bases to any appreciable extent – gas cutting does. This was all figured out decades ago by better men than me, like Elmer Keith. Since higher pressures also yield higher temperatures (simple physics) even a conventionally rifled barrel can build up lead quickly if you use hot loads, or try to reproduce +p type ratings using lead or copper plated bullets. It isn’t lead build up that leads to a “kaboom”, it’s nearly always a compressed load which is far more dangerous in any barrel. Gas checks (copper jackets that go on the bottom of a lead bullet) are effective not because the leading lip of the gas check hits the rifling and splits to seal the angle of the rifling in addition to shielding the base of the lead bullet. Don’t believe me? Check the effective velocities of a gas checked bullet, it’s higher than just lead – less pressure leakage.
2. Copper plated bullets should be treated as if they were lead when calculating your powder charge. Because the plating is not a “jacket” but a very very thin microscopic coating of copper the hardness of the bullet is still essentially whatever the hardness of the lead that was used in casting it before plating. The plating process does not harden the lead bullet, it seals the bore better than a copper jacketed bullet – and should be loaded accordingly otherwise you can create higher pressures and you may damage your pistol or yourself. Always load copper plated bullets as if you were loading lead. You get less lead fouling with copper plated bullets, but I’ve pulled lead deposits out of a pistol bore that was only shooting copper plated bullets, although it had a couple thousand rounds through it prior to the cleaning.
3. Remember that the higher pressure rounds will have more problems with overpressure than low pressure rounds, typically autopistols shoot 9mm, .45 ACP, .40 S&W – I’ll ignore the other more uncommon rounds, so look them them if you’re going to reload for them., as an example only (look up your specific combination of powder, bullet, primer and casing) the following number can give you an idea of the pressures involved:
9mm Luger (9x19) is around 34,000 psi
45acp (45 auto) is around 20,000
40sw (40 short and wimpy) is around 32,000 psi
ammo manufactures spend a seriously paranoid amount of time calculating not only pressure, but the pressure curve (burn characteristics inside barrel) and they minutely examine the components after firing before determining a load is safe, they do this for each and every “lot” of ammunition they produce, if they change one component then there is a different “lot number” assigned to it and the workup is repeated for it. Since their powders and components are custom blended and manufactured, they tend to repeat this process a lot. A typical handloader will not have access to the testing equipment that a manufacturer has and has to be at least as meticulous. Pressure is king and over-pressure will injure you and destroy your weapon. In a grid-down survival situation the nominal savings that reloading will yield are offset by the very serious chance a non-expert reloader will inadvertently take. If and when THSTF I do not plan on shooting any reloaded ammunition out of my autopistols or autoloading rifles.
As a side note, a few more thoughts on reloading practices:
The typical reloader who uses “junk brass” that is harvested from a shooting range is taking some serious chances. Without realizing it, a handloader can work up a load that is perfectly safe in a Lake City 5.56 case, and start producing with a large range of brass cases from various manufacturers – without realizing that the internal dimensions of each manufacturers casing are different, in fact the typical Lake City nato 5.56 casing has a thicker web and thicker walls than a commercial Winchester .223 Remington case – so a perfectly safe load in a different case will yield MUCH different results and since we’re worried about pressure (as we should be) we inadvertently are producing loaded cartridges that are quite different while believing we are making a consistent product because we’re using only one type of bullet/powder/primer. Whenever possible, use ONE head stamp AND be sure they’re of the same year of manufacture.
I have reloaded now for 20 years, from .50 BMG to .380 and the one thing I keep as my watch-word is that I’m loading for target ammo only and I am not trying to reproduce factory maximum pressures. I’ve had to toss out a serious amount of ammo from time to time because I wasn’t as careful as I should have been, and in case you’re wondering – no I never considered breaking apart the casings to reclaim components – why? Because it’s just not worth the time and potential hazards to re-use bullets that have already been crimped, and powder that may be contaminated by whatever was in the case when I reloaded it or handled it during disassembly. Sure a lot of old codgers will say that you can avoid problems, but I have a healthy enough paranoia to toss a couple of bucks in the trash (actually I take them to a public range to put in their “red bucket” I’ve see these same guys pull ammo out of a red range bucket – such disregard for Murphy will surely clean the shallow end of the gene pool at some point
It comes down to pressure and amassing as much possible knowledge about interior ballistics as is humanly possible. Most of the “kaboom” problems that Glocks and other autopistols have had occur when a reloader tries to reproduce a hot cartridge – or as the old competitors used to call it “make major” because before a typical competition each competitors load would be chronographed to insure they weren’t using a “wimpy” load to reduce recoil and thus increase accuracy.
I’ve had two kabooms, both were from compressed loads in reloaded ammo (one mine and one a factory reload) I’ve met other people that have had compressed loads from factory ammo, which is a major cause of “kaboom” in police departments across the country as they use duty ammo on a rotational basis during qualifications (use up the duty ammo to issue fresh duty ammo). I’ve shot a lot of lead out of Glocks, never had a problem – the one I reload for most often is my Glock 20 and 29 – the ultra-hot 10mm. And in case you’re wondering, reloading for revolvers has a slightly different set of problems that can be just as dangerous as those faced by autopistol reloaders.
Remember that no firearms manufacturer will warranty your firearm if you shoot reloads of any kind avoiding lead in Glocks while shooting jacketed reloads is just as much a warrantee problem as the other. Seek knowledge and understanding, understand why polygonal rifling creates higher pressures and you can anticipate and compensate for it, understand why shorter barrels are less efficient at launching light and fast loads, and a host of other knowledge that is useful.
For me the greatest value that I get from reloading is that I’m much better educated than a typical shooter about the products I shoot and it’s a relaxing hobby that helps keep my mind sharp. When I first started reloading I did save a significant amount of money on ammo, but component prices have skyrocketed since then and the savings are now pretty much non-existent. - Jim H. in Colorado
Dear Mr. Rawles,
This was an excellent article. I have a few comments for consideration. There are several aftermarket barrels available for Glocks to allow shooting lead bullets. Search for "Glock replacement barrels". Many of the competition shooters I know use them quite successfully.
Reloading ammo or buying factory ammo are definitely not mutually exclusive activities. I do both. My goal it to increase opportunities to keep shooting. Where I seem to save the most is in reloading my own match ammo. Not only do I save money but my groups are significantly tighter with my reloads. The downside I see with reloading is for those of us who can be distracted into endless pursuit of the "perfect" load.
For folks who have a short memory, reloading is a good thing when ammo is either not available or is so expensive it is unaffordable.
Get out and vote. - Jim Z.
JWR,
Just a few observations about R.S.O.'s article.
I had a few issues with R.S.O.'s article on reloading and wanted to share them.
First, if you order powder or primers by mail, there will be a $25 hazardous materials fee for each package (not item, but boxes in which they're shipped) you receive. Also, I have yet to find a business which mixes primers and powder in the same package. If you're going to mail order either, get some friends who also reload to place orders for their needs to defray the costs (Besides, if you don't already reload, you're going to want some help with set up and some instruction, right?).
If you use range brass (and there's nothing wrong with that), beware that some (mainly polymer) pistols, like the Glock, generally have issues with bulged brass at the base. Over time, this brass will not feed reliably. There are a number of methods to deal with this, like roll-sizers ($$$$$) or some specialty dies. Proceed at your peril. You can generally feel this bulge, and many dies do not size the base low enough to completely get rid of the bulge.
If you decide to buy brass (and there's nothing wrong with that), you can lower the cost of purchase by reusing that brass. So, while $.18/round is somewhat expensive for brass, you'll reuse most of it multiple times, spreading out the cost. If you want another way to get bulk brass, just buy loaded ammo, run it thru your favorite unloader (mine's a M1911), keep track of the brass you shoot and pick it up after you're done. Lots of people like once-fired brass better than pristine. (Note--If you shoot bolt-action rifles, you'll get better results from fire-formed brass than from pristine or fully-sized brass. Use a neck sizer only after you fire form your brass, and it'll be custom to your rifle's chamber.)
Your mileage may vary here, but I've had no issues shooting unjacketed lead (moly coated and uncoated) thru my Glock. Granted, I'm more diligent about cleaning the barrel when I shoot lead thru my Glock (which isn't often, I'm not a Glock fan), but have had no ill effects. If you want, Lone Wolf Distributors makes a great aftermarket barrel, and one of the marketing points for it is you can use unjacketed lead in it. The biggest issue with Glock is the fact that shooting reloaded ammo (yours or anyone else's) voids your warranty, tread at your peril.
I recommend specifically against buying any Lee Precision progressive press, which is unfortunate, because most of their other equipment is outstanding an affordable. The reason I recommend against their progressives is the large number of important parts made of plastic--especially the primer feed system. I owned a Lee Loadmaster for several years, and spent a lot of money on spare parts to replace broken ones.
The Dillon 550B is NOT a true progressive press, as it requires a manual index of the shell plate. True progressive presses index the shell plate by using the lever--every time you pull the lever, the ram goes up and down, does all the operations, and the shell plate rotates. The 550B requires you to turn the shell plate by hand after each stroke.
R.S.O.'s point about buying dies made by he same manufacturer as the press is a good one, but not entirely accurate. Almost all dies are threaded the same, so they're theoretically interchangeable. However, the depth of the place where you screw them into the press can vary. If your die bodies are too short, they won't adjust or work properly. I currently use Lee dies on an RCBS single stage press with no issues. Lee dies have the advantage of coming with a shell holder, no other die sets do (at least as far as I can tell).
I wholeheartedly agree with R.S.O.'s point on the manuals. If you use a recipe someone else gives you, you're risking losing vital body parts. Don't be that guy/gal.
R.S.O.'s point about Boxer and Berdan priming is a good one, but many foreign manufacturers of handgun ammo use Berdan primers. Look into the case, and if you see two small holes instead of one relatively large one, it's not reloadable.
When cleaning your brass, a tumbler is not strictly necessary, it's just the most efficient and easiest method. You can clean brass with water and let it dry. When you go thru the sorting operation, make sure you check the cases for dings, dents, Berdan priming, and cracks. Dings and dents may not be a problem, discard Berdan and cracked cases. Also discard any steel and aluminum cases, as they're generally poor candidates for reloading.
R.S.O. is mostly correct that you don't need to lubricate most handgun brass if you use carbide dies. However, having reloaded a bunch of .500 S&W Magnum, I recommend lubing long cases, even if you're using carbide dies--I snapped a Lee Loader trying to resize .500 brass without lube. Additionally, most bottleneck cartridges (like many popular rifle calibers) require some lube to make the operation effective, even when you use carbide dies. I can't say this is strictly true for calibers like .400 Corbon or .357 SIG, but I refuse to own pistols chambered for these cartridges--they are answers to unasked questions, and if you're going to go to the bother of chambering a pistol to mostly .40 S&W or .45 ACP, why not just go with the straight wall version and use heavier bullets?
R.S.O. omitted a step--you have to prime the cases. Make sure you use the appropriate primers. One thing to note, some popular calibers (like .45 ACP) have manufacturers who have switched from large to small primers, so pay attention--especially if you're using range brass. It is generally not smart to interchange rifle primers for pistol primers--there's a reason why they make primers specifically for rifles and pistols. Also, be aware that using a magnum primer in a non-magnum cartridge will give you inconsistent velocity.
Three additional sources for reloading supplies:
www.midwayusa.com (based in Columbia, Missouri)
www.brownells.com (based in Montezuma, Iowa; they recently acquired Sinclair International)
www.grafs.com (based in Mexico, Missouri)
Martha in Indiana's Whole Wheat Bread
3 cups warm water
1 1/2 tablespoons dry yeast
1 tablespoon honey
Dissolve the honey and yeast in the water in a large crockery bowl.
Pray for 5 minutes while the yeast "activates", becoming foamy.
Stir in 3 c. W.W. Flour, stir for 5 minutes to develop gluten.
Add 1/3 c. Honey, 4 teaspoons salt, 1/2 c. Applesauce and stir for another 5 minutes.
Add flour (6-7 cups) till a stiff dough is formed.
Turn out on floured board and knead until elastic and smooth. A good test to see if it is kneaded enough is to pick up the dough and then drop it, it shouldn't stick to your hand.
Place dough in a greased crockery bowl and place in a slightly warmed oven into which you have put a pan/bowl of warm water. Dough rises much better in a warm (not hot!), moist, environment. Let rise for 40 minutes or till it doubles in volume.
Punch down and divide/shape into 4 loaves. Place in pans and let rise for 40 - 60 minutes in a warm/moist oven. Remove from oven and preheat to 350 degrees, bake for 40 minutes or until it sounds "hollow" when loaf is thumped. After turning out to cool, I baste the tops of the loaves with butter.
Chef's Notes:
I've used this simple recipe for whole wheat bread for almost 30 years. It always turns out well. I have ground my own flour using hard red winter wheat and used it in the recipe as well as store bought whole wheat flour, both work equally well.
Useful Recipe and Cooking Links:
Do you have a favorite recipe that you have tested extensively? Then please e-mail it to us for posting. Thanks!
Ruh Roh: Europe's Invisible Bank Run Accelerates. (Thanks to B.B. for the link.)
J.D.D. sent this: Nightmare foretold if Greece heads for euro exit
AmEx (American Expat) spotted this: Gold & Silver Decline: George Soros Nearly Quadrupled Gold Stake in Q1
James K. sent this: Economist Nouriel Roubini predicts trouble ahead for economy
Mr. Singh sent this link: John Embry interviewed by James Turk again (on the 18th May 2012) Embry notes: "If you are negative on gold, then you must be positive on currency." (He can't see that such a position makes sense.)
Kevin S. suggested this piece : Be Resilient, Part I: How to Measure Resilience
o o o
Steve H. sent this: New FBI Surveillance Backdoors? Six Key Points
o o o
North Korea 'executes three people found guilty of cannibalism'. One man... "reportedly resorted to cannibalism after supplies to the city dwindled in the wake of the government's disastrous efforts to reform the currency triggered rampant inflation and worsened already critical food shortages."
o o o
Ol' Remus of The Woodpile Report recommended this piece: How Government Wrecked the Gas Can
o o o
"If you are unwilling to defend your right to your own lives, then you are merely like mice trying to argue with owls. You think their ways are wrong. They think you are dinner." - Terry Goodkind in "Naked Empire"
Sunday, May 20, 2012
Today we present three more entries for Round 40 of the SurvivalBlog non-fiction writing contest. The prizes for this round include:
First Prize: A.) A gift certificate worth $1,000, courtesy of Spec Ops Brand, B.) A course certificate from onPoint Tactical. This certificate will be for the prize winner's choice of three-day civilian courses. (Excluding those restricted for military or government teams.) Three day onPoint courses normally cost $795, and C.) Two cases of Mountain House freeze dried assorted entrees in #10 cans, courtesy of Ready Made Resources. (A $350 value.) D.) a $300 gift certificate from CJL Enterprize, for any of their military surplus gear, E.) A 9-Tray Excalibur Food Dehydrator from Safecastle.com (a $300 value), and F.) A $250 gift certificate from Sunflower Ammo.
Second Prize: A.) A Glock form factor SIRT laser training pistol. It is a $439 value courtesy of Next Level Training. B.) A FloJak FP-50 stainless steel hand well pump (a $600 value), courtesy of FloJak.com. C.) A "grab bag" of preparedness gear and books from Jim's Amazing Secret Bunker of Redundant Redundancy (JASBORR) with a retail value of at least $300, D.) A $250 gift card from Emergency Essentials, and E.) two cases of Meals, Ready to Eat (MREs), courtesy of CampingSurvival.com (a $180 value) and F.) A Tactical Trauma Bag #3 from JRH Enterprises (a $200 value).
Third Prize: A.) A Royal Berkey water filter, courtesy of Directive 21. (This filter system is a $275 value.), B.) A large handmade clothes drying rack, a washboard and a Homesteading for Beginners DVD, all courtesy of The Homestead Store, with a combined value of $206, C.) Expanded sets of both washable feminine pads and liners, donated by Naturally Cozy. This is a $185 retail value, D.) A Commence Fire! emergency stove with three tinder refill kits. (A $160 value.), and E.) Two Super Survival Pack seed collections, a $150 value, courtesy of Seed for Security.
Round 40 ends on May 31st, so get busy writing and e-mail us your entry. Remember that there is a 1,500-word minimum, and articles that relate practical "how to" skills for survival have an advantage in the judging.
Let me start with this statement: You should be in good cardio condition to survive the acronyms, and I can help you get there. Like the guy that sells Men’s clothing say’s … “I guarantee it!”
Why is it important? Because life ain’t a video game! Anyone that visits this site more than once, I would hope, has enough knowledge to know you won’t be playing this game sitting on the couch. And while it would be nice to think of all our fellow men as “good people” … we know when the going gets tough: the un-prepared and desperate folks, and bad guys, will get going.
Even if you live in the perfect dream come true enclave in the Great American Redoubt, you still have to protect it, and you still have to hunt/gather/plant/harvest food and water. If you have a retreat, but don’t live there – you have to get there – and don’t assume you’ll be able to drive. If you live in a big city, suburb or small town – sooner or later, you gotta leave the house. And when you leave your house, whether to patrol you’re area, gather intelligence, scavenge for food/water, or are forced to leave – you need to be in good enough physical condition to stay ahead of the bad guys. It would be nice if you were so stealthy, that you could always avoid dangerous encounters. But when you come face to face with trouble, you have two choices: Fight or Flight. I won’t go into ‘fight’, since that’s a whole different topic and I just read a great article by Gunfighter on small team tactics; but for ‘flight’ – there is no choice but to be in the best condition you can. And I don’t care how far out of shape you are, you can improve. Frankly, if ANYONE depends on you, then you owe it to them to be in good enough shape to do your part and help out.
Brief Background. I was very active in my 20s and early 30s. But the combination of getting married (and my wife is a great cook), having a job that keeps me at a desk 8+hrs/day, and generally staying home with the family ….. all came together, so that by the time I was in my early 40s, it’s fair to say I was out of shape – big time. I'm 6 feet tall, but weighed 225 pounds, with a medium frame. However, at the age of 47, I achieved Black Belt in Tae Kwon Do. That Black Belt test was the most grueling physical thing I have ever done. How did I go from around 45 pounds overweight, and not able to climb two flights of stairs without breathing hard – to surviving a 5hr beating that is a Black Belt test?
This is how you get there, no matter what kind of shape you are in now: Set some goals, Get off your ‘six’ and start, create and follow a training plan. I’ve included mine to help you get started.
After getting in the physical condition required to survive a Black Belt test, you might ask – what are you training for now? For me, it’s simply to be in good enough condition to stay ahead of trouble. At age 50, I don’t pretend that I can take on all threats alone, martial arts training or not. So my goal is that, as I mentioned at the start of this article , if I have to ‘flight’ from a situation, I have a plan: if they run – I run faster, when they start to slow down to a jog – I keep running, when they slow to a walk – I keep jogging, if they stop – I keep walking. My goal is to put some distance between myself and the threat, and plot my next steps from safety. Knowing that predators are usually after easy targets, they usually won’t follow you for long. And in the condition most folks are in these days, they can’t. So my training goal became: be able to evade, run/jog/walk, for as long as it takes. In my estimation, that would put me in good enough condition to elude most threats. You can tailor your end state goal to your environment and situation. But don’t fool yourself … you cannot be invisible, and will not be able to fight in all circumstances. Except Chuck Norris, I don’t think I’ve ever seen him run?
How to begin … Make a commitment and start! Set a goal and commit to improving. You don’t have to climb Mt. Everest by the end of week one. By taking it in steps, you will be able to get there. As you achieve a milestone, set a new one, until you ultimately get in the condition you think serves you well. For me, the first thing I needed to do is get my weight down to a reasonable, healthy level. I targeted 180lbs, based on where I was before I got married. Second, I needed to be able to function with my heart rate up in the 170-180bpm range for an extended period of time, with short periods of going full out. When I started training in martial arts, I could not even spar for two minutes before being winded! So the strategy is to improve over time, and be realistic. It took me a year to get to where I could jog five miles without stopping, at a pace to finish in one hour. That’s 6mph, or a 10 minute mile. Pretty reasonable target. And in the process, I dropped 45lbs in about six months.
Depending on where you are, you can start at any level below.
· Starting Out
My initial training step was to walk for an hour, as fast as I can. Keeping track of how far I went in that hour. If you are out of shape and overweight … you might do this several weeks, or a few months, to start building some cardio strength. Be patient and persistent.
· Two Intervals (Walk and Jog)
My next step was to begin adding level of difficulty in intervals. As I mentioned, I could only jog for about 2 minutes when I started. So what I did was … jog for 2 min, walk fast for 5 min, and repeat. At first, I couldn’t do that for an hour, I ended up walking more than jogging. It took me a few weeks to get there.
Next step is simply to keep increasing the intervals. When I go to the gym, I do intervals in minutes. When I go to the county park and run either on the ¼ mi oval running track or the 2 mi trail, I switch between doing intervals by time or distance. It’s nice to mix it up so you don’t get bored. Start off by just trying to keep moving, whatever pace you run so you can jog the whole ¼ mile, then walk ¼ mile, repeat and keep that up for an hour or 5 miles, whichever comes first. When you can do that, move to jogging ½ mile, walk ¼ mile. Then jog 1 mile, walk ¼ mile. Etc, etc. Until you can jog the full five miles. Once you can jog five miles, work on pace. The first time I was actually able to jog five miles without stopping, it took me a little over an hour. Over time, I was able to pick up the pace, and now I can jog five miles in about 40-45 minutes. Why did I pick five miles? A professional trainer once told me: “If someone can run five miles, I can train them to run a marathon”. So I thought is must be a good target?
· Three intervals (run/jog/walk)
Now that you have a good cardio base, you can start to train for evasion scenarios. It’s time to add a third interval – sprinting. As with the plan above, I add time or distance in the mix for sprinting. Initially, I used the same strategy as above, to continuously improve. I downloaded a free interval timing app to my iPhone, but you could do the same thing with a watch. Try starting with 15 sec sprint, 30 sec jog, 2 min fast walk, repeat. Not as easy as it sounds, especially after an hour. Keep increasing to a target you believe will meet your needs. Again, my goal is to be able to sprint until the bad guy slows down and put a little distance between me and the threat, then stay ahead until I get to a safe area. I am getting to where I can flat out sprint for a several minutes, run hard at a fast pace for several minutes more, decreasing to a jog for a minute or two to recover and allow my heart rate to drop, the run hard again if needed.
· Advanced Training?
First and foremost – you can start training in a Gym, on a treadmill. But that just doesn’t duplicate real world. You will find that actually running on a track is harder. And a jogging trail is a step up in difficulty from a track. So to keep taking in to the next step, keep making it more real ... Try running trails, up and down hills, thru heavy woods, tall grass, in the middle of the hot summer, even in the rain. All that keeps it interesting, and you won’t get as bored doing the same thing day after day. Secondly, mix up the training – variety is more fun. Some days I just jog. Some days I do mix up intervals based on time – two intervals (2 min jog / 5 min walk), some days three intervals (15 s sprint / 30s jog / 2min walk), or mix up the distance ( ¼ mile sprint, 1mile jog, ¼ mile walk). Also, I have found it helps me to take a day off and rest. I don’t work out on Sunday, regardless of whether I missed a day during the week, for whatever reason.
Lastly, consider training with your G.O.O.D., BOB, or SWM (stays with me) gear. What are the chances you may have to evade while toting one of these? How far can you walk with a 50 lb G.O.O.D. pack? Can you jog with a 20 lb BOB? How fast can you run with a SWM bag? (Mine is a medium size fanny pack.)
Measuring Success. Obviously, one measure of success is the increase in distance and rate you can run. But, if you are like me, you want cake and to be able to eat it too. The best part of all this is, you can eat what you want, and still get in shape. You don’t have to eat grass and pine cones, join a gym or hire a personal trainer. Here is tip … Get a cheap bathroom scale, and learn some simple math to measure success. Your Weight = Food – Exercise. Understand, to get your weight where it needs to be, it doesn’t matter what you eat, as much as if you are burning it up. This article isn’t about nutrition, just how to know if you are moving in the right direction. So, jump on the scale each day, and if over time: a) weight stays the same – then you are burning the food you eat, and are balanced; b) if, over time, weight is increasing – you are either eating too much or not exercising enough; c) if, over time, your weight is decreasing – you are expending more energy than you are eating. It’s really pretty simple.
I use these free iPhone apps and found them to be very valuable:
- WalkingGPS – This is a great app to track exactly where you have been, and it even plots your path on a map. Measures distance, time, rate, and even altitude change. I’ll bet the first time you walk what you ‘think’ is five miles, you are way off, it’s further than you think. This will keep you honest. It’s also easy to see the pace you are moving at in real time. So you know if you are jogging at 4mph (15min mile), 6mph (10min mile) or 10mph (6min mile). I’ll bet the first time you try to run at 8mph you are shocked at how fast that really is?
- IntervalTimer – I can set it up to alert me when it’s time to walk, jog, sprint and listen to music at the same time. I’ve saved several … Jog/Walk: 2m/5m, 10m/2m or Sprint/Jog/Walk: 15s/30s/2min, 1m/4m/1m, etc.
- Lose It! – great way to track your weight over time, and does a great job of helping you keep track of calories if you want to.
My daughter was recently in an Earth Science class where a discussion took place. The other students didn’t know that the dandelion with the yellow flower and the dandelion with the white seeds were one and the same. And this is from students who have taken numerous public school science classes and will soon be out in the adult world. As I told this to a close friend, she made the observation that this will be the level and skills of people we will be dealing with should TEOTWAWKI happen. My heart hurts that children aren’t taught to think and how to ask appropriate questions. Some never develop a thirst for knowledge. They are simply unprepared to live an independent and self-sufficient lifestyle.
As a 12-year homeschooling mom, I have some thoughts and ideas to share with others concerning children and the area of preparedness. I realize that many readers of Survival Blog may have already raised their family and would instinctively pass by this article. But are any of you grandparents, aunts, uncles, or neighbors of younger children? I recently spent the day with a curious youngster who asked many questions of “how” and “why” I was doing things throughout the day. It occurred to me what an opportunity it was to engage a young mind and body into the everyday life of a prepper.
Children can be very intelligent. My husband’s mother loved to tell the story of when they hired a handyman to do some wiring in their home. My husband, who was 3 or 4 and didn’t talk much, quietly said “It won’t work.” Sure enough, when his dad got home the wiring wasn’t done correctly and the lights didn’t come on. They were wowed at the thought that their young son could see this.
In parenting, my first thought is that a child must be involved in what the mom, dad, or perhaps another adult is doing. Do your very best to not put the child aside to play while you “get some things done.” At first, having the child assist you will certainly slow you down, but after a while the child can be a real asset as he learns to think and process ideas.
About a month ago I visited a friend to discuss vacuum sealing mason jars and brought various supplies to demonstrate. The three young children in the family were fascinated by the discussion and function of vacuum sealing. The 7-year-old boy suggested an experiment to try and it worked! But what would he have learned or been able to contribute if he were merely told to go play?
In my own prepping journey, I have researched sun ovens. I do intend to purchase a professionally manufactured one, but right now I am experimenting with a solar funnel cooker made from a car windshield sun shade. I can only get the temperature inside the cooking pot to 225 degrees, but it will definitely cook food on sunny days even if the weather is chilly.
My curious young neighbor asked plenty of questions when I set the cooker up on the patio. I was conducting an experiment to increase the temperature by putting a mirror in the funnel. (Surprisingly, my efforts failed as I got higher temperatures without the mirror). But it was “fuel” for me and my young friend to discuss.
Here is a link to show you how to build your own for under ten dollars. And it shows a father and his daughter working together to make the video and demonstrate the oven. Awesome!
What fun to involve a child and cook things like “baked” potatoes, brownies, or simply heat up already cooked food (for quick and impressive results). You both learn important skills that could actually be used in emergency/disaster situations. As your skills grow, you can research more recipes to try and build on the knowledge you have gained.
This past year I saw some videos on the StoveTec Rocket Stove. For my birthday I asked for and received one. It is an amazing stove that I will get many years of use from. It will be invaluable in the event of emergency, but it’s also fun and practical to use now. After we ordered our stove, I stumbled across a video that showed someone who made a rocket stove with a few pieces of concrete. It’s called a Redneck Rocket Stove. Here’s a link to show how it works and how to make it.
Although I love my StoveTec stove, I must say the “Redneck” one is cheap, EASY to set up, and with adult supervision, a child could operate and cook on it. As you can see in the video, this is an efficient little stove fueled by sticks easily gathered in the yard. I plan to teach some classes in disaster preparedness in our community and will demonstrate this little stove, as I think every family should know how to make and set up one of these stoves in their back yard.
In reality, an open camp fire and little ones cause me to be more than a little jumpy and nervous. From what I have read, children in 3rd world countries have fallen into open cooking fires and
have been horribly burned. But this technology makes a contained fire that, with supervision, is much safer. With adult help, a child from age 7 on up could be taught fire building skills and outdoor cookery. So whether you want to roast some hot dogs and marshmallows on a starry summer night, cook a side dish to accompany meat grilled on the BBQ, or want to cook up a fantastic chili or stew, the rocket stove provides the means to hone those outdoor cooking skills for yourself and your child.
A word of caution. You know your child. Only you can decide when they are responsible enough to do this without supervision. I do urge you to err on the side of caution when it comes to fire safety. When finished, make sure the fire and coals are completely out. You wouldn’t want your carelessness to be the reason of a fire disaster.
In continuing on our preparedness journey, my husband saw a need to “get out of town” and about 8 years ago we were able to move to the country. This by itself was invaluable as we saw and heard our first mockingbird, realized that the sunrise and sunset pattern changes with the seasons, that the moon rises almost an hour later each night, that the constellations are in different places according to time and season, and many other amazing things. We looked and learned and discussed and learned some more. Can you REALLY eat dandelion greens and make jelly from the flowers? Can plantain really take the itch out of mosquito bites and poison ivy as well as take the swelling out of bee stings? Could an old fashioned remedy of plantain and soaking in Epsom salt reverse the horrible flesh damage caused by a brown recluse spider bite? Even when the doctor said it was the worst case he had seen and my brother would have to endure surgery to remove a large amount of damaged flesh? Yes, we learned all this and more by simply stopping to ask questions, look and observe, and gather information when we didn’t know the answers.
Something we did in our family is to choose good books to read aloud from the time the children were little on up to the teen years. These books have made impressions that will be with us a lifetime. It was a time investment on my part, but I believe the returns from the information gained was well worth the effort. Everyone loves a good story. When you can actually learn while being entertained, so much the better.
We started with the Little House on the Prairie series. This pleased my daughter, but my 6-year-old son said he was not going to listen to a story about girls! I read aloud anyway and he inched his way closer as he became interested in the story. Needless to say, we finished that series and it is a happy memory we share.
Stories of hardship and perseverance are always good ones to read. It was probably my fascination with pioneer life that put me on the preparedness path I am on today.
Another set of books that we especially enjoyed was the Little Britches series by Ralph Moody. The first book, Father and I Were Ranchers and the third book, The Home Ranch, are most enlightening. Like the Little House books, these are also true stories. They will especially appeal to boys 10 and up, but contains information both genders can learn from. The young boy, Ralph, tells how his family moved out west, endured hard times, and then the father dies. Ralph becomes the man of the family and goes to work to provide for his mother and siblings. It is an amazing example of working hard and overcoming adversity. It is also a loving tribute to a father who knew how to think, how to solve problems, and who in turn taught his son to do the same.
The book Lost on a Mountain in Maine by Donn Fendler is a fascinating true tale of a young boy who is lost in the wilderness and almost doesn’t make it out alive. This story is invaluable to open up discussion of what and what not to do when lost in the wilderness.
A favorite story we read aloud, Freckles , is a work of fiction by Gene Stratton Porter. “Freckles” was orphaned in the early 1900’s. His hand had been severed from his arm and he was simply left on the steps of a building when he was a baby. Upon turning 18, he is released from an orphanage in a large city, and must now live and provide for himself. He ends up at a logging camp and is given an opportunity to prove himself on a job, in spite of his handicap. The grueling days, overcoming fear of the wilderness in which he finds himself, and battling thieves has you rooting for Freckles. It is a real page turner. A book is great, in my opinion, when it can engage children through adult level. My daughter recently recommended it to a guy friend to read and he loved it. My sister borrowed our book to take on a trip with her husband. She read it aloud while he drove. After the first chapter her husband said his “emotions had emotions.” They, too, were drawn into the story and learned many things about natural science as well.
Another book we enjoyed was Carry On, Mr. Bowditch by Jean Lee Latham. It tells of a young boy whose dreams of an education are dashed when his father puts him in an apprenticeship which he legally can’t break. He works hard and then self-educates as he finishes his obligation. His main text book was a King James Bible. He then goes on to change nautical history. Although I was hesitant about reading this book in the first few chapters with my teens (due to it at first being geared to a younger audience and talked about “luck” which I do not believe in), I was glad we continued on. It transitions to when the boy gets older and decides he wants to learn and be educated more than anything. This is based on a true story that clearly shows the need for self-education and how to do it.
Whether we choose to homeschool or not, parents are their children’s teachers. And as we prepare for the worst and hope for the best, we need to ask “How will children be educated in an TEOTWAWKI situation”? Families may have no choice but to homeschool. How do you prepare for that?
Locate good materials (even through garage sales and thrift stores) and keep them for the future. Do not only buy math books and dry text books (they DO have their place), but choose good quality books such as I have mentioned and whet their appetites for lifelong learning.
In a lot of preparedness articles I have read, the authors caution you to know how to use your supplies. The time to learn is not after disaster strikes. How true this is. So make the best of the time you have now. Whether you have a 3-year-old, a teen, or are just a concerned friend of a family with children, start investing in the lives of young people now. Teach them skills. Even if you are just beginning to learn yourself, involve the kids in what you are doing. Ask them questions and wait for the answers. Help them think through problems. Help them come up with solutions. Help them help themselves. Their lives (as well as yours) may depend upon it.
While we are all preparing for something most of us are not financially secure there for we must stretch our Dollars as long as we have them as a form of currency.
Here in falls the concept of reloading your own ammunition. Because face it we need to practice and we need to store for when the supply runs out. Let’s start by doing a little math, Ammo 9mm Luger Winchester USA 115 Grain FMJ 1190 fps 100 Round Box $21.11 x 10 = $211.10 bought online. Now let’s order the individual component parts online and see how much we save Winchester Bulk Bullets 9mm 115 grain FMJRN = $105.10, Winchester Small Pistol Primers 1,000 = $29.95, Powder 1 pound about $20.00, Winchester Bulk Brass 9mm = $176.30. Ok total to load your own 1000 rounds of 115 Grain FMJ = $331.35 now you’re saying to yourself that’s $120.25 more than if I just bought it already loaded there’s no savings to heck with this idea right? Wrong! Take a look around next time you go to the range or your favorite outdoor shooting spot how much 9mm brass is just laying around. LOTS and LOTS all you have to do is pick it up, and as for the powder on average you can load 1200 to 1400 rounds of ammo with just 1 pound. Hmmm, so let’s take just the price of brass $176.30 out of the equation that will leave us with a grand total of $155.05 for 1,000 rounds of loaded ammo that is a savings of $56.05 or roughly 27%. Greater savings can be had by buying plated and lead bullets. (If you shoot a handgun with a Polygonal rifling such as a Glock DO NOT USE unjacketed lead bullets!)
I think if you have made it this far into the article you are now saying to yourself but the equipment is expensive. This statement is true for the most part however there are many different manufactures to choose from thus making it a matter of figuring out how fast you want to load your 1000 rounds. You can get a RCBS ROCK CHUCKER SUPREME PRESS you will need to buy Dies (single stage) for MSRP $ 202.95, or a Lee Breech Lock Challenger Press you will need to buy Dies (single stage) for MSRP $94.00 or a Lee PRO 1000 9MM LUGER (progressive press includes Dies) for MSRP $254.00. Another option is the Dillon Square Deal 'B' (progressive press includes Dies will not load Rifle ammo) for MSRP $379.95 or the Dillon RL550B you will need to buy Dies (progressive press loads Rifle ammo) for MSRP $439.95. I can go on and find all the presses that are available and put prices in here but then I might as well just open a store and sell the stuff too. (Note to self, find investor open store) Ok do some more research on your own talk to friends other people at the range find out what they like and WHY. Before we get too much further I am not employed by nor do I receive any kickbacks from any of the above mentioned Manufactures, however I was at one time employed by Dillon Precision. Yes I do like there products I have used them for over 10 years and the Lifetime "No-B.S." Warranty is great! Links to some key manufacturers mentioned are listed at the bottom of this article.
You will need to buy Reloading Dies for most of the machines listed. The Dies range in price from about $29.95 to $63.95 depending on which company you go with. If you by a Lee reloader and Dillon Dies you may need to buy 1 more Die for the system to work correctly and yet if you buy a Dillon machine and Lee Dies you may not use 1 of the Dies. My strong recommendation is to use Dies made by the same company that made your Reloader.
Most of the companies also have some sort of case prep Deals (i.e. Starter Kits) these kits should include a Scale that weighs in Grains (the industry standard unit of measure), a case tumbler (the thing that cleans the brass), media (the actual cleaning material), a bottle of polish (so the brass is shiny again), a set of dial calipers (used to measure the dimensions throughout the loading process), and a Reloading manual (this is where we find all the data needed to make SAFE ammo). On a side note your-cousins-sisters-boyfriend once used X amount of powder Y on a ### grain bullet will cause you to BLOW UP your GUN, HAND, FACE, and other things you DO NOT want to BLOW UP!!! If someone gives you a recipe for a load look it up in a RELOADING manual before ever trying. Your Best friend in reloading is your RELOADING Manuel get lots of them cross reference them with each other if it’s not in a book DO NOT TRY IT!! Most powder manufactures put out FREE manuals every year or so. BUY multiple Manuals from different manufactures they are worth it, lots of research has gone into them so you will not hurt yourself.
Your initial investment will be around $1,000 for one caliber this is a lot of money. However if money is no longer good for anything other than fire starter then having it will do you no good. Invest in Heavy Metals (lead) keep a comfortable amount on hand. Set a minimum and maximum number of loaded rounds that you want to keep on hand then set a minimum number of projectiles, primers, and pounds of powder that you want as your supply. Remember that powder and primers are the only parts of the ammo that may go bad if not stored properly or for too long. Powder should be bought and rotated often if you buy 2 pounds every time you stock up use 1 from your old supply and put the 2 new ones into your reserve. Then the next time you buy powder use the ones on the shelf to load and put the new ones in their place on the shelf. This practice is much like rotating your stored food.
Loading rifle ammo is a little more complex than handgun ammo but the primary principles are the same with a few added steps. Rifle brass has to be identified as boxer or Berdan primed, brass cased or steal case. The Berdan cases have two off-center flash holes and are difficult to de-prime because of this without special Berdan tools and very time consuming. I have heard of steel cases being reloaded however I strongly recommend against it due to the case being more rigid than brass and possibly having unseen cracks that would cause a catastrophic failure.
The principal steps of reloading handgun ammo. You will start by acquiring your brass, and then separate it by caliber. The next step in the process is to clean and polish it this is accomplished by using a tumbler and a medium such as crushed corn cob or crushed walnut shells and adding in a polishing compound. The polishing compound is not necessary but it does make the brass look almost new again. Step number three is to separate the media from the brass. In step four you will start the transformation from fired case to loaded ammo by sizing the brass using hopefully a carbide re-sizer for the appropriate caliber being loaded. If not you will have to lubricate the brass before sizing. In step five you will be flaring the case mouth, this makes it easier to insert and seat the projectile. Step six is adding the proper amount of gun powder for the chosen load. Be very careful to not over or under charge the load this too can cause a catastrophic failure. In step seven you will be placing the projectile in to the top of the case so that the properly adjusted bullet seating Die will press the projectile into the case. Step eight is to crimp the brass and remove the bell from the case mouth, so that the bullet will be held securely. This will keep the projectile from being pushed back into the case in a semi-automatic handgun or shaken loose in a revolver. Step nine in this process is to use your micrometer to check the overall dimensions of the loaded round. The best part of this process is finally here you’ve made several small batches with different powder weights. You’ve placed them in separate containers and labeled them accordingly, you now need your reloading log book (this is just a notebook that you keep) with the load data entered onto different pages the only thing missing is in the results section. Now it’s time to go to the range and find out which batch works best in your gun or guns. Don’t forget to enter your results!
The difference between rifle and handgun ammo reloading comes at the beginning of the case preparation. Rifle brass will need to be measured prior to loading if it is too long you will need to trim it to within the specifications listed in your loading manual.
The reason to reload is so you will be able to resupply yourself and your group with quality low cost ammunition for training and during a SHTF scenario the ability to stay in the fight.
I hope this article has given something to think about and give you another option for procuring one of the three primary supply that are needed in TEOTWAWKI: Beans, Bullets, and Band-Aids you can never have enough. As always stay alert and Prepare for the Worst and Pray for the Best.
Online Vendor Resources:
Dear Editor:
There are a few errors in J.C.'s article posted 5/19/12. I am a registered nurse that has delivered many babies in hospital and in home and other emergency locations. My comments are in bold type.
J.C. wrote:
Make sure to never pull on the baby's head. Do apply gentle downward traction while someone pushes firmly down superior to mother's pubic bone.
This counter pressure is usually only done if there is a problem delivering the shoulders not as a routine intervention.
Once the baby delivers the top shoulder, then release all pressure by everyone and tell mom to push.
It is much easier on Mom and baby to have the mother get on her hands and knees which opens the pelvic area significantly and allows the baby to proceed with the process of being born without interventions.
Some items that I would like to touch on would be minor complications. One such issue is that the "water never broke" or the placenta has not ruptured.
These are two separate conditions that the writer is treating as the same thing and it is not. Placentas should not rupture. Placentas are embedded into the uterine wall at the beginning of the pregnancy and supply via a cord (the umbilical cord) all the nutrients and oxygen that the baby needs during life in the womb. The writer is referring to two different structures that develop throughout the pregnancy, the amniotic fluid sac also called the bag of waters, holds the amniotic fluid within which the infant is cushioned and the placenta which is attached to the uterine wall and provides all the nutrients and oxygen a baby requires. A ruptured placenta is not what the writer means.
"If this is the case, you will have to rupture the placenta".
You cannot nor should not rupture a placenta which is usually attached higher up the sides of the uterine walls.
Be careful that you do not hurt baby. Try to pull the membrane away from the baby and make a small puncture or incision. Then pull it apart with your fingers.
This statement is a “how- to- do” direction on rupturing the membranes of the amniotic sac, which really should only be done by a professional but it does not relate to the previous statement about the placenta. You want the placenta to be delivered " intact" or all in one piece if not, retained pieces of placenta will cause problems that even in this day and age can result in the loss of a mother's life if not addressed quickly.
I am an RN of 38+ years of experience and have taught graduate nursing school for years so I fee confident in commenting on this subject from both a professional and personal point of view. I have another grandchild to deliver at home in December.
With My Regards, - P.C.
JWR Replies: Thanks for your sharing your expertise. I have already made immediate corrections to J.C.'s article, and re-posted it.
Massive Inflation Coming, Warns Donald Trump. (Thanks to Pierre M. for the link.)
Ned M. suggested this: Geithner Comes Clean: "I Don't Understand It"
I found a link at The Drudge Report to this: $12,984--Increase in Debt Per Household Since First 2011 Bipartisan Spending Deal
Items from The Economatrix:
Why A Greek Exit From The Euro Would Mean The End Of The Eurozone
Drugmakers weigh emergency supply plan for Greece
o o o
Patrice Lewis of the excellent Rural Revolution blog posted her account of the recent Preparedness Expo in Colorado.
o o o
Those gadgety folks at Uncrate posted this: Bug Out Bag: Everything that you need to survive and thrive in the Apocalypse, all stuffed conveniently into one pack. (Thanks to Greg P. for the link.)
o o o
Tara McKelvey of The Wall Street Journal asks: Could We Trust an Army of Killer Robots?
o o o
Pinellas residents flock to 'Chickens 101' to learn about raising backyard hens. (Thanks to Greg C. for the link.)
"Go ye therefore, and teach all nations, baptizing them in the name of the Father, and of the Son, and of the Holy Ghost:
Teaching them to observe all things whatsoever I have commanded you: and, lo, I am with you alway, [even] unto the end of the world. Amen." - Matthew 28:19-20 (KJV)
Saturday, May 19, 2012
Today we present three more entries for Round 40 of the SurvivalBlog non-fiction writing contest. All three of them are about childbirth. The prizes for this round include:
First Prize: A.) A gift certificate worth $1,000, courtesy of Spec Ops Brand, B.) A course certificate from onPoint Tactical. This certificate will be for the prize winner's choice of three-day civilian courses. (Excluding those restricted for military or government teams.) Three day onPoint courses normally cost $795, and C.) Two cases of Mountain House freeze dried assorted entrees in #10 cans, courtesy of Ready Made Resources. (A $350 value.) D.) a $300 gift certificate from CJL Enterprize, for any of their military surplus gear, E.) A 9-Tray Excalibur Food Dehydrator from Safecastle.com (a $300 value), and F.) A $250 gift certificate from Sunflower Ammo.
Second Prize: A.) A Glock form factor SIRT laser training pistol. It is a $439 value courtesy of Next Level Training. B.) A FloJak FP-50 stainless steel hand well pump (a $600 value), courtesy of FloJak.com. C.) A "grab bag" of preparedness gear and books from Jim's Amazing Secret Bunker of Redundant Redundancy (JASBORR) with a retail value of at least $300, D.) A $250 gift card from Emergency Essentials, and E.) two cases of Meals, Ready to Eat (MREs), courtesy of CampingSurvival.com (a $180 value) and F.) A Tactical Trauma Bag #3 from JRH Enterprises (a $200 value).
Third Prize: A.) A Royal Berkey water filter, courtesy of Directive 21. (This filter system is a $275 value.), B.) A large handmade clothes drying rack, a washboard and a Homesteading for Beginners DVD, all courtesy of The Homestead Store, with a combined value of $206, C.) Expanded sets of both washable feminine pads and liners, donated by Naturally Cozy. This is a $185 retail value, D.) A Commence Fire! emergency stove with three tinder refill kits. (A $160 value.), and E.) Two Super Survival Pack seed collections, a $150 value, courtesy of Seed for Security.
Round 40 ends on May 31st, so get busy writing and e-mail us your entry. Remember that there is a 1,500-word minimum, and articles that relate practical "how to" skills for survival have an advantage in the judging.
Childbirth is both exciting and terrifying. We will discuss here is normal birth with few complications. Major complications need to be discussed in major detail per situation. The fact is that many women will have children during a SHTF timeframe. There is much more than just pushing. Whether you will be on your own or part of a group, someone must learn how to assist in the childbirth process. I assure you, it will happen. Let's begin with the basics. When dealing with a pregnant woman, these are the first questions that you need to ask:
- vaginal bleeding, tissue expulsed, amount
- pain, severity, radiation, location, duration
- vaginal discharge, color, odor
- current sexual activity
- last menstrual cycle (last period)
- prior pregnancies, hours of labor, complications, losses
- prior c-sections, other abdominal surgeries
- past pertinent medical history (diabetes, hypertension, etc), meds, allergies
- due date
- STDs (past and present)
- prenatal care
- contraction times
- bloody show or water breakage
These questions will help a caregiver to determine the best course of action, but will also help the layman to deliver a baby.
With normal labor, you will begin with contractions. This will continue until the cervix is fully dilated. This phase can take between 7-15 hours. Contractions tend to begin short in duration and are farther apart. Contractions that are one minute or longer or are closer than two to three minutes apart mean that birth is imminent. Mother needs to be positioned one her back, with the back elevated around ten degrees. A pillow under mom's rear will help. Whatever position of the legs make mom feel comfortable will be appropriate. Just make sure that both legs are equal to take pressure of mom's pelvis.
By this time, the child is moving out of the uterus and into the birth canal. It's very important to comfort mother throughout this process as much as possible. During this time, mom has an urge to push. This is when you will begin to see a presenting part, and in a normal birth, it will be the head. By this stage, you should be in sterile gloves, or at least cleaned washed hands, doused in hand sanitizer. Make sure that you have warm, clean blankets or cloths nearby along with a bulb syringe. This is so you can suck all of the fluids out of baby's mouth and nose once the head is delivered. Having all of your items close at hand and organized is essential.
Here are some items that need to be at hand:
-Clamps
-Gloves, both sterile and non sterile
-Bulb syringe
-Warm, clean blankets and towels and lots of them
-Warm, clean, sterile water and lots of it
-Emesis basin or puke bucket
-A place for comfortable and clean delivery. On your bed is probably not the best place since the bed will be covered in goop. Or have some sort of covering on top of the bed.
-At least one other person to help you if need be
-Sterile shears or scissors
If you can come across these and know how to use them:
-BVM pediatric
-Defibrillator/AED with pediatric settings
- Magnesium Sulfate
-Sterile gowns, mask, eyewear
-Epinephrine 1:10000
-IV supplies
-Oxygen with supplies
You will also need two umbilical clamps. This could be the sterile hospital type, or simply two strands of boot string. Once you begin to see the head, you must provide a support system. This helps baby's head to come in a neutral position, while preventing the fast "cannon shot." Babies, especially in later pregnancies, can shoot out fast just like a cannon.
Make sure to never pull on the baby's head. Do apply gentle downward traction while someone pushes firmly down superior to mother's pubic bone. [Note from an RN: This counter pressure is usually only done if there is a problem delivering the shoulders not as a routine intervention.] Once the baby delivers the top shoulder, then release all pressure by everyone and tell mom to push. [Note from an RN: It is much easier on Mom and baby to have the mother get on her hands and knees which opens the pelvic area significantly and allows the baby to proceed with the process of being born without interventions.] Once the baby delivers the top shoulder, then release all pressure by everyone and tell mom to push. This will help to deliver the bottom shoulder. Baby should be facing either left or right. Once both shoulders are through the vaginal cavity, baby will deliver with normal force. Special notice needs to be applied as to the pressure you are applying. Too much can cause serious and permanent damage to baby. Be prepared that the baby will be very slippery. Use a firm grip without hurting baby.
Once baby is delivered, clamp the first clamp four inches away from baby. The second clamp will be six inches away from baby. Now cut the cord in the two inch section between the two clamps. Now bring baby to the chest of mom. Clean and cover baby and mom in warm blankets. Allow baby to suckle the breast if it is willing. This is very important. When breastfeeding occurs, oxytocin will stimulate the uterus into contractions.
Now that baby is born, you have a second delivery on the way. It's the placenta, or bag, that was around the baby in the womb. This can take up to 45-60 minutes.[Note from an RN: You want the placenta to be delivered "intact" or all in one piece if not, retained pieces of placenta will cause problems that even in this day and age can result in the loss of a mother's life if not addressed quickly. JWR Adds: You should carefully inspect the placenta to make sure that it was delivered intact. You can turn it inside out, to examine it.] Once the placenta is delivered, you need to massage the uterus until it is firm. This will stop bleeding. Just above the pubic bone and at the belly button is typically where your hands need to be. Start massaging and squeezing in circular motions. This will not be gentle. You want to really squeeze. Do this until you feel the uterus tighten up about the size of a grapefruit.
While it may not help you. It could help a future provider if you can give an APGAR score. Here is how it's broken down.
A=Appearance
0=blue or pale
1= blue legs/arms, pink trunk
2=all pink
P=Pulse
0=none
1=less than 100
2=more than 100
G=Grimace
0=no response
1=grimace
2=coughing,sneezing,crying
A=Activity
0=limp
1=slow movement
2=active movement
R=Respiratory Effort
0= none
1=slow and/or irregular
2=good with crying or cooing
Some items that I would like to touch on would be minor complications. One such issue is that the "water never broke"--the amniotic sack not ruptured. If this is the case. you will have to rupture the sack. Be careful that you do not hurt baby. Try to pull the membrane away from the baby and make a small puncture or incision. Then pull it apart with your fingers.
Another issue is when the cord wraps around the babies neck. If you see that the cord is around the neck when the head is out, try to slip your fingers between the baby's neck and the cord. What you are trying to do is keep the airway open for baby.
Another scenario is a prolapsed umbilical cord. This is where the umbilical cord pops out of the vagina. Unfortunately, this normally requires a C-section. Unless you have a surgeon on hand, you'll have to do the best that you can on your own. Keep the cord moist at all times. The cord is baby's lifeline. If the cord begins to dry out, the baby cannot receive it's life support from mom anymore. Try to keep the cord from being compressed, as this will also shut off the supply to baby.
Meconium is baby poop. It's generally a dark green or yellowish color. This can mean that baby has already been stressed in the womb. Babies do not normally poop while in the womb. Babies can also inhale the meconium and die. This is where suction of the mouth and nose becomes especially important once the head is delivered.
Minor trauma may also occur to mom while in delivery. Soft tissues may tear as she pushes. Once the baby is delivered along with placenta, examine the vaginal and rectal tissues to see if there is any trauma. If minor, simple bandaging may be sufficient treatment. However, if the trauma is severe, sutures may be required. This can pose a problem to the non-health professional.
Always make sure that you are there for mom as well as baby. Mom may have a variety of emotions. Childbirth is not just a medical practice but also a psychological one as well. If family and friends are not nearby, you will be taking the brunt of the emotions. Be prepared that at one moment, she will hate you and love you at the same time. She will hate you for not making her childbirth easy, but will love you for helping her become a mommy. You also have to be prepared to take care of her emotionally if the birthing process takes a wrong turn. If the child dies after birth, during birth, or pre-birth, you will have to be there to comfort her. Understand your patient and her wishes. If she wished to have the placenta buried or tossed in the trash, do it. Your ideas may not match hers but her wishes rule during this timeframe.
There are plenty of complications that can occur. Maybe I'll write on them someday. Until now I think this is sufficient. Remember that birth is a natural process that normally doesn't need any intervention. Hopefully you will have someone experienced in this should it happen. If not, you now have a head start. Children have been born for a long time without doctors. You can help just like a doctor would. There are plenty of things to prepare for in a SHTF scenario. Some will happen, some will not. I promise you that childbirth is the one that will happen.
I never intended to be a homebirthing dad. Our first child was born in the “normal” American way – in a hospital. Physically, mom and baby came out fine. But the scars from that experience still throb in our hearts many years later.
The impersonal way hospital staff treated us; the overactive use of clinical equipment, terms, and technology; the fact that I had to keep briefing incoming personnel on our birth plan (since apparently they didn’t take the time to actually talk to read the copies I had provided, or talk to one another); the fact that they ordered my wife to lay on her back, which made the process excruciatingly slow and painful; the fact that the first thing my baby saw was a doctor dressed in a haz-mat suit; the way they whisked the baby away from mom as if the child were public property; the way they treated me like a useless observer and not the head, protector, and provider of my family; the forced hospital stay in a shared room, an uncomfortable bed, and with nothing to eat but sub-par food...the whole experience definitely convinced us that there had to be a better way to do this.
Unfortunately, our second birth did not allow for that. Due to medical complications in the pregnancy, my wife had to get a non-emergency C-section. It wasn’t that bad. Our second hospital experience was better than the first -- but only by degrees. Still present were the lack of communication by hospital staff, the impersonal way my wife, our baby, and I were treated by that staff, the way I was shoved aside, the way my wife was given orders, and so on. Not to mention the price tag. If it hadn’t been for our excellent health coverage at the time I’d still be paying for that birth years later. Also notable was how after each hospital birth some designated staff member would come talk to us about how to use contraception to prevent another pregnancy -- as if pregnancy were an undesirable medical condition. The hospitals sure make a lot of money off of parents’ love for their babies, but they do treat all of the parties as ignorant, blundering, or unwelcome troublemakers.
When we found out the happy news that we were expecting our third, we once again wanted to do things differently. We really didn’t want to go the hospital route because every time we dealt with an OB/GYN she treated my wife like a semi-idiot and treated me worse -- or simply ignored me. We hoped that this time we wouldn’t be shoved around and have to make more unpleasant memories.
We wanted to use a midwife and try for a normal birth, called a VBAC (vaginal birth after Cesarean). The bad news was that in our state, it was illegal for a mom to have a VBAC with a midwife or doula after having a C-section. She had to be with an OB/GYN. Few OB/GYNs in the area would even consider letting a woman attempt a VBAC, and then they would still insist on doing all the pre-operative procedures as if she had scheduled a C-section. Invasive procedures and cold, clinical environments like hospital rooms work against a woman’s body and make it harder for her to relax and have her baby. It was no surprise to learn that many of these moms had “failed” VBACs – meaning that sometime during labor they asked to go ahead and have a C-section. To top it off, doctors are extremely unlikely to help a woman try for a VBAC if she has had more than one C-section. My wife had already gotten one C-section; if we went to a hospital and got cornered into having another one, it seemed very likely that my wife and I would face a future of choosing between getting her repeatedly cut or not having more children. I didn’t want my wife to be put under the knife – and in harm’s way from surgical complications – if it was unnecessary.
We learned a lot about the reasoning behind this law, and concluded that it was designed to prevent a tiny number of uterine ruptures – which happens 0.4% of the time in a VBAC . We were more concerned about the 99% likelihood of having another bad birthing experience, and a bleak reproductive future. Therefore, we used a loophole to prepare for the worst case scenario as well as the best case scenario. Worst case, we’d have to get another C-section. Fine. So we got an OB/GYN and did our mandatory prenatal visits. We were set if that was what circumstances called for. But there was a loophole in the law. While it prohibited midwives and doulas from assisting with VBACs, it didn’t outlaw unassisted childbirths (childbirths with no medical professionals present). Since a UC would allow us to have maximum freedom in our birthing experience, we decided to try to have a baby on our own.
This would take some serious training. We had already read books on birth -- but that had not seemed to be of much help. We needed more than book learning; we needed experience. But the birth classes we had attended prior to our first birth had not helped at all. We needed an intensive, hands-on, birth training course. We wanted to be ready this time. So we signed up for a Bradley method class.
I was totally unfamiliar with the Bradley method prior to this time, and given that many readers may also be unaware of its origins, philosophy, and distinctives, I’ll take some time to explain.
Decades ago, a few Californians decided that the hospitalized birth experience I’ve described above -- and which tens of millions of Americans have gone through -- was not something they wanted to keep experiencing. In fact, they believed that some if not most of the things about it -- its impersonality; marginalization of the mother, father, and child; overuse of drugs, et al -- were downright harmful to people. So through research, experience, and training, they developed what is now known as the Bradley Method of Husband-Coached Childbirth. Like the name suggests, its philosophy and technique of childbirth is centered around the husband-wife relationship. What happy news that was to me as a hugely-engaged and devoted husband and father! The American Academy of Husband-Coached Childbirth is headquartered in California and operated by the same family that founded it, the Hathaways. Their web site is www.bradleybirth.com, and it offers links to find a class in your area, buy books, and much more.
What we signed up for was a 12-week course that involved a workbook, weekly meetings, hands-on practice of birthing techniques, personal interaction with a certified instructor, and the opportunity to make like-minded friends in our area. It cost $360, or $30 per class. It turned out to be a bargain -- and the expense gave me an incentive to make sure we didn’t miss class unnecessarily!
I’d summarize the goal of the class as this: to teach expectant mothers and fathers how to enjoy a healthy, low-pain, natural childbirth together without the use of drugs and unnecessary medical intervention.
We met for a few hours each week at a local birthing center. Six expectant couples were part of the class, taught by a Bradley-certified instructor who had given birth herself without drugs (and yes, it had been a positive experience!). Her husband was also on-hand occasionally to help. He had been the one who “caught” their babies. Contrary to popular belief, an everyday father is fully qualified to do that!
Every week, we did floor exercises, practiced relaxing using visualization, learned a lot about the physiology and psychology of women in pregnancy and labor, and overall built our relationship as couples. The husband-wife bond is strengthened by the husband’s involvement in the pregnancy and birth. The Bradley method strengthens the marriage even further by placing the husband and wife right in the center of the birthing experience. No doctors, midwives, nurses, or anesthesiologists can do for a woman in normal labor what her tuned-in, trained husband can do for her. The Bradley method classes taught me how to listen to my wife better, recognize her physical and emotional cues, soothe her, encourage her, and support her while she does the amazing work of giving birth to a baby -- the way God intended it to be.
The act of giving birth involves every part of a lady: her mind, her emotions, and yes, her body. Mom needs to pay attention to what she’s eating. She needs to keep harmful toxins (alcohol, nicotine, caffeine, paint fumes, etc) out of her body during the entire pregnancy if for no other reason than to protect the baby from developing birth defects. She also needs to make sure that she eats appropriate foods so that the baby can get the building blocks he needs to grow. She should also eat well to help herself. If she doesn’t eat enough calcium to provide for her and the baby’s needs, for example, the baby will draw calcium from her teeth and bones and she’ll develop a deficit that could lead to osteoporosis.
Birth is a physical feat that demands more strength, endurance, and cardiovascular health than many sports full-grown men play. Mom should do whatever possible before and during pregnancy to improve her health through appropriate exercise.
The Bradley method classes teach a number of birth-specific exercises to strengthen the muscles mom will be using during birth. As a dad, I found it helpful to do these exercises with mom to encourage her and to also strengthen these oft-neglected parts of my own body.
Years ago I learned about the physics of flight while in a civilian aeronautics group. It made dealing with turbulence during commercial flights so much more bearable because I understood that what was happening was not life-threatening. It was normal.
Mom should know that pregnancy and childbirth are normal. They’re probably not what she’s used to, but they are normal. Her body was made for it the way a man’s body was made strong for work and for protecting the family. The Bradley method classes and literature are good sources of information for moms and dads preparing for childbirth. A little bit of knowledge can calm many unneeded anxieties.
Dad should also remember that what is happening is normal. Nothing in my life has scared me as much as the sight of my wife going through great pain – and being ignorant of how to make it stop. That was during our first birth when we were woefully unprepared. But in subsequent natural childbirths, I have seen her go through the same stages of childbirth faster and with much less pain simply because she and I knew what was happening in her body, and what to do about it.
Please note that the Bradley method does not disparage the medical profession, but rather seeks to put medical professionals in their proper place in the hierarchy of a birth team -- as supporting cast members, not the stars of the show. Mom and dad are star and co-star of this performance, and ought to seek the expertise and resources of trained medical professionals when conditions necessitate them.
As a father of a C-section baby, I had a good appreciation for these medical professionals. I had experienced the blessing of modern medicine. But again, I had also experienced the heartache that comes from being treated like a number and not a person by the same medical professionals. In an emergency, I still look for a doctor. When things are going fine though, a doctor is overkill at best and a hazard at worst.
I consider self-education, appropriate exercise, and proper nutrition fundamental to any mom and dad preparing for childbirth. But the one thing I value above all else – the thing that I think made the crucial difference between an unhappy, painful, and prolonged childbirth and two peaceful, quick ones – is the practice of husband-coached visualization and relaxation.
We learned about and practiced one new technique each week in our Bradley method classes. Our homework for the week largely consisted of spending 20 minutes twice each day practicing the technique. I’d say we got in about half as many practice sessions as we should have prior to our third birth. (Compare that to about one or two sessions total prior to our first birth.)
Man, oh man, what a difference it made! Mom’s muscle memory remained intact several years later when she gave birth to number four after only a few weeks of refresher practice sessions.
Again, this isn’t rocket science. The techniques aren’t mystical or complicated. It’s stuff like visualizing a rainbow and thinking about each color, one at a time, while dad helps mom focus on relaxing each body part, one at a time. The hardest and most important thing about it, in my opinion, is making the time and space to practice and focusing on what you’re doing. Getting good at these techniques is a lot like getting good at prayer, or the violin, or being a good listener. Thinking about it or reading about it is no substitute for doing it – and you get out of it only what you put into it.
The science behind it is simple: like other living creatures, a woman in birth does best when she is in a near-sleep state – muscles relaxed, mind calm, not distracted, and alone (or nearly alone). God made her body know what to do – her primary task is to let go, give in, give up, and let it happen. Dad helps by gently reminding her (“coaching,” in Bradley-speak) of this. I never felt like I did my job all that well, but my wife always tells me afterwards “I couldn’t have done it without you. You knew just what to say and just what to do.” Men, the opportunity to be your wife’s rock during childbirth is a gift of God and I strongly encourage you to take up your swords and shields, carve out the time necessary to prepare for this, and be your wife’s coach/champion.
Weeks before the anticipated due date, we picked out a location where my wife could give birth. We have other children in our home, so we wanted to pick a location that had the following characteristics:
- a door that locks
- as far away as possible from where the other kids sleep and play
- has access to a toilet, sink and tub
- can be warmed via electric or other heater
We thoroughly cleaned and sanitized the space weeks ahead of time, and stashed our gear nearby in boxes or bags so that things would be easy to get to once mom began active labor. Scissors and other things used on the umbilical cord had been sanitized and stored in new Ziploc bags. Cloth diapers, towels, and other laundry had been washed and dried in baby-friendly Dreft laundry detergent, and stored in new, clean plastic or paper bags.
We had babysitters on-call if labor occurred during the day or evening, but thankfully our home births have begun and concluded during the wee hours when everybody is usually asleep.
When mom and I saw that active labor had begun (indicated by things such as a broken water bag, loss of mucus plug, contractions at regular intervals, etc) we got things situated, made mom comfortable, and began to do what we had rehearsed so many times before: we relaxed.
I kept track of how long her contractions lasted so that we could have an idea of how things were going. I shuttled back and forth between the kitchen and birthing space when needed to get drinks or wet down a cool washcloth for her forehead. I kept my eyes wide open to check for any hint of distress in her or the baby. Primarily though I was there next to her, holding her, massaging her, and encouraging her with reassuring words such as, “you’re doing a great job.” I helped her relax her muscles and went through visualization techniques during contractions.
Then, when she felt the urge to push, I kept encouraging her and communicating with her, watching for anything unusual, and getting her what she needed. Mom sometimes changed positions, and I helped to steady her when needed. Finally, she passed through the “ring of fire” that occurs when the baby’s head stretches the perineum to the max, and our child began to enter the world.
As with everything else, I let my wife set the pace for this phase of the birth. Sometimes she caught her breath and paused; at other times she wanted to get it over with and bore down. I was ready. I’ve caught many a football and had no problem cradling our baby’s head in one hand while catching his body between my arm and chest. He was safe, sound, and ours!
After getting the mucous out of his airway, I gave our baby to my wife, who held him to her skin. She was amazed. She kept saying, “I can’t believe we did it,” and then, “I could do that again.” She oohed and aahed over the baby.
Because our third childbirth was such a positive experience, it redeemed the act of birth for us. No doctors scared the baby into screaming with a slap; I held our baby while mom got situated. No nurses whisked the baby away for measurements, drugs, and shots; I wrapped him up and handed him to mom. We had done our homework and knew to make sure the cord wasn’t wrapped around his neck, and to make sure the mucous was out of his airway so he could breathe. We had sterilized our equipment for cutting the umbilical cord. All that went as smooth as silk. The bottom line was that mom got to hold her baby without anybody telling her what to do, dad was the first person who held the baby, and that baby was healthy, safe, and loved.
Mom’s labor was one-third the length of her first labor. To me, it was miraculous. And it was all possible because God had made a way for women and their husbands to give birth naturally, safely, and happily. That is so typical of God! Man comes along and tries to improve upon God’s procedures and what happens? Things get complicated, upsetting, dangerous, invasive, expensive, and tragic. I know it’s not possible in all cases, given complications that do occur (such as the ones that necessitated our C-section). But we don’t make rules based on exceptions; we make exceptions to the rule. And the rule is, “If God made it, it ain’t broke -- so don’t go trying to fix it!”
Mom’s postpartum recovery was the best she had experienced thus far. She slid into her own bed, snuggled in her own sheets, and had her own husband waiting on her hand and foot while she slept next to her newborn baby. We had all the necessary postpartum supplies on-hand. It sure isn’t rocket science. Anybody can do it with a little education and a few dollars of supplies. (see the list below)
As an added bonus to any fathers out there who might be considering doing what we did, consider this: the cost of our unassisted childbirth was less than $200. Compare that to $2500 per day charges for a hospitalized childbirth, and $10,000 and up for a C-section. As preppers living on a budget, unassisted childbirth is a no-brainer.
And in later years, it got better. We recently had another UC. This time, labor was even shorter, and mom and baby are once again happy, healthy, and home. Mom would never go back to the hospital route and I am so blessed to have played a central role in the birth of my children. There’s no place I’d rather be than protecting my wife, guiding her, and supporting her while she performs the penultimate act of womanhood: childbirth. I am proud of her and grateful to God for the privilege.
I am also grateful to brave men and women such as Dr. Robert Bradley and Marjie and Jay Hathaway who fought medical and political bureaucrats to give everyday folks the right to experience birth free of state interference and corporate control.
Below is a gear list of things we used for our unassisted childbirths, with links to online merchants for reference and convenience.
For preparing the birthing space:
- Whatever mom wants to make her comfortable, and nothing that she doesn’t!
- Food (if mom is hungry, she can eat; if she’s not, she shouldn’t)
- Drinks (water, Gatorade, etc)
- Movies, music, audiobooks – very gentle, quiet stuff – only if mom wants
- Candles (unscented or scented, depending on mom’s preference) – only if mom wants
- Pillows, blankets, mats, anything to make the area soft and comfortable for the birthing mom
- Large bowl in case mom vomits during labor
- Mainstays shower curtains to waterproof the floor, mats, etc. – $11.47 at Walmart.com
- Dark colored Mainstays flat sheet to cover the shower curtains (they’re more pleasant to the touch than shower curtains) - $5 at Walmart.com
- Dark colored Mainstays pillowcases – $5.50 at Walmart.com
- Plastic garbage bags for covering pillows (inside pillowcases) and for collecting trash afterwards - $4.16 at 365OfficeSupplies.com
- Puppy pads for absorbing lots of fluids - $9.99 at Petco.com
For the laboring mom (if she’s using a birthing pool/bathtub):
- Dark towels - $3.99-5.99 at Target.com
For delivering the placenta:
- Large bowl for catching the placenta
- Garbage bag for storage or disposal
For cleaning up mom and baby immediately after birth:
- Cloth diapers - $1.00 at Cotton Babies.com
- Peri-bottle - $1.00 at Midwifery Mercantile
For keeping baby warm and snuggly:
- Receiving blankets - $10 for five at Walmart.com
- Newborn infant cap - $2.25 at Midwifery Mercantile
- Newborn disposable diapers - $7.90 for 36 at Walmart.com
- Baby wipes - $8.97 for 360 hypoallergenic wipes at Walmart.com
One of the following to clamp the umbilical cord:
- Two 8” lengths of yarn or thick string
- Sterile umbilical cord clamps - $1.65 at Midwifery Mercantile
- Stainless steel umbilical cord clamps - $7.50 at Midwifery Mercantile
For cutting the cord:
- Cramer bandage scissors - $13.88 at Walmart.com
For keeping the cord-cutting gear sterile:
- Ziploc plastic bags - $2.98 for 100 at Walmart.com
For weighing the baby:
- Mustad 50 lb. digital scale - $19.96 at Walmart.com
- D-ring sling for newborn hanging scale - $21.95 at Midwifery Mercantile
For mom, postpartum:
- Perineal cold packs - $3.10 each at Midwifery Mercantile
- Mesh panties - $1.95 at Midwifery Mercantile
- OB pads - $2.99 for 12 at Midwifery Mercantile
- A change of comfortable clothes
- Ibuprofen to reduce postpartum swelling - $4.00 for 200 tablets at Walmart.com
This article is not intended to be a complete guide to childbirth. We highly recommend enrolling in a Bradley method class in your area. To find a local instructor, go to www.bradleybirth.com/Directory.aspx.
Our favorite books and web sites where you can learn more about the Bradley Method of Husband-Coached Childbirth, or to learn about unassisted childbirth.
- Husband-Coached Childbirth: The Bradley Method of Natural Childbirth
by Robert Bradley, M.D., Fifth Edition
- Unassisted Homebirth: An Act of Love
by Lynn Griesemer - $19.95 at Amazon.com
- Unassisted Childbirth
by Laura Kaplan Shanley
Disclaimer: The information included in the preceding article is for educational purposes only. It is not intended nor implied to be a substitute for professional medical advice. The reader should always consult his or her healthcare provider to determine the appropriateness of the information for their own situation or if they have any questions regarding a medical condition or treatment plan. Interested parties should thoroughly consult professionals and literature to be aware of possible complications and to determine the appropriate type of childbirth for their situation.
Other Useful Links:
http://vbacfacts.com/quick-facts/
http://www.mayoclinic.com/health/pregnancy-nutrition/PR00108
http://www.niams.nih.gov/health_info/bone/Bone_Health/Pregnancy/default.asp
http://www.babycenter.com/pregnancy-exercises
http://www.webmd.com/baby/guide/pregnancy-safe-exercises
http://en.wikipedia.org/wiki/Bradley_method_of_natural_childbirth
http://www.webmd.com/baby/labor-signs
http://www.whattoexpect.com/pregnancy/eating-well/week-40/eating-well.aspx
http://www.webmd.com/baby/news/20100120/eating-drinking-may-be-ok-during-labor
http://www.babycentre.co.uk/pregnancy/labourandbirth/labour/eatinganddrinking/
Our society today views childbirth as a sickness that can only be managed by “professionals” in the hospital. Babies that might come out blue and unresponsive, possible hemorrhaging, and babies that get stuck in the birth canal are all things that deter families from having births at home. These are real issues and should not be ignored, but they make up only a small percentage of birth outcomes. The vast majority of women in the world can and do give birth safely at home. As fellow survivalists, we understand that the government and media either hide statistics or distort them. The fact is that the U.S. is ranked 24th in infant mortality following such countries as Cuba, Portugal, and Singapore. When one looks at the countries with the lowest mortality rates, at least 70% of the births are attended by midwives. At the turn of the 20th century, that same statistic was true for our country. Now home births account for less than 3% of all births. In fact, in some of our major cities, nearly 50% of births are performed by a major surgical procedure known as Caesarean. When one investigates the facts concerning the safety and reasons for home birth, it is not hard to see that it is a better way to birth. Regardless of opinion and inclinations during normal and peaceful times, in a survival situation caused by economic collapse or natural disaster, childbirth will have to be dealt in possibly less than ideal conditions. I believe that in such a situation, midwives will be an invaluable and precious asset. In preparing your family for a TEOTWAWKI situation, you might consider making contacts with midwives in your area if you are expecting a child or plan to have some in the future. There is no substitute for experience and knowledge, so please consider the care of a midwife if you are pregnant. If your situation does not allow you to have a midwife, then here are some good suggestions to ease the process of labor and birth.
If you and your family have had children before, then you know something about the process and how things progress. Still, having a baby at home can be intimidating when traveling is dangerous and help is miles away. One thing to remember is that the mother knows her body and will, almost unconsciously, facilitate an easy entrance for the baby if she is left to herself. Once labor has started, you should contact any help you planned on having, whether it is an ambulance or a midwife. The best way to help Mom is to encourage her in her efforts and provide as much food and drink as she wants; labor is a very strenuous activity. Help her to go to the bathroom often, as this will help relax her muscles and speeds the descent of the baby. Childbirth can be painful, but the pain is most often caused by a poor position of the mother that forces the baby on the pelvis or against the spine. A good overall position is standing up or squatting.
Squatting opens the pelvic cavity 30% more than lying down. If the mother is lying on her back, her body weight is compressing an artery in the back and preventing good blood flow to the baby; it is also a very uncomfortable position. When the mother wishes to lie down, she may prefer laying on her side or sitting up part way. A hands and knees position may also be preferable, especially when a baby is posterior (its back bone is against the mother’s spine). This position drops the baby off Mom’s spine and gives some relief.
We know that Mom can push this baby out, but what do Dad/ Sister/Friend do as the baby comes out? You may want to gather some supplies for the birth. This would include a bowl to catch the placenta, plenty of towels or other absorbent material to clean up blood and amniotic fluid, sterile scissors (boil for 10 min.), and towels for baby (warm in low oven, dryer, or over a wood stove). As the newborn arrives, have Mom pant through her contractions to slow the descent of the baby and prevent tears in the perineum. Supporting the head as it comes out will also minimize tears. Also, the infant has been in the mother’s belly for approximately 40 weeks, floating in warm, cozy liquid. Unless careful consideration is taken to keep the temperature slightly warmer than body temperature, the baby arrives into a colder environment. You might think that the baby should immediately be wrapped in a towel, but the best place for a newborn is on the mother’s bare chest with a blanket on top. God designed the mother to be able to adjust her body temperature to warm or cool the baby. Fathers are also able to warm up a baby. Placing the infant on Mom’s chest also allows it to smell her and the nipple area so the baby will be calm and ready to nurse.
As the baby comes out, careful checking of the umbilical cord should assure the birth partner that it is not wrapped around the infant’s neck and cutting off blood flow. If it is wrapped around the neck, it can usually be slipped off easily. In the instance where it is too tight to free the neck, tie two strings or shoelaces to the cord and cut between them, otherwise the baby could lose a lot of blood. In a preferable situation, the cord is left intact and is only cut after it has stopped pulsing. This allows a maximum amount of blood and nutrients to flow into the baby that will help the baby prepare for life outside the womb. Before cutting the cord, be sure to sterilize your string and scissors in boiling water.
As well as checking the cord, the father/birth partner should check the baby for breathing and responsiveness. Obviously, if it is crying, there’s no worry. But sometimes fluid or meconium (baby’s first bowel movement) can get into the nasal and mouth area and possibly aspirate into the lungs, causing breathing problems. This is usually not a serious problem, as the baby’s crying and coughing will bring it out; suctioning the mouth and nose with a bulb syringe will help. If the baby is unresponsive, place on Mom’s chest and rub vigorously with a towel and this will usually trigger a response. If the baby is still not coming around, try giving it oxygen through a face mask, otherwise start CPR immediately. As part of preparedness, CPR training would be good knowledge to have.
When the baby is born, everyone is absorbed with the infant and the extraordinary event that just took place. However, there is still a placenta that has been providing nutrients and blood flow to the baby. At no time should the umbilical cord be tugged on to facilitate its release from the uterine wall, which will cause hemorrhaging. During the birth process, hormones and chemicals are telling the body what to do and when. If the baby is born naturally with no drug inhibition (always the situation in home birth), the body will usually tell the placenta to detach. The mother may or may not feel some more contractions and the placenta will be pushed out; standing will help this process. Remember that the best place for the newborn was the mother’s chest. When a baby starts to nurse, it causes oxytocin in the mother which produces contractions and helps to release the placenta from the womb. If the baby will not suck, manual stimulation of the nipple will suffice. Be sure to watch for excess bleeding, in which case, more stimulation of the nipple is needed and/or vigorous massage of the abdominal area to cause the uterus to shrink up and stop the bleeding.
Another situation that may be cause for concern is if the baby becomes stuck in the pelvis. The pelvis is shaped somewhat like an oval with the narrow portion extending from side to side of the woman. As the baby is being born it rotates slightly to pass this narrow part so the shoulders can come out. Sometimes this does not happen; maybe the baby is very large, its arm has come out with the head, or some other similar situation. Whatever the cause, its shoulders cannot get past the narrow part. If the mother is lying down or only slightly sitting up, help her get on her hands and knees to help open the pelvic cavity. This may drop the baby down and back in slightly and get it in a better position to come out. In a very difficult situation, the dad may have to reach a couple fingers in alongside the baby’s head to the shoulders and try to pull one shoulder past the ischial spines (the narrow part of pelvis). The important thing to remember if a baby gets stuck is that the umbilical cord may be getting pinched as the infant comes out. If the baby’s head is out, it may start to breath on its own, but acting quickly is very important. Encourage the mother to help pull her baby out, move, and swing her hips to get the baby to move down. This will solve most problems instantly.
Again, knowledge is power and researching the means and/or possibility of a home birth will give both parents some ease about the process and confidence in a TEOTWAWKI situation.
A few recommended books to have on hand would be:
• “Spiritual Midwifery” by Ina May Gaskin (wonderful collection of home birth stories, very focused on spiritual and emotional care of woman, as well as info regarding medical care of labor and birth),
• “The Birth Partner” by Penny Simkin (more for father/birth partner, gives info on best birthing positions, encouraging mother, hospital practices, items to have on hand for birth, stages of labor),
• and “Heart and Hands” by Elizabeth Davis (midwifery-oriented, lots of info for midwife on care for pregnancy and birth).
These books offer a wonderful collection of knowledge for both mother and father and would be invaluable for the birth at home.
About The Author: "No Place Like Home" is the pen name of a doula who is pursuing DONA-certification. She is an advocate for home birth and believes that women are strong enough to birth on their own and should be given that opportunity.
JWR:
The last posted letter correctly pointed out that Japanese Knotweed can be very invasive, although as a local farmer showed me, regular lawn mowing from the beginning of the season will keep it corralled within its allotted plot.
It's too invasive to just plant as a miscellaneous vegetable; its real value lies in a post-TEOTWAWKI world where powerful mediations are hard to come by. Knotweed is the actual source of reversatrol, the natural phenol in red wine that adds years to your life despite lousy eating habits, keeps brain function sharp, and prevents all the nasty, chronic degenerative diseases of old age that we can no longer expect to have treatment for. Pick up a bottle of reversatrol at the health food store and look at the main ingredient: its Knotweed.
This stuff really works. There was a strain of skinny, healthy brown mice, who had plump blonde siblings separated by only a single different gene. The plump blondes died young of degenerative diseases similar to those of elderly humans: cancer, stroke, etc. Scientists then give both groups reversatrol, added to their mouse chow.
The fat, unhealthy blonde mice stayed as plump as ever, but now lived just as long and healthy lives as their skinny siblings.
Frenchmen from the Bordeaux region of France, famous for its black-red wines have the highest percentage of 100 year olds in Europe. They drink reversatrol every day.
So yes, planting Japanese knotweed is vital for long term survival in a grid-down situation. However, as others have aptly said, THINK FIRST! I'm planting mine near a water drainage swale along a driveway. They have their beloved sun and water, but have no place to go from there. The driveway blocks two sides, the forest blocks a third (too dark, they need at least partial sun), and a granite cliff blocks off the fourth side.
The medicinal part is in the roots, which are dug up and dried in the spring and the fall. The dose is one ounce of pulverized dried root boiled into a tea.
So make sure you grow them in an area you can access. I've got another perfect spot: a sunny, well watered pocket surrounded by deep forest and a road. But it's too steep, and grubbing out roots on a steep hillside is my idea of how to get hurt. Roadsides with forest behind are the best, since they have nowhere to spread. In a TEOTWAWKI situation, you don't have to worry much about car pollutants.
I believe that God allowed Japanese knotweed to spread all over the world as quickly as it has against the day our government medical systems fail us, to give us the medical care we need. Some herbs are taken to cure disease, others are to prevent disease and give you a long, healthy life.
To explore this yourself, read up on reversatrol.
May God lead each of you to those people and things He knows you and your family will need. - Johan D.
JWR Replies: Because Japanese Knotweed roots are so invasive, I would only feel safe growing the plant in a stout planting container such as a concrete or steel stock tank.
James:
I too am a 25 year IT veteran with the last 14 years specializing in information security. I am currently in process of completing a PhD in the field. There is nothing that currently exists that can save us from the coming cyber attack that will devastate our infrastructure. The security vulnerabilities are legion. Our only hope is the Lord and using the good minds He gave us to become self-sufficient. The vain attempts of Homeland Security and the National Security Agency has only resulted in a loss of our personal freedom and privacy. The more I learn, the more I know how vulnerable we are. I spent a couple of years being extremely depressed about our inability to protect ourselves from a technological perspective, now I’m all about action and it has nothing to do with technology. It has to do with striving for total independence – off the grid living – and zero trust in the established government for protection. There is no such thing as security. There is no such thing as privacy. There is only God. Maranatha – Lord come quickly. - C.J.
Get Ready: We’re About To Have Another 2008-Style Crisis
B.B. sent this: Cost of Greek Exit from Euro Put at $1 Trillion USD
Spain falls into recession amid fears of eurozone bank run
China's Economic Slowdown Foreshadows Trouble for the U.S.
Items from The Economatrix:
TMFR Podcast #19: Jim Willie. "Jim ties together today's seemingly unrelated headlines of European sovereign debt, JPM hedging losses and paper gold price drops and ties them all together into a tidy little package that clearly shows where we are headed in the not-too-distant future.
Housing Starts Join US Factories Topping Forecasts
The Bank Runs In Greece Will Soon Be Followed By Bank Runs In Other European Countries
The GSA is auctioning an offshore oil drilling platform that was later used for a lighthouse, on May 24th: Diamond Shoals Platform. 13 Miles offshore of Cape Hatteras, North Carolina. The opening bid is just $1. Here is a PDF with some details. (Thanks to John G. for the link.)
o o o
Alaska man plans year on uninhabited island. (Thanks to J. McC. for the link.)
o o o
I heard that CampingSurvival (one of our loyal advertisers) just received big shipments of both Mountain House foods in retort pouches and Heater Meals.
o o o
Reader Robert B. Found a YouYube channel covering edible wild plants: Eat The Weeds. It is of excellent quality, with more than 130 episodes.
"Curse not the king, no not in thy thought; and curse not the rich in thy bedchamber: for a bird of the air shall carry the voice, and that which hath wings shall tell the matter." - Ecclesiastes 10:20 (KJV)
Friday, May 18, 2012
One last reminder that a Self Reliance Expo will be held in Colorado Springs, Colorado on May 18th and 19th. There will be several SurvivalBlog advertisers there, including:
- Backwoods Home Magazine
- Pantry Paratus (they are offering a free gift for any readers of SurvivalBlog)
- Project Appleseed
- Shelf Reliance
- LPC Survival
Please let them know where you've seen their ads.
--
Today we present two more entries for Round 40 of the SurvivalBlog non-fiction writing contest. The prizes for this round include:
First Prize: A.) A gift certificate worth $1,000, courtesy of Spec Ops Brand, B.) A course certificate from onPoint Tactical. This certificate will be for the prize winner's choice of three-day civilian courses. (Excluding those restricted for military or government teams.) Three day onPoint courses normally cost $795, and C.) Two cases of Mountain House freeze dried assorted entrees in #10 cans, courtesy of Ready Made Resources. (A $350 value.) D.) a $300 gift certificate from CJL Enterprize, for any of their military surplus gear, E.) A 9-Tray Excalibur Food Dehydrator from Safecastle.com (a $300 value), and F.) A $250 gift certificate from Sunflower Ammo.
Second Prize: A.) A Glock form factor SIRT laser training pistol. It is a $439 value courtesy of Next Level Training. B.) A FloJak FP-50 stainless steel hand well pump (a $600 value), courtesy of FloJak.com. C.) A "grab bag" of preparedness gear and books from Jim's Amazing Secret Bunker of Redundant Redundancy (JASBORR) with a retail value of at least $300, D.) A $250 gift card from Emergency Essentials, and E.) two cases of Meals, Ready to Eat (MREs), courtesy of CampingSurvival.com (a $180 value) and F.) A Tactical Trauma Bag #3 from JRH Enterprises (a $200 value).
Third Prize: A.) A Royal Berkey water filter, courtesy of Directive 21. (This filter system is a $275 value.), B.) A large handmade clothes drying rack, a washboard and a Homesteading for Beginners DVD, all courtesy of The Homestead Store, with a combined value of $206, C.) Expanded sets of both washable feminine pads and liners, donated by Naturally Cozy. This is a $185 retail value, D.) A Commence Fire! emergency stove with three tinder refill kits. (A $160 value.), and E.) Two Super Survival Pack seed collections, a $150 value, courtesy of Seed for Security.
Round 40 ends on May 31st, so get busy writing and e-mail us your entry. Remember that there is a 1,500-word minimum, and articles that relate practical "how to" skills for survival have an advantage in the judging.
Computers are the exposed backbone of America’s infrastructure. They are new technology with big holes that is under attack from very skilled and motivated people who mean our country harm. Yet, we trust them to provide almost every service our modern life requires.
I’ve spent the last 13 years as a computer security expert for a large telecom, and I would like to convince you that today your family's ability to survive is dependent on fragile and over-trusted systems.
Preppers have historically had distrust for computing technology. Y2K was a real risk, but since it seemed to be overblown, a catastrophic computer-centric risk has fallen off the radar of many. A cyber attack should rank up there with many other potential Black Swan risks (solar flares, economic collapse, etc).
Today, most everything the average American depends on to sustain life is run by some computer or another. Some examples:
• Wal-mart or your local grocery store cannot provide just-in-time food delivery to it's stores without complex computerized logistics systems.
• Your municipality cannot pipe water to your house or sewage from your house without computer-controlled pumps.
• Your bank cannot issue you paper money or process credit card transactions without computerized accounting systems.
• Your electrical and gas provider cannot provide power or heat to your house without computer controlled generation and distribution systems.
It's important to know that there are no manual backups to these systems. In a race for efficiency, businesses have gotten rid of any real redundancy to the automation offered by computers. 85% of "critical infrastructure" is privately managed by businesses that have no economic incentive for manual backups to these automated functions. Simply put, if they massively fail, society massively fails.
Today, these important computer systems are under attack. I'd like to let you know what the view is from my front row seat. First, let's start with a brief history of cyber risks in three short acts:
1. Cyber Fun: All early attacks on computing systems seemed to start with some one saying, “Gee, I wonder if I can do that?” Curiosity drove early floppy-net based viruses, internet-based malware like the Morris Worm, and even famous early hackers like Kevin Mitnick or Steve Wozniak. That's not to say these hackers were right or these viruses the didn't cause harm. The Blaster virus may have knocked out the power grid in 2003, and the I Love You virus may have caused $5 Billion in global economic damage. That harm seemed to be accidental, though, not motivated by profit or malice.
2. Cyber Crime: Somewhere around 2000, we started to see wide-spread malicious software written for profit. It might be spyware that causes pop-ups, trojans that hijack your computer to send spam, or it could be more serious. They organize these hijacked computers into massive groups called botnets that they can remote control to steal identities and empty bank accounts. There are serious criminals and organized gangs stealing billions every year this way. This is scary stuff, no doubt. However, you need to remember two things about attacks for profit: 1) The losses are generally covered by your bank or credit card company, and 2) hackers motivated by profit have every incentive for everything to stay up: if they crash your computer, your bank or the whole internet, they can't make any money.
3. Cyber Attacks: Not to say that stealing is not malicious, but the for-profit hacker probably has nothing against you or your country personally. There is an emerging type of attack in the computer security world that is much more scary. Some call it cyber-warfare or cyber-terrorism, but I find those terms muddy the issue more than clarify. Let's just say they want to do bad things solely for the purpose of hurting you or hurt your country.
We have clearly moved into a era where there is an increasing likelihood that this is a serious threat to our county's security and your personal welfare.
We are now in the age of Cyber Attacks. Recently, we saw the Chinese breach RSA, then leverage what the grained to break into Lockheed Martin, L-3 Communications, and Northrop Grumman. These attackers used a personally targeted attack called an Advanced Persistent Threat (APT). Instead of casting a wide net to get as many computers as possible, they will write an attack to go after a select set of people an a certain company.
An APT is very hard defend against because it can be malicious software no one has ever seen before, making Anti-Virus software largely useless. Today, most companies are largely powerless to stop an APT without radically changing how they do business.
Most of these attacks are not trying to take out infrastructure... yet. However, the massive botnets of computers that have been built for profit could easily be used for more malicious purposes, or an APT is obvious vector of attack to critical infrastructure. It get it's worse though. In the same race for efficiency that got rid of manual backups, companies have gotten rid of separate networks that keep critical infrastructure separate from the average employee checking his email. This puts the Programmable Logic Controllers (PLCs) and other systems systems built decades ago and never patched on the same network as machines connected directly to the internet. Even worse, this researchers found 10,000 PLCs directly reachable from the Internet.
Stuxnet was the shot over the bow and a wake-up call for to expect from this new era of attacks. There has been much reported about it (including here and on 60 minutes), but here's the important details about Stuxnet:
1. It was light years more complex than malicious software we've ever seen before. It's now "in the wild" for others reverse engineer.
2. It was written by a nation-state targeting another nation-state. It was probably written by US or Israeli intelligence, and was definitely meant to (and probably did) cause substantial harm to the Iranian nuclear program.
3. It's purpose was to destroy things in the physical world. It targeted PLCs, which control everything from power plants to pipelines to dams.
From my experience and what experts are saying, we are utterly unprepared for something like this to attack America. If something like Stuxnet was targeted against the right systems in our country, the outcome could be catastrophic.
Some people are demonstrating what can be done: one security researcher was able to unlock prison doors remotely, another with no experience with PLCs was able to cause explosions after accessing one. There is good evidence to suggest the US critical infrastructure is already being targeted. Targeted attacks against utility providers are on the rise, with at least some "nation-state actors that have unlimited funding available and conduct espionage as they establish a covert presence on a sensitive network."
Let me be utterly clear about one thing: the reason that America's critical infrastructure has not been knocked out is not because it is well protected, it's because the proper mix of motivations and capabilities has not been realized yet. Similarly, in 1939, the reason French had not been overrun by the Germans was not the Maginot Line, it was because the German Army wasn't quite ready to do it.
The capabilities to mount a cyber attack are spreading exponentially. Many counties of the world are turning out very capable and very underpaid computer scientists. Motivations to hurt America don't seem to be on the decline.
All of this leads me to agree with Brian Snow, Former NSA Technical Director, when he says he believes we are in a "Trust Bubble" (6:03 in the video) much like the Credit Derivative Bubble that recently burst in the financial markets. This requires a little explanation. For example, let's think about the people and systems you trust every time you buy a book on Amazon:
• The company that designed and manufactured the parts of your computer and any computer with which you are communicating.
• The army of programmers that wrote the operating system and applications you use.
• The companies that manage the networks that all your communications traverses.
• The companies that issue certificates to encrypt your data and "sign" applications to be safe.
The problem is there is an amazing lack of analysis on the actual trustworthiness of any of these things. Just like we trusted Wall Street with to understand the risks of CDO Swaps, we today trust computers we don't understand designed and run by people we know nothing about to run our whole society. This blind trust is what Director Snow calls the Trust Bubble. He expects this bubble could burst in the next 18 months to 5 years.
Now, I don't take a Skynet-like approach to this. The computers aren't going to take over. I fear people evil people will use computing technology to hurt other people on a mass scale.
So what do we do? While there are some good things you can do to protect your personal computers and privacy, there is nothing you personally do to protect the systems that provide you phone service, generate your electricity, or deliver your water or sewer services.
Should a properly motivated and skilled attacker decide to take those out, I assure you that your bank or utility provider is not prepared to stop them, or perhaps more chillingly, recover from the attack. How many spare generators do you imagine your power utility has on hand? How long would it take to repair an exploded gasoline refinery?
Here's a few things the answer is not:
• Filter everything on the internet in the name of national security. Iran did that. It is guaranteed not to work, and guaranteed to reduce our personal liberty.
• Patch the holes. Patching is good, but no where near enough. It's is always reactive to known holes and too slow (Microsoft recently patched a 17 year old vulnerability), and many of the PLCs weren't even built to be patchable.
• Put up more separations. Firewalls quickly turn leaky and even separating (air gapping) their computers from the Internet didn't help the Iranians.
• Trust a government program to fix it. Regardless of your political views, even the government agrees they are bad at this. Do you really want the TSA of Computer Security?
The only answer I know is personal resiliency. Resiliency for your family that shouldn't have to be reliant poorly managed computers running poorly written software to drink clean water, flush a toilet, buy something, or stay warm. Don't rely on your bank, utilities or government for your families survival.
What if you spent the next $20 or $200 or $2,000 you would normally spend on technology (computer, phone, car, power tool, etc) and instead invested it in things that can't be taken away from you by a skilled hacker?
• Stored food
• The ability to heat your home while the grid is down
• Stored water and the ability to filter dirty water
• Guns and other tools to protect your family
• First Aid supplies
I'd like to close with a few words of spiritual reflection for my Christian bothers and sisters: I like technology. I'm a geek who believes all technology from the cotton gin, to cars, to iPhones to be a gift from God. However, I've learned a truth about God's gifts, including technology: the better a gift from God is the easier it is for it to become something we trust in more than God. I am reminded of the Psalmist when he talked about that great technology of his time, the chariot:
Some trust in chariots and some in horses, but we trust in the name of the LORD our God. (Psalm 20:7 ESV)
There is no technology that will save us -- not a chariot or a computer. Our hope is Jesus and following His wisdom and plan for us.
Introductory Note: I am not an employee of RWVA, Appleseed Project or any company I might mention in this article. I am however a volunteer Instructor in Training for Appleseed. I receive no remuneration for my service.
My introduction to the Appleseed Project was different, than for most SurvivalBlog .com readers.
I have had an avid interest in firearms from the time my uncle came to live with us during my high school years. Uncle Dick had several rifles, shotguns and pistols (of which I have since inherited). My first after school job was at a hardware store that just happened to have the largest gun display in our little town of 20,000.
I spent as much of my paycheck on firearms and ammunition as my parents would allow, while still saving for college and paying for my own personal expenses.
Early in 2010 I was thinking of how I could take a Ruger .22 rimfire Model 10/22 and make it look like an M1 Carbine. And so I did a web search on the phrase “Ruger 10/22 M1 Carbine”. I was surprised to see something pop up. It was E.A. Brown’s web site. They had a stock, sling and sights that would allow me to do exactly what I wanted to do.
But they also had in the description, a reference to the term “Liberty Training Rifle”. I had never heard of this. What could it mean?
Back to Google, which then directed me to Appleseed Project, child of the Revolutionary War Veterans Association (RWVA).
I was intrigued with what I read:
Marksmanship and Heritage.
Shooting skills and Patriotism.
Tales of the Revolution.
It seemed too good to be true.
As I read more I wanted to learn more. For you see, I too believed that our country was on the edge of an abyss. Our ship was floundering about to sink. But how could marksmanship help? I mean without using it to force our government to come to their senses?
And as much as I disliked the actions of those in Washington D.C. and our state capitols, I didn’t think that armed revolt was the answer.
But wait, Appleseed did not suggest such. As I dug deeper into whatever I could extract from the internet, I never found such reference.
I decided it was time to find out for myself what Appleseed was all about.
The nearest event to me would be in a couple of weeks at a club range about 40 minutes away, close in Southern Ohio standards.
I decided to not pre-register but to take my chances that they weren’t sold out. On that Saturday morning I registered with cash and only part of my name. You see, I figured I was already on enough “lists” without adding myself to another…NRA, CCW, BSA, etc. If this was a militant or subversive group, I didn’t particularly want them to have my personal information.
I also made a mistake that day, one that I repeated 60 days later. I only enrolled for Saturday. You see, I was of above average intelligence, and had been shooting for over 40 years, a better than average shot, with a lot of knowledge about guns and targets. I had volunteered at the Rifle Range at the nearby Boy Scout summer camp for over 20 years. I had NRA Expert status in small-bore. What could they really teach me? So I concluded that I would only need one day.
I sat down and waited for it to start. Several of the “Orange Hats” (more about this later) tried to make me feel welcome. Coffee and doughnuts inside…help yourself. Where are you from? How did you hear about Appleseed? We’ll get started in a few minutes, have a seat.
I sat down at a picnic table away from everyone else…don’t want anyone to really get to know me or who I am. I can leave anytime…its only $40 (one day). I looked around at the flags hanging around the shelter…Gadsden, Liberty, all of the flags of the American Revolution.
Soon we started. Introductions, range rules, first aid and emergency information…then an invocation and Pledge of Allegiance….okay…so far so good.
Next came some basic safety rules and how to make your rifle safe. Rifle, not weapon. That didn’t sound very military to me. Also we went over range commands.
Okay everyone to the parking lot. Bring your gear to the equipment line. Next carry your cased rifle to the firing line. With the muzzle (the bangy end) downrange, take the rifle out and place it on your mat. Make sure it is safe. Remove the case and everything else (including magazines) from the line.
We are handed targets with five different sizes of shapes in red. They are called “RedCoats”.
Prepare as many magazines as you need to have 13 shots.
We shoot our first target of the day and keep it for future reference.
I won’t go into the instruction that we received that day…I couldn’t do it justice. Let me just say that it was great. The volunteer staff was wonderful. And surprise… much of the staff were women and teenagers. And they knew what they were about!
The end of the day brought a second RedCoat target. This was a way to compare and check improvement. (My second was about 30% better. 30% improvement in one day…WOW!)
Interspersed throughout the day were stories of our forebears, those brave men, women, and boys who gave all for us. And now for the closing… the Benediction…the challenge to take what we learned and do something with it.
I didn’t shoot Rifleman (210 or better out of 250 possible), though I was fairly close. I couldn’t go back the next day…other commitments, but I knew I would go back and I would take those I loved back with me for the History, the Heritage, the instruction, and yes, for the fun.
And go back I did. I made Rifleman as did two of my sons. My youngest son and I “picked up the Orange Hat”, volunteered to become “Instructors in Training”.
Would I recommend you going to an Appleseed event? Oh Yeah! I do to most everyone I know. Men, women, and children who are old (mature) enough to listen and follow instruction. Maybe listening is the most important thing to do at an Appleseed.
At my second Appleseed I was talking to an Orange Hat. He lived about halfway between the range and where I live. We talked long after the event of many things. Soon we were talking of books that we enjoyed and books that affected our lives. He mentioned “Patriots”, by James Wesley, Rawles. Had I read it? No. You should. I did.
And so I found SurvivalBlog.com. Over the last few months I have read much. You see, I have been a prepper most of my life. But reading “Patriots” and SurvivalBlog reawakened me towards being prepared much as Appleseed reawakened my concern for our country.
Lord Robert Baden-Powell, the founder of the Boy Scout movement, was once asked what Scouts should be prepared for. You see, the Boy Scout Motto is “Be Prepared”. Lord Baden-Powell said, “Just any old thing.”
Any old thing…read everything. Be prepared…for life, for death, for travails, and for Appleseed.
And so I would like to take a few minutes to help you prepare for your first Appleseed. On the Appleseed web site you will find a list on “How to Prepare for an Event”. Let me repeat it here along with some footnotes and opinions.
How to Prepare for an Event
Not everything listed here is necessary. This list was compiled from the experience of those who have attended an Appleseed. It includes those things that did or would have made their experience more enjoyable. Remember that you need to bring whatever it takes to learn to shoot better.
There is also a short video on YouTube called Project Appleseed: What Should You Bring?
Personal items
- A teachable attitude (most important thing) ** (I agree. Listen and learn. Ask questions and be willing to humble yourself to become a better person. It is all about improvement)
- Ear protection Muffs and plugs ** (You don’t want tinnitus, trust me)
- Eye protection ** (Don’t be stupid. Mandatory for minors)
- Elbow pads or shooting Jacket (By the end of the weekend you will wish you had something on your elbows. Soft elbow pads like for skateboarders work well. Avoid the curved hard plastic kind; they let your elbow roll. You can even cut the toe out of a pair of thick socks and put them on your arms.)
- Ground cover (Rug remnant will work) (Again some padding between you and the ground. Note, don’t make it too thick or soft – you want firmness to get a steady sight picture.)
- A hat (To keep the glare out of your eyes or the sun off your neck)
- Little notebook (those little 2.5 X 3.5 work well) (please take notes or write down questions. Also very important when recording corrections to sights.)
- Pen (Or Sharpie)
- Sun Screen (I forgot once…but never again!)
- Lots of water (Must stay hydrated) (Eyesight and steadiness are some of the first things to go when you dehydrate.)
- Light Lunch (Sometimes provided for nominal charge...check flyer)
- Snacks (You need to keep your energy level up)
- Folding Chair (not necessary but nice)(Its nice to sit for a minute while you prep your magazines)
- Wet wipes (A quick way to refresh yourself, and to clean your hands before that snack)
- Bug spray
- Aspirin or Ibuprofen (especially at the end of the 1st day and beginning of the second day. You will be sore in places you have never been sore before)
- Necessary clothing for any kind of weather (Be prepared. Expect the worst.)
** Very important things
Rifle specific preparations (Appleseed is a long distance rifle marksmanship course. When there is a known distance range, 100 or more yards, we prefer to use it. However, due to cost of ammunition and rarity of distance ranges, most Appleseed events are shot at 25 meters. Everything you learn at 25 meters will apply at any distance. Even with the distance ranges most shoot at 25 meters on day one and Known Distance (KD) on day 2.)
- See the Appleseed Liberty Training Rifle document: Word Doc or PDF
- Rifle preferably zeroed for 25 meters (Any sights )
- 400+ rounds of the same type and brand of ammo (Its best to use same brand, type and LOT of ammo. Lessen the variables.)
- Sight adjustment tools (Depending on your sights, this could be a screwdriver, a drift punch and mallet, or a sight adjustment tool.)
- GI style web Sling (as seen here at the The Appleseed Store) (Bring what you have, but if you need to purchase a sling please get an USGI web sling. You will never regret it.)
- Two magazines, 10 rounds each. Bring extra mags. If you have them. 20 round magazines work well if State law allows
- Gun cleaning supplies and lube (You will need to do some maintenance cleaning)
- Instructions for your rifle (if you have them) (At least be familiar with the rifle you bring. Know how to tear it down, clean it and put it back together.)
- Know your rifle (See above)
- Something to cover your rifle to keep blowing sand or rain off it. (This can be a rug, a plastic trash bag, or if your mat/carpet remnant is long enough, you can just fold it up and over.)
- Staple gun (Make sure it works. Need one for every 2 people in your group)
- Staples (I recommend that you use at least ½ inch staples. You want them to go through the cardboard backer and not have the wind blow the target off in the middle of an AQT.)
- Know the laws of the State you are going to and only bring that which is within the law (This is really important if you are traveling across a state line for your Appleseed. Don’t become a victim of ignorance.)
- Back-up rifle, if you have one. ("Two is one and one is none.")
Ready Your Equipment
1. |
Be prepared for blowing sand and dust, rain, mud — all those weather conditions a rifleman would have to generally put up with. (I might add snow, ice, cold, heat, sun, insects…) |
2. |
In event of blowing sand and dust, you'll need to totally degrease your rifle. Any lube should be a dry lube, like graphite. Be ready to protect your rifle with a plastic rifle bag or a simple waterproof wrap for the action. |
3. |
Be ready to protect ammo and mags from the same weather. Ziploc bags are great for this. |
4. |
Again, be prepared. You should function-test your rifle and, if possible, have it zeroed for 25 meters or 200 yards. You can also adjust your sights so your group prints 3" above point of aim at 100 yards, and mark your sights with paint, magic marker, or fingernail polish. Doing so will leave you properly sighted for the 25 meter AQT. |
5. |
It's a good idea to get down into the prone position and dry-fire ten shots "by the numbers" (click here to print out the steps from Fred's Web site). If you will do this three times a week, you'll be way ahead of everyone else. Hey, while you're at it, put a GI web sling on your rifle, and get it adjusted so it supports the rifle in prone, too. |
6. |
Practice at home is a great way to prep for arriving at the range. By doing so your range time will be far more productive. |
Whenever a family member or friend decides to attend an Appleseed I will give them some advice. I recommend that they practice the prone and sitting positions. You will find that if you stretch your body into these two positions several times a day, increasing the length of time each day until you can stay in it for 10 minutes or so, that you will not be as likely to need the Ibuprofen. I practice my positions during my television time. I get on the floor in the prone or sitting position and watch television. (I don’t hold a rifle, just in the position to stretch my back, legs and arms.
Note: Even if because of physical limitations you can’t get in a particular shooting position, please go ahead and attend an Appleseed. This is not a competition. We have adaptive Appleseeds all the time. Do what you can. Appleseed is ALL about improving.
It really helps to know your rifle before you show up at an Appleseed. Know the controls – safety, magazine release, how to clear a malfunction, etc. But it’s alright if you are borrowing a rifle and have never seen it until that day.
There is no official Appleseed Rifle. We will see almost anything on the firing line. Bring what you have and normally shoot.
That said, I’d like to offer my opinion on a reliable, safe rifle. The Ruger 10/22 is very dependable and accurate. I have owned (and still own) several over the years.
To get the most out of the gun there are a few accessories that I would recommend to have my Ideal Liberty Training Rifle. Please note that any changes may void your rifle’s warranty.
The first would be a set of 1-¼ inch quick detachable sling swivels (such as Uncle Mike's) and a USGI sling.
Secondly, I would replace the stock sights with sights from TechSights or a decent telescopic sight. The stock sights are difficult to adjust.
Lastly, if you are proficient at all in the anatomy of the 10/22, there are a few internal changes to make it better (IMHO):
- Replace the stock hammer with any of a number of target style hammers (roughly $35). This will lower your trigger pull from 6-7 pounds to about 2.5-3.5 pounds.
- Replace the bolt release with an automatic bolt release. This allows you to close the bolt with one hand instead of two. It is also possible to drill out the larger hole yourself. There are YouTube videos on how this is done.
- If you have an older Ruger 10/22 you may have the short magazine release. This can be replaced with one that is longer. This allows you to change magazines in a timelier manner. There are many available from $5 -30, depending on manufacturer and material.
- I prefer to replace the stock bolt buffer with one made of polymer. This quiets your rifle and relieves some of the stress on the bolt.
The 10/22 comes with one 10-shot magazine. You will need at least one more. I try to bring 4-5 magazines. That way I have a spare if one fails or someone needs to borrow one, and so I can prep my magazines when I have time and not be rushed. I do not like using the extended magazines for Appleseed. When you are wearing a sling the magazine can get in the way of your arm, preventing you from obtaining a proper position. At Appleseed you never need more than ten shots at a time anyway. Make sure that all screws are tight, maybe even using green Loc-tite. My shooting at my second Appleseed suffered greatly due to a loosened takedown bolt. I repeat, make sure screws are tight.
A second rifle can be a lifesaver if something happens to rifle number one. However, loaner rifles are sometimes available.
It would be advisable to know what brand of ammunition your rifle likes, and to have it sighted in, preferably at 25 meters (27 yards). Then make sure you have 400-500 rounds of that brand ammo.
If you are fortunate enough to attend an Appleseed that is held at a range that has a Known Distance (KD) range, be sure to take your center fire rifle. I have seen people shoot the entire weekend with an AR or Garand, but that can be pretty expensive. Use your rimfire while learning some basics and then carry them over to your center fire and distance.
When you get to your Appleseed you will be advised to leave all firearms in your vehicle until told to retrieve them. This includes your carry gun. Please leave it in your vehicle while you are at Appleseed. This is for safety’s sake. If, for example, you are in prone position with your pistol on your side, you would be sweeping everyone behind you, every time they walked by.
Appleseed is family friendly. Many of the students are women and children. Most of the staff at the first Appleseed I attended were teens and ladies.
The cost is very low – check the web site, AppleseedInfo.org for the price in your area. (Some of the ranges charge a modest fee to use the range.)
Appleseed does not take the place of a combat type courses like those offered at Thunder Ranch, Front Sight, etc. It is basic riflemanship at a very fair price.
In closing, I would highly recommend attending an Appleseed regardless of what your level of expertise. You will never find better training, from such qualified instructors at such a fair price almost anywhere in the country. Not one near you? Find a range and we’ll come to you!
Sir,
I want to pass along a recommendation for field telephones. Coleman's Military Surplus is selling Swiss army surplus field telephones (made by Ericsson) for $19.95 plus shipping. I have purchased some of these and have good luck with them.
They use a crank for ringing the bells and "D" cell batteries for voice transmission. They can also be hooked up in a common battery / switchboard set up if a person is lucky enough to have one. - Matthew in Kansas City, Missouri
Sir,
No one should ever plant Japanese Knotweed, even for survival purposes. The stuff is so aggressive that it can tear a house off its foundation in a matter of months. I've read of at least one case in England that required the top ten feet of soil be dug out and hauled away to keep it from sprouting again. If your readers find this invader someplace and can eat it, wonderful. But I pray they don't make the mistake of thinking this would be a great addition to their survival garden. - Kathryn D.
Only Chuck Schumer could dream up legislation so repugnant: Schumer Introduces Ex-PATRIOT Act: Will Banish Those Who Renounce US Citizenship.
Greg P. sent this news from Europe: The Next Money: As the Big Economies Falter, Micro-Currencies Rise
Matt C. sent us this: JPMorgan Fiasco Means Higher Interest Rates Ahead
JPMorgan, a counterparty to itself
Over at Alt-Market: How The U.S. Dollar Will Be Replaced
Items from The Economatrix:
The Curious Calculus of the US Employment Numbers
April Retail Sales Hint at Slower Spending Pace
Here's How the Whole Eurozone Could Unravel in Just a Few Months
SurvivalBlog reader D. in Colorado has kindly reformatted Dr. Koelker's OTC medication information to fit on three cards. Have this PDF printed double-sided on card stock and laminated, then cut them out and put in your medications bag or kit.
o o o
David S. sent this useful map of U.S. military installations. JWR Notes: There are only a few military targets in the American Redoubt. But note that the star designating the location Malmstrom, Air Force Base (AFB) in Montana doesn't tell the whole story. They actually have missile silos scattered through nine counties in central Montana. Ditto for the dispersion of Minot AFB, in North Dakota, and Warren AFB, which straddles the the state lines of Wyoming, Colorado, and Nebraska. When looking for retreat properties, avoid any locale that is within 30 miles upwind or 250 miles downwind of the outer limits of active missile fields. (The missile fields in South Dakota and Missouri have both been deactivated and hence are no longer in the Russian target structure.)
o o o
Here Comes the Sunstorm: Electric Grid Is Vulnerable to a Big Solar Blow; Officials Spar Over What to Do. (Thanks to Mark A. for the link.)
o o o
Local police boost arsenals with free military weapons. (Thanks to Rick M. for the link.)
o o o
Island DIY: Kauai residents don't wait for state to repair road
"When you have zero rates that go on indefinitely, you are inviting future problems." - Kansas City Federal Reserve Bank President Thomas Hoenig, warning that an extended period of ultra-low interest rates can trigger speculation, in a May, 2012 interview.
Thursday, May 17, 2012
Today we present two more entries for Round 40 of the SurvivalBlog non-fiction writing contest. The prizes for this round include:
First Prize: A.) A gift certificate worth $1,000, courtesy of Spec Ops Brand, B.) A course certificate from onPoint Tactical. This certificate will be for the prize winner's choice of three-day civilian courses. (Excluding those restricted for military or government teams.) Three day onPoint courses normally cost $795, and C.) Two cases of Mountain House freeze dried assorted entrees in #10 cans, courtesy of Ready Made Resources. (A $350 value.) D.) a $300 gift certificate from CJL Enterprize, for any of their military surplus gear, E.) A 9-Tray Excalibur Food Dehydrator from Safecastle.com (a $300 value), and F.) A $250 gift certificate from Sunflower Ammo.
Second Prize: A.) A Glock form factor SIRT laser training pistol. It is a $439 value courtesy of Next Level Training. B.) A FloJak FP-50 stainless steel hand well pump (a $600 value), courtesy of FloJak.com. C.) A "grab bag" of preparedness gear and books from Jim's Amazing Secret Bunker of Redundant Redundancy (JASBORR) with a retail value of at least $300, D.) A $250 gift card from Emergency Essentials, and E.) two cases of Meals, Ready to Eat (MREs), courtesy of CampingSurvival.com (a $180 value) and F.) A Tactical Trauma Bag #3 from JRH Enterprises (a $200 value).
Third Prize: A.) A Royal Berkey water filter, courtesy of Directive 21. (This filter system is a $275 value.), B.) A large handmade clothes drying rack, a washboard and a Homesteading for Beginners DVD, all courtesy of The Homestead Store, with a combined value of $206, C.) Expanded sets of both washable feminine pads and liners, donated by Naturally Cozy. This is a $185 retail value, D.) A Commence Fire! emergency stove with three tinder refill kits. (A $160 value.), and E.) Two Super Survival Pack seed collections, a $150 value, courtesy of Seed for Security.
Round 40 ends on May 31st, so get busy writing and e-mail us your entry. Remember that there is a 1,500-word minimum, and articles that relate practical "how to" skills for survival have an advantage in the judging.
Our hunter-gatherer ancestors survived for generations by gathering the food that nature provided. Some of those plants contain natural remedies to many common problems, and in fact are where many modern pharmaceuticals come from.
In this article we will be discussing various edible plants mostly found in the north east United States, as well as a few others.
Provisos: Before getting started you should be warned that some plants can be highly toxic. We will cover some common look-a-likes, but you should never eat a plant unless you are one hundred percent sure of what you’re eating. Wild poisonous plants often resemble non-poisonous varieties, and also often grow side by side. Some edible plants can have non-edible parts. It is up to you to make the right decisions when applying this information in the wilderness. With that in mind, once you can identify wild edibles accurately you will find that natures garden is full of delicious and healthy food, fresh and at your finger tips. Also, I’ve included a few definitions at the end of this article you may find helpful.
Common Dandelion
AKA: Lions Tooth, Priest Crown, Swine’s Snout
How To Spot It: One yellow flower on a hollow, hairless stem,or spherical cluster of white “parachute” seeds, no leaves other than basal leaves with large teeth pointing toward the base. There are no poisonous look-alikes, however other edible relative can look similar when young.
Cautions: Dandelion root should be avoided for those with an irritable bowels or stomach.
Uses: Use young leaves or flower tops in salads. The taste can be slightly bitter, so use sparingly. Light cooking will increase the bitterness, however further cooking (about twenty minutes) will make the taste almost disappear, especially when combined with a sauce or spices.
Notes: Dandelion root contains a substance called inulin. Inulin has very little impact on blood sugar levels, and—unlike fructose—is not insulemic and does not raise triglycerides making it increasingly popular among diabetics and potentially helpful in managing blood sugar-related illnesses ; Dandelion has also been known to be especially beneficial for treating chronic hepatitis and gall stones.
Japanese Knotweed
AKA: Monkeyweed, Hancock’s Curse, Water Weeds, Elephant Ears, Donkey Rhubarb, Japanese Bamboo, Pea Shooters, Fleeceflower, American Bamboo
How To Spot It: Tall, bushy plant with a bamboo like sheathed stalk. Alternating triangular leaves, green and/or red-ish in color. Hundreds of tiny white flowers grow on long lacy spikes in the spring and summer. Mature plants can grow to be nine to twelve feet tall. It’s interconnected root system often creates a dense bamboo like thicket. There are no poisonous look-alikes, however it could be confused with Giant Knotweed, which is used the same way except it is much less common, or wild Asparagus or Rhubarb (a relative), which of course are also edible.
Cautions: Do not eat large quantities of Knotweed raw. It contains substantially more oxalic acid than cooked Knotweed which could potentially cause problems in a survival situation. Smaller portions, however, are fine.
Uses: Collect the young shoots, discard the leaves, discard the rinds of older shoots and chop or slice the stalks.Has a nice sour flavor. Use in fruit dishes or pies just as you would Rhubarb. Also excellent addition to soups, stews, jams, or applesauce.
Notes: The large hollow stalks contain some fresh drinking water. To collect it chop the plant at the base the hold it upside down. Take a stick and poke through the inner wall of the joint, opening the ‘chambers’ one at a time, then simply pour the water into your mouth. ; Larger quantities can act as a laxative, breaking down fats and stimulating digestion, which of course, could possibly be fatal in a survival situation. ; Extracts of this plant are currently being tested to help lower the risk of cardiovascular disease, dely the onset of Alzheimer’s or slow its progression, and to help treat or lower the risk of certain types of cancers.
Poor Man’s Pepper
AKA: Virginia Pepperweed, Peppergrass
How To Spot It: The small spicy annual grows six inches to three feet tall, beginning with a ‘basal rosette’ in early spring. The narrow stalked basal leaves grow two to five inches long and soon the lobes become deep, sharp teeth that usually point toward the leaf tips. A long, wiry, branching flower stalk grows from the plants center mid-spring to fall with similar, but smaller, lance shaped toothed leaves tapering toward the base. From spring to fall the plant is covered in tiny, white four petaled flowers at the tips. In summer and fall the flowers are replaced with flat, circular seed pods, slightly notched at the tip, and containing many yellow-brown seeds. There in no no colored sap when you break open the stem, and the plant has a short, white taproot. There are no poisonous look-alikes, however it could be confused with other edible species.
Cautions: It should not be given to very young children, or others that may be sensitive to spicy foods.
Uses: The leaves, seeds, pods, flowers, tender part of the top of the stem, and taproot are all edible raw or cooked, and make excellent addition to salads, stews, soups, ground as a seasoning for meats, etc. The flavor can be compared to horseradish or wasabe. They tend to lose a little of the kick when cooked.
Notes: The Poor Man’s Pepper is actually not a pepper at all, rather a member of the mustard family. ; The leaves contain notable levels of vitamin c, calcium, iron, and potassium. ; A ‘tea’ made from the leaves has been used historically for diabetes, to expel intentional worms, as a diuretic, and to ease arthritis. The seed pods have been used to treat coughs and colds, to help break up and expel fluid built up in the chest.
Field Garlic
WARNING: THIS PLANT HAS A POISONOUS LOOK-ALIKE
AKA: Wild Onion, Meadow Leek, Onion Grass, Wild Garlic
How To Spot It: Long, unbranched, hollow, rounded basal leaves six inches to two feet tall, with a strong onion /garlic smell, growing from an onion like bulb. In late spring consisting of stalkless, green or red-ish bulblets grow on top of a single long leafless stem, one to three feet tall. Each bulb has a curved side and a straight side, project a tiny green shoot upward, and lilac colored, six petaled flowers bloom from them. Later the bulb falls to the ground as the plant dies and turn into new plants next year.
Cautions: Field Garlic should not be confused with the highly toxic plant ‘Star of Bethlehem’, which also has a long linear leaf resembling various wild onions, except it has no odor, a white stripe running down the length of each leaf, and the six-tepaled white flowers don’t resemble that of any other edible plant.
Uses: Collect the leaves in early spring or fall, when the young plants are most tender. Consume them raw or cooked just as you would chives or scallions. The underground bulbs are more onion tasting in seasons with cold weather, and more garlic-like in seasons with warmer weather. Use them accordingly raw or cooked. The Young bulbs growing from the plants have an almost spicy taste and should be used when still young, before the skin toughens.
Notes: Field Garlic is a blood purifier, diuretic, and expectorant. Raw bulbs can help to lower blood pressure. It is also used to prevent worms in children and animals.
Daylily
WARNING: THIS PLANT HAS A POISONOUS LOOK-ALIKE
AKA: Tiger Daylily, Orange daylily, Ditch Daylily
How To Spot It: This perennial produces large, showy flower yellow-orange in color above a basal rosette of long, sword shaped leaves. Six to fifteen short stemmed, upward facing, funnel shaped flowers stem from a slender, unbranched , smooth stem, three to four feet tall. During flowering, buds grow on the same branch as the flowers, which wither and die the same day they bloom. Other species while still edible, are not as tasty.
Cautions: This is not to be confused with Daffodil or Iris, which are both toxic to humans. By identifying the plant by its flowers, you can avoid confusion, as Daffodils and Iris look nothing like the orange Daylily.
Uses: The flowers and buds are a good source of beta caratine, vitamin c, and iron. Cook the larger, unopened flower pods in recipes that call for green beans, as the flavor is similar. They cook in about fifteen minutes. Be sure not to eat the green base of the flower, as the taste is rather unpleasant. Flowers and the pods can also be batter dipped and deep fried for a delicious side dish or snack.
Notes: The Daylily is an important herb in ancient Chinese medicine. An infusion is made from the flowers is used to treat Post Traumatic Stress Disorder, as a sedative, to reduce fever, as a pain killer, and to ease childbirth. The rhizomes and tuber has shown antimicrobial and antiparasitic properties. Research is also being done one how to use the Daylily to treat cancer.
Common Mallow
AKA: Buttonweed, Cheeseplant, Dwarf Mallow, Roundleaf Mallow
How To Spot It: The plant, which arises from a long, slender taproot, can creep along the ground or grow upright. The crinkled, rounded to heart-shaped, toothed, slightly hairy basal leaves grow up to three inches across, with five to seven shallow lobes. The leaf stalks can grow up to seven inches long, and the leaf is notched where it connects to the stalk. Flowers are white to pale-pink with five petals, have a bushy column of many stamens surrounding one pistil, and are under one inch across. Pink lines run through the petals, which are notched at the tip. At a quarter-inch across, the tiny, flattened, segmented fruits resemble a wheel of cheese. There are no poisonous look-alikes.
Cautions: Common Mallow could possibly be confused with various ivies if only ID’ed by the leaves, so be sure to look for the distinctive fruits and flowers.
Uses: A good source of vitamin c, iron, and calcium. The leaves, flowers, and fruits are good cooked for about 10 minutes as you would cook okra. The fruits are also excellent raw.
Notes: Tea made by boiling the root is said to be internally soothing. It has been used by natives to treat skin sores, stomach and dental ulcers, digestive irritations, as well as sore throats and coughs, Although thorough medical testing has yet to be done and results are not confirmed.
Garlic Mustard
AKA: Jack-by-the-hedge, Garlic Root, Hedge Garlic, Penny Hedge, Poor Man’s Mustard
How To Spot It: This common, highly invasive woodland biennial has a distinct garlic smell when crushed. The sprouts of new plants resemble alfalfa sprouts, each with a singular red-ish stalk about two inches tall, and a single strap shaped leaf about half an inch tall. The thin white taproot smells and tastes like horseradish. By mid-spring plants grow to be one to the and a half feet tall, slightly hairy, with more pointed, alternate, deeply veined triangular leaves. A flower bud resembling broccoli gives way to clusters of white four-petaled flowers. The flowers are replaced with long, green, four-parted seedpods curving upwards, about an inch long.
Cautions: Not to be confused with the Common Blue Violet or Henbit Deadnettle which can look similar when young, as always ID the plant through multiple means and be sure of what you are eating.
Uses: The leaves taste like garlic. Young leaves near the flowers are better tasting than the basal leaves, although both are pretty good. Cooking can add a bitter taste, some lightly sauté them for 5 minutes at most. The seeds have a wonderful spicy flavor and don t need cooked or crushed (cooking actually ruins the flavor, so ad them to your dish near the end). The root is used just like horseradish, and again, should only be cooked lightly if at all.
Notes: Crushed Garlic Mustard is a good topical treatment for bug bite, as well as bug repellent, and as a disinfectant.
Shepard’s Purse
AKA: Mother’s Heart, Lady’s Purse, Pickpocket, Rattle Purse
How To Spot It: Shepard’s Purse begins with a basal rosette of stalked, lobed-to-deeply toothed, lance shaped leaves up to nine inches long, and broader towards the tip, coming from a slender white taproot. Unlike similar plants, the leaves point outward and the is no white sap when broken. In mid-spring long, wiry stalks branching from the base grow from eight inches to two feet tall. Smaller, alternate lance shaped leaves, sometimes with teeth, meet the stem with two small pointed lobes at their base. Tiny stalked flowers grow inside four oval sepals, with four white petals. The flowers eventually form long-stalked, flattened, heart or triangular shaped seedpods.
Cautions: Because of possible effects on the blood, this plant is not recommended for women who are nursing or pregnant.
Uses: Mid-spring the flowers, buds, and tops of the stems are all edible and similar in taste to broccoli. Leaves can be cooked ten to fifteen minutes and are great additions to salad soups and stews. It provides vitamins a,c,k,b1, b2, b3, choline, inositol, calcium, potassium, and phosphorus. The also contain fumaric acid, which may help inhibit cancer.
Notes: There is little evidence of any beneficial medicinal use, however historically it has been used to ease childbirth, lower blood pressure, and as an astringent.
Lady’s Thumb
AKA: Persicaria, Redleg, Gambetta, Adam’s Plaster
How To Spot It: Growing with slender branching stems, it usually reaches a height of one to two feet tall and can create a dense brush.The pointed, lance shaped leaves grow from one to four inches long. A darkened triangular spot often appears toward the leaf’s center. Tiny white or pink flowers form in dense clusters about two inches long. This plant has both fibrous roots and a tap root. There are no poisonous look-alikes.
Cautions: Don’t confuse this with Smartweed, which can look similar and while non-toxic, has a horrible taste.
Uses: The leaves are the best parts, although the flowers and stems are also edible but can be unpleasant. They taste similar to lettuce, and can be used raw in salads and on sandwiches, as well as added to soups, casseroles, and stews.
Notes: This plant is rarely used in herbal medicine.
Asiatic Dayflower
AKA: Yazhicao, Duckfoot Herb, Tsuyukusa, Dew Herb
How To Spot It: This hairless plant with distinct blue flowers grows from one to three feet tall. The simple, smooth edged leaves resemble grass grow three to five inches long. Their stalkless bases wrap around the stem to form a sheath. It has two upper blue petals, and a lower, smaller translucent-white petal. Two short sepals fuse to partially enclose two small yellow-green elongated seeds.
Cautions: It could possibly be confused with Virginia Dayflower which is also edible but larger, and grows more towards the south. Also similar is Spiderwort, which has three blue petals, not two, and is much larger. The leaves of Spiderwort are also edible.
Uses: Strip off the leaves, flowers, seeds, and tops of the stems. Add to salads or other vegetable dishes. The taste can be compared to string beans
Notes: It has been used in ancient China as an anti-inflammatory, and also to sooth a sore throat. It can also be used as a pigment or dye.
Definitions
- Basal Leaves - Leaves at the plant’s base
- Basal Rosette - A circular arrangement of leaves, with all the leaves at the base of the plant, near the soil
- Diuretic - A substance that increases the rate or urination
- Expectorant - A substance that helps bring up mucus and other liquid from the lungs, bronchi, and trachea
- Iris - The female fertilization organ of a flower
- Rhizome - A horizontal stem, usually underground, often sending out roots and shoots from its nodes, also called rootstock
- Sepals - Modified leaves that lie under the more conspicuous petals of a flower
- Stamen - The male fertilizing organ of a flower
- Taproot - A straight tapering root growing downward and forming a base from which other roots spring
Have a good time in the wilderness and remember to always be safe!
As a professional project manager for a large international corporation, my position requires me to mitigate the risks of unknown variables that can alter the success of large and small projects. Donald Rumsfeld quote that ‘we don’t know what we don’t know” comes to mind. It is my job to insulate our company from cost overruns, time delays, or catastrophic project failure by identifying those variables and reducing their impact. These principles of project management applied to small personal events to those effecting us globally has led me to recognize some concerning trends in the preparedness community.
My observations have evolved as I have reached out or involved myself with various groups, whose vision and goals were to help other become aware of the fragile society and economy and how to prepare for it. I have discovered that the vast majority of people prepare themselves and their families, then stop at that point, thinking they have what they need to weather the storms of life. That discovery is what led me to move people beyond a personal stockpile of “stuff” and develop a Concentric Circle Preparedness Plan.
The goal behind this next step in preparing is to build a personal community, enhance your skills, resources and knowledge base and insulate you from the crisis with circles of defense. Concentric circles multiple your ability to survive. From small events, such as job loss, to major events, such as a global socio-economic collapse; adapting this along with a color code of awareness will help you identify what actions you should take and when.
Your Family Circle
This is your Primary Circle and where most people start and stop. They lay up food, water, medical supplies, fuel, shelter plans, guns, ammunition, maybe some cash and silver. They may develop some new skills such as sewing, canning, gardening, animal husbandry and acquire books as reference material. Yet they get to this point with a new level of confidence and assurance and falsely believe all is well or at least better. They may be prepared more than the masses but this is not the end of the journey. This initial circle is very important, because without it you become a refugee at the mercy of others or worse case FEMA.
Areas you should focus on are: Food, Water, Shelter, Fuel, Security, Medical needs, personal Hygiene, Currency/Barter skills, Gardening, Basic First Aid, etc. I would suggest finding a comprehensive list here on the List of Lists.
Extended Family Circle
This becomes your Secondary Circle and by its nature and mindset of awareness, an individual will naturally reach out to mothers, fathers, brothers, sisters and cousins, your extended family. All of us have done this at some point or another and have our message both accepted or we are given the look (you know the one I am speaking of). Developing the second circle is important to acquire trustful partners in a time of crisis. Additionally, a family member may have a farm to act as a retreat or access to skills and talents you neither have the education nor training, such as mechanic, nursing, welding, etc. Your extended family circle gives you a multiplier effect to your resources, tools and supplies that you may not have or the ability to purchase. Since typically, (family dependant) the trust factor is high in extended families, the sharing of information becomes less of a factor than in the outside circles. This second circle along with your family circle becomes the basis for your primary community of support and security.
At this point the creation of additional circles becomes more difficult as the trust factor diminishes and OPSEC issues arise. The benefits are great but I would caution and use extreme discernment in reaching out to others without a thorough knowledge of others ideologies and personal beliefs.
The following Circles are interchangeable in their position. For instance, your Church Circle may well be more important or relevant to your personal situation than a Neighborhood or Friend Circle.
Neighborhood and Friend Circle
This can be broken into two separate and distinct circles. As you move to develop this circle the selection process of people to include should be done with care. Again, if you know your neighbors you can pick out the individuals that would be hostile to any mention of preparedness or political differences that may jeopardize your inter-circles. I know in our neighborhood we are surrounded by “opposing” ideologies that would expect us to share what we stored. An Occupy movement for my storehouse would likely ensure if they knew of our preparedness mindset. Nice people under normal circumstance but potential threats should the crisis develop beyond the point of stretching regional resources. We do not mention our plans or thoughts on preparing to these individuals. Choosing friends and neighbors under extreme situations is left to your discretion. There are advantages, you may have certain friends or neighbors who can add to your skill and knowledge base or those that you know are all ready preparing and the subject matter would not be threatening to them. These individuals become additional multipliers and another layer of security and insulation to mitigate risks of a crisis.
Reaching out to unknown neighbors is not a wise decision. One way to evaluate a neighborhood mindset is to start a Neighborhood Watch program. You will find out very quickly those that are armed, concerned about crime or possibly even have a similar mindset.
We have friends that have developed over the last year from our Homeschool Co-op. They have a farm with cattle, milking cows, a private shooting range. We are working together now to learn new skills, their location is not ideal for a retreat since it is a farm in the midst of a highly populated area, but the resources we have access to are beyond our individual efforts.
Church/Organizational Circle
I would hope your church would be supportive and what better core of individuals to build community support. I would say that in my experience depending on your denomination, that some church leaders may oppose preparing or at least look at you with the same look you get from skeptical family members. The groups I have been involved with have reached out to Churches with mixed results. The reason may vary from those that believe preparing is equal to not trusting in the Lord (which I believe He does) or that the Rapture will let them escape any major crisis (which I have no doubt He is capable to do). Unfortunately most automatically jump to a TEOTWAWKI situation and fail to see that hurricanes, tornados, ice storms, and job losses are everyday crisis’ people deal with. When they hear preparing, they hear Revelation events. That being said, I have found that most church members understand the principles found in scripture concerning preparing and are not opposed to it. The Joseph Principle, Noah, the Ant proverb, and the parable of the Ten Virgins are great examples.
The benefits of building the relationships in this circle are vast. Your trust factor should be higher than the population at large, the number of people (depending on your church) gives you access to more skills and resources of knowledge, a pre-structured community, access to large commercial kitchens equipment to feed large numbers of people and most importantly a support group of people of like faith.
Local Authority Circle
I know the mention to some will send shivers through your spine but bear with me. In no way am I suggesting you reveal your preparedness plans to local law enforcement. Especially in light of recently signed Executive Order -- National Defense Resources Preparedness. If you are not familiar with this order I suggest you read it.What I am suggesting is to make yourself acquainted with your local sheriff’s office or in my case we have a Deputy Sheriff that lives next door. He does not know that we are have a preparedness plan, in fact he does not even know that he is part of my circle, he knows who I am, and to some extent my views on life. Remember the crisis may be personal or global so mitigation of any risk is your goal and having knowledge and a personal connection with the local county sheriff or fire department may prove to be an extra layer of security. I would also add that including a Deputy Sheriff at your Neighborhood Watch Program actually provides you with information on the Sheriff in your county. You may discover that your sheriff is an Oath Honoring Constitutional minded Sheriff willing to assist citizens in his county to prepare.
By no means should your circles encompass any or all of these, you can tailor your concentric circles according to your own personal situation. But as you do, you will start to gain even more confidence in your survival skills, knowledge and resources.
How and when to engage these circles will be dependant on the event you are experiencing. Of course a job loss will not require you to engage the sheriff’s office but you may reach out to family, then your church, etc., yet a regional chemical spill may. Remember each circle provides a resource to mitigate risk.
Codes of Awareness
Now that you have a circle of security to insulate and mitigate risks to your family, establish a Color Code of Awareness. Information is key and if you plan to bug out it is imperative that you are the first ones out the door. While everyone else is watching Fox News to learn of the most up-to-date report on the crisis, then it is time to go. My personal opinion depending on the crisis will be that 80% of people have no where to go and will stay glued to the television for up to the minute news. The remaining 20% will have the sense to leave but 80% of those will hesitate because they are not ready, have nothing packed and no plan of action. That leaves us. The question my primary and secondary circles discuss on major events is What is the trigger? I still don’t have an answer for that question. We have thoughts and ideas and those are used to form a basis for decisions. But this is when we venturing into the “don’t-know-what-we-don’t-know-area”. We all have a sense in today’s world that events are upon us that can go badly very quickly. This unknown variable can only be provided with contingencies, a If this-Then this scenario, and in no way could every possible scenario be accounted for. Under that unknown variable, we apply an OODA Loop.
Observation: You information do we have; what is going on around us, etc
Orientation: Formulate a plan around the Data you have received
Decision: Is the information valid, is it sufficient to make a decision, if not then more observation, reach out to your circles to uncover other information that will assist you
Action: Based on the information, is it a trigger event for you to implement a plan. What are the implications of delaying action?
Using an OODA loop for engaging your circles will help you from jumping the gun or crying wolf. The color code may also be used to determine when you call upon on more levels of your circles. Those decisions should be based upon your specific circumstance.
Code White
Means there are no potential hazards, ongoing crisis or crises on the horizon. Anything that happens would be a complete surprise. Personally we have never been in a Code White. With all the events going on politically, economically, socially a Code White would be a welcomed relief.
Code Yellow
Code Yellow means there is no specific threat but you are aware of some crisis that may be on the horizon. Example: A potential hurricane, snow storm. We have Code Yellow occasionally in North Carolina. In a Code Yellow we may contact those in our Extended Family and Friend Circle
Code Orange
Code Orange means there is a specific threat serious enough for us to have gassed up all the vehicles and be prepared to bug out. Bags are at the ready, Daily phone calls to members of our Primary Circle are made with location and daily plans. A sound like over kill but it is nice to be in touch with a spouse or children on a regular basis even if just to check in on each others status. The cause for a Code Orange in our operational book is terrorist threats, economic uncertainty, looming war, severe weather alerts, political uncertainty, etc. Yes, we seem to stay recently in Code Orange. We are in contact on a regular basis with Extended Family, Friends and Church Circles.
Code Red
This is the most severe of Codes. This means the event triggering a Code Orange has a high probability, has effected our immediate area or has national implications. Events such as a terrorist attack on a major city, Urban Riots, Collapse of the Markets suddenly, outbreak of a regional conflict in the Middle East are classified as major non-weather events with devastating impact. In these cases we will have contacted multiple circles (if possible) and have initiated our evacuation plan of action.
I suggest that each of your Codes have a specific reason, specific plan of action, reasons why the Code would change either to less or more extreme level. Don’t trigger a Code without using your OODA Loop. You will prevent much heartache and stress if your Code decisions are based on sound Observation and Orientation.
As you see, once each circle is developed, you start insulating yourself and developing an increased probability of successful survival. We have lost too many years of not developing our personal communities. Communities in the past, survived because they developed these connections, if not by design but through necessity. Your survival can not be based on only your resources alone; you can not be an island unto yourself. It has been said many times before; if your plan is to scamper off in to the woods to survive by yourself off the land then your chances are slim if not zero.
This may seem hard but just as when you began preparing your inter-circle, it took a small step. Now you need to take another small step and call a family member and start building on your secondary circle today. Start with those family members that will be more accepting to your message or plans and branch out from there. There is nothing more motivating than early success and building early connections. If that circle is complete, which I would assume it is, then start your next circle, you may never use it but like insurance its there if you do.
Good Morning Jim,
I would like to add my wholehearted support to the article “Cycling into TEOTWAWKI” by Mine T. I have been an enthusiastic Cyclist for many years, and consider a well set up bicycle to be an excellent option for bugging out, when staying where you are is not an option. I also believe a bicycle will give urban preppers a considerable advantage to those attempting to get out of dodge on foot, or even by four wheeled vehicle. A bicycle can go just about anywhere, so the option of riding out of a city along footpaths, railway lines, drainage culverts, and in the UK, old Canal Paths, would be a definite possibility.
My current choice of touring bike is a Surly Ogre. The Ogre is the latest generation of 29” wheeled mountain bikes, which has been specifically designed for long distance off-road touring. (I have no connection with the company, other than being a satisfied customer). The Ogre is built in the USA, and could be described as the John Deer Tractor of Bicycles, thanks to its strength and the unlimited set up options, including a huge number of mounting positions for water / Fuel bottles and accessories. It can be set up for Hub Gears, Trailers, Disk Brakes, extra wide tires, and just about anything else you could think of. My choice of 29” Schwalbe Marathon tires really come into their own on long trips, on or off road.
I fitted my Ogre with Old Man Mountain front and rear racks http://www.oldmanmountain.com/ and Ortlieb Back Roller Plus Panniers (front and rear)in a subdued Hazel brown colour. These give me plenty of storage space for extended trips of a week or more. By caching food and other supplies at strategic points along your bug out route, you could remain mobile for months at a time.
I will send you a full review of the bike and the other touring equipment I use later in the year, once I’ve had a chance to give it a full trial.
All the best, - Andrew in England
Dear Jim:
MineT wrote a great article! When you really think about it, a bike in the back of your car or truck is likely the most effective way to get home when driving is no longer an option due to blocked roads, car damage, etc., etc.
When a crisis hits you are going to want to get home immediately, if not sooner! 10 miles hiking is a 5 hour trek at 2 mph, 20 miles is a full day. Biking on any kind of road surface at 10 mph is easy, so you would get home in just one or two hours. And you when you get home you will have much more energy left to deal with the situation.
The problem is the space - even with wheels off, a bike takes up a lot of room. (A motorcycle, moped or electric bike would be even faster to get home if only you had the space to carry it around all the time.) Bike racks outside the car are a possible solution, but leave your bike vulnerable to theft and the weather (and decrease your mileage).
For convenience and practicality I have my eye on a Montague folding bike that can be kept safe and discreet in the trunk. A nod to SurvivalBlog advertiser Ready Made Resources, they have a good selection and great prices:
[JWR Adds: I've owned a Montague folding bike for two years, and I love it. It is very reliable and folds up quite compactly.]
Regarding type of bike: I would not even consider a road bike. [In disaster situations] you need the robustness and reliability of a mountain bike. (Put slick tires on to reduce the weight and rolling resistance if you are mostly road riding.)
There is much less chance of flat tires on a mountain bike, and you have many more route options of road or trail surfaces that can be ridden.
Definitely install tire liner inserts, (e.g., Mr. Tuffys) and/or a tire sealant. I do both on serious backcountry trips.
Reliability is the key when you are on your own. Regards, - OSOM
Those #&%*#^@ derivatives! JPMorgan exec disregarded warnings on portfolio risk
MC in Florida suggested this Zero Hedge article: Japanese Pension Fund Switches to Gold for the First Time Ever
B.B. sent this: U.S. has Two to Five Years Before Financial Meltdown.
Items from The Economatrix:
Bank Runs Hit Greece. (Another news article quotes Greek President Karolos Papoulias: "[Greek Central Bank chairman] Provopoulos told me that of course there’s no panic but there’s great fear which can evolve into panic.")
As Europe's Economic Outlook Darkens, US Risks Grow
Oil Drops a Fourth Day on Rising U.S. Supplies, Greek Elections
Yet another preparedness conference has been announced. These have been popping up like mushrooms this year. This one is near Portland, in Oregon City, Oregon. (That fun cliff-dwelling city with an elevator that connects its two levels.) PREPARE 2012 will be held at the Oregon City Pool Conference Center, 1211 Jackson Street, on Saturday, June 23, 2012, from 6-to-8 in the evening. The organizer of the event is Scott McSorley of Cascadia Preparedness Disaster Consulting.
o o o
The Poster Boy for Bad OPSEC: Preppers do their best to be ready for the worst
o o o
K.A.F. flagged this: Scientists Link Stomach Flu Outbreak to Reusable Shopping Bag
o o o
Long-time content contributor R.B.S. sent: Man bitten by rattlesnake at Walmart in Clarkston, Washington.
o o o
A new Ttabs ultralight flying video that shows some of the geology of eastern Washington: Rock Lake Washington and the Ice Age Floods - Trike Flying
"Save some cash, load up with gold and silver, and be patient. Get ready for a crime wave -- a large segment of the population will do ‘whatever it has to’ in order to obtain food. Hungry men and women can be desperate and lawless." - Richard Russell, author of the Dow Theory Letter.
Wednesday, May 16, 2012
Today we present two more entries for Round 40 of the SurvivalBlog non-fiction writing contest. The prizes for this round include:
First Prize: A.) A gift certificate worth $1,000, courtesy of Spec Ops Brand, B.) A course certificate from onPoint Tactical. This certificate will be for the prize winner's choice of three-day civilian courses. (Excluding those restricted for military or government teams.) Three day onPoint courses normally cost $795, and C.) Two cases of Mountain House freeze dried assorted entrees in #10 cans, courtesy of Ready Made Resources. (A $350 value.) D.) a $300 gift certificate from CJL Enterprize, for any of their military surplus gear, E.) A 9-Tray Excalibur Food Dehydrator from Safecastle.com (a $300 value), and F.) A $250 gift certificate from Sunflower Ammo.
Second Prize: A.) A Glock form factor SIRT laser training pistol. It is a $439 value courtesy of Next Level Training. B.) A FloJak FP-50 stainless steel hand well pump (a $600 value), courtesy of FloJak.com. C.) A "grab bag" of preparedness gear and books from Jim's Amazing Secret Bunker of Redundant Redundancy (JASBORR) with a retail value of at least $300, D.) A $250 gift card from Emergency Essentials, and E.) two cases of Meals, Ready to Eat (MREs), courtesy of CampingSurvival.com (a $180 value) and F.) A Tactical Trauma Bag #3 from JRH Enterprises (a $200 value).
Third Prize: A.) A Royal Berkey water filter, courtesy of Directive 21. (This filter system is a $275 value.), B.) A large handmade clothes drying rack, a washboard and a Homesteading for Beginners DVD, all courtesy of The Homestead Store, with a combined value of $206, C.) Expanded sets of both washable feminine pads and liners, donated by Naturally Cozy. This is a $185 retail value, D.) A Commence Fire! emergency stove with three tinder refill kits. (A $160 value.), and E.) Two Super Survival Pack seed collections, a $150 value, courtesy of Seed for Security.
Round 40 ends on May 31st, so get busy writing and e-mail us your entry. Remember that there is a 1,500-word minimum, and articles that relate practical "how to" skills for survival have an advantage in the judging.
DISCLAIMER: I am not a medical professional. All advice given in this article should be discussed with your doctor before attempting to use them. Please be cautious that all plants that you use have been properly identified before using them medically.
After a societal collapse, no matter the cause, store bought medicine will disappear. If you are like my wife and I you have stored up medicines along with your food, water, and all the rest. However, if the collapse will be long term then sooner or later you are going to run out of medicine. About a year ago, after moving to the small town our retreat is in to start farming and setting up agriculturally, my wife and I began a discussion as to how we could supplement and even replace our medical supplies as they begin to run short and eventually run out.
The answer was surprisingly simple; plant-based medicines or herbal medicine. Nature is our medicine cabinet! Most of the pharmaceutical-grade medicines we have today are based off of plants and plant derivatives, so why not take it one step back in the process to the plants themselves. Anyone who has begun a study of herbal medicines has heard the story about foxglove and how it was prescribed by herbalists in the past to help treat heart conditions. Unsurprisingly, when modern science began studying this herb they discovered it contained a medicine that they extracted called digitalis. Digitalis has been prescribed for decades for patients with heart conditions.
One of the things that my wife and I discovered as we began our quest into herbal medicines is that (unless you live in very cold or very hot climates) we are quite surrounded by medicines. Not only medicines but vitamin supplements in plant form. For example, we are surrounded in our area by red or crimson clover, a plant that was introduced to the United States as a cattle feed which has spread like wildfire and is now found in 43 of the 50 states. The flowers of red clover are what gives the plant its name and are also where most of your medical and vitamins are located in the plant itself. Red clover can be used as a tea or can be converted to a salve. As a tea it acts as a mild sedative and also loosens phlegm so is excellent when you have a cold. It is high in Vitamin C and niacin. Also it contains the minerals calcium, magnesium, potassium, and chromium. In ointment form it can be used to treat psoriasis and eczema.
My wife and I spent this past weekend picking an entire bowl of the flowers. The flowers can be dried for use in teas later, which is what we are doing. You can also make a tea with it as soon as you pick it. You boil your water, dump it on top of the flowers, wait 30 minutes to steep, add honey and drink! What could be simpler? That is just one of hundreds of plants that we have identified in our area.
How Do I Get Started?
First: Identify potential health problems you may face after a collapse. Does someone in your family have asthma? Then you would probably want to identify herbs in your area that can be used to treat asthma. Worried that you will not have anything to treat a fever with once the Tylenol runs out? Red clover is great for reducing fevers and has anti-viral qualities.
Second: Identify plants in your area. This is as simple as starting with what you know. My wife and I know without a doubt that the clover growing in our area is red or crimson clover. We had questions about other types of plants so we went online to help identify them. There are great resources out there that make this easy. An example is: RealTimeRendering.com. If you cannot figure out what a plant is after searching in books or online, get in contact with a botanist at a local university. If they don’t know they will help you find out and are usually extremely helpful.
Third: Look up the medicinal uses for the herbs you have identified. Sometimes the results will be disappointing and there is little or no value in harvesting the plant, such as the musk thistles that are abundant in the area where we live. Other times you will hit a gold mine of medicinal uses, such as what we discovered with the abundant red or crimson clover. Check out multiple sites and books to insure that you are getting proper information.
Fourth: Find out what you have to do in order to extract or use the medicine. Sometimes it is as simple as making a tea. At this point, I feel I must give this warning: BE CAREFUL OF INGESTING ANYTHING. Please make 100% sure that you have positively identified a plant before using it as a medicine. You want to help your family and poisoning yourself (or even them) by rushing or guessing will help no one. Other times they are best used in poultices, salves, and in other types of applications. Read up on the medicinal uses then look up how to make these online.
Fifth: Be mindful that herbs will naturally reproduce themselves annually and that you should pick them fresh every year. One of the herbal remedies I will give below (yellow dock) has a shelf life of about six months but can be harvested in the spring and in the fall so this is not a problem at all. Just remember that herbs medicinal qualities will expire after a certain amount of time.
Sixth: Compile all of your findings and share them with your group. This will also give you a great deal of bartering power after a collapse PLUS would be an excellent form of charity that you could use to increase your reputation in your community. Not to mention the simple fact that sharing your medical knowledge would be a very Christian thing to do!
Example of a herbal remedy: Yellow Dock Tonic
There is a plant known as Yellow Dock (you can look up pictures of it on Google Images) that grows on the side of roads and in open pastures. Since there are two different methods for harvesting and preparing this plant depending on whether it is spring or fall, I will tell you how to harvest and prepare this now. The seeding part of this plant can be harvested in the fall after drying and used as flour. The medicinal part of this plant lies below ground.
Yellow Dock is a great medicinal herb with multiple uses, something you should seek in your medicinal plants. It can be added to many other mixtures and remedies, such as the red clover tea. A few of the many medicinal uses of Yellow Dock include, cough medicine, liver detox, digestive aid, gout remedy, headache remedy, depression remedy, skin treatments for itching and eruptions (boils, poison ivy, psoriasis, etc.), bowel infections as well as treating peptic ulcers.
Preparing Yellow Dock in the Spring: To use this plant medicinally you need to grab a shovel and dig out the root system. The root system of Yellow Dock is usually very well established and can go as far as twelve inches below the surface. After you dig out the root you will notice that the roots are carrot like in appearance (but not color). The top of the root system near the stem will be tough and barky. You want to cut right above this hard bark portion of the roots near the stem. The top half of this plant can be fed to your livestock (in moderation). Our goats love them.
The roots should be washed over and over until all the dirt has been removed. After this cut up the roots into ¼” sections and pile these up. When you get to the top of the root that is difficult to cut with a knife you can stop and discard this section. Once you have a nice pile (about 1 lbs or more) of the roots you can begin boiling water. Place the roots into another pot that has a cover. This pot should be small enough that your roots fill it almost to the top with a half an inch to an inch to spare.
Once your water has boiled, pour it on top of the Yellow Dock roots to where it is just barely covering them. At this point, place the top on the pot and go do something else for an hour. While you are waiting you can prepare a strainer and whatever you wish to place the root extract into. My wife and I used an old vinegar bottle to place our tonic into. The excess went into a mason jar.
After your hour is up, fill your tonic bottle halfway by passing the golden brown liquid extract through a strainer to remove any root parts. Let it cool for a while. Place the remainder of your extract into another bottle, also straining. At this point you can throw the roots in your pot onto your compost heap as you have extracted all you can get from them. Warm (not boil) some apple cider vinegar and pour into your tonic bottle. Take a couple of teaspoons of this every day. Remember to not overdo it as the mixture you have is pretty potent.
The foregoing is just one of many herbal remedies that you can concoct. My wife and I have tried the two remedies recommended in the above article so speak from experience that they do work. You may find that you have plants unique to your area with great medicinal uses! In a collapse situation you will need any advantages you can get so start learning about herbal medicines today.
Final Words: I can talk for a long time about herbal medicines but I urge you to get out there and start learning all of this yourself. This post should give you a good idea of what to do and I sincerely hope that a few people out there will take it seriously. God Bless and stay healthy!
Cycling has many facets that could attract people preparing for the time when the comforts we have been so accustom to are no longer available. Pick your scenario for the drastic change in our future and a bicycle might be able to handle some of the chores that a computer controlled fossil fuel vehicle may no longer be capable of. If the family car is incapacitated, how will you get from point A to point B?
But one can't expect to just shell out some money on a human powered urban assault vehicle, and one day just pick it up and head out towards the burning horizon as if it’s a normal evening sunset. I’m going to attempt to write this article to the person who’s looking to add this option by doing research, making wise purchases, testing equipment, and training properly, just like any other prepping should be done.
You’d think silly of me if I bought a firearm for self-defense, loaded the one magazine provided with ammunition I bought from a yard sale, placed it under my pillow, and then expected it (or me) to instantly be ready to fend off anything more than a girl scout ringing the doorbell with a wagon full of cookies. If you consider this a viable threat, I apologize for making light of it, and you might want to talk to somebody about that. But I digress. You should have done your research, talked the poor guy behind the counter at the local gun store into insanity, purchased a firearm and accessories based on your intended use, and budgeted for ammunition to test and train for the moment of truth. Cycling is no different, except for the slinging of lead and the fact that training is much, much cheaper. You should do the research, buy from a local bike shop (can’t stress this enough, as a working relationship with a good bike shop will pay for itself), and train, train, train.
This should lead to a high confidence level that you and your bicycle can reach its planned destination while carrying the gear necessary for the trip. Confidence will come from not only the tested gear, but the change in physical health that the training is going to afford you. I’m not going to assume you have already put in the amount of seat time it takes to get those sit bones in tune for a day of cycling past the no longer gas guzzling modern dinosaurs stuck on the road after TSHTF. To get there, you’ll need to add cycling to your current physical training routine. If a physical training plan doesn’t exist, cycling is the perfect place to start.
Cycling Out Scenarios
Immediate bug out
For us who are still looking for that perfect land to wait out the Apocalypse, we still consider abandoning our current digs for better ones immediately upon realizing that the grid is down and ain’t coming back soon. Walking doesn’t get us very far, and we’ve got to carry everything we need on our backs. It goes without saying that if this isn’t something you have trained for, you might still be able to look back and see your own mailbox before you decide where you’re making camp for the night.
Forced bug out
All but the most fortified and mega-stocked castle-on-a-hill should have a bug out scenario at least in the realm of possibility, or have graves already dug. By the time stores run out, and the angry mobs have eaten each other, cycling can give you that 100+ mile range when the fuel pumps have run dry, and your Hummer is out of commission. You’ve got your maps and have contacted a community with your short wave radio; but how do you get there carrying what you need for the trip when cars are incapacitated and roads are impassable? Your cycle choice and training can step up to the challenge.
Cycling home
Many people who have prepared their suburban homes for disaster work in more urban areas due to the higher paying jobs. For them, being at work when the news gets bad is a concern. Trying to get out of a densely populated area in a car on limited road space due to everyone else trying to do the same might become problematic. If getting home by car is no longer an option, cycling can be a much faster alternative to hoofing it. A ten mile commute on back roads via bike is a 45 minute ride with limited training vs. half of a day. 35 to 50 miles and more is possible in the same time it would take to walk. With no impact on your joints from the ride, you might be of some good when you get there to bunker down and defend your home.
Shelter in Place
You might think in this scenario that a bike would be useless, but I’d like to argue the point. Exercise will still be important no matter where you find security. A cycle trainer can turn your outdoor bike into an indoor gym. Even if you’re 10 feet under concrete avoiding the nuclear winter, you won’t have to have memorized your favorite 90 minute exercise DVD to get in a good workout. You’re gonna want to keep that heart in good shape for when you pop the hatch and greet the new world. Also consider the power you’re generating with that spinning wheel. That could run a generator that keeps batteries charged or run small appliances. With a little ingenuity, this energy can be used in a number of ways. Hook it to a water pump normally run by a drill and you can move stored non-potable water up to a tank on the roof to flush the last working toilet in existence. This might be a topic for another paper.
Bike Choices
Road
Road bikes are very specialized machines for exactly what they’re named for; the road. If your plan includes pavement from point A to point B, and you train for the situation, a road bike can get you home in a hurry while your coworkers are stuck on clogged roads. I mention training due to the fact that these speed demons are to be ridden bent over and don’t have any creature comforts. 100 psi tire pressures, a rigid architecture, and a seat hard enough to deflect incoming artillery make for an uncomfortable ride if you aren’t prepared for it. The component sets are built for speed, not abuse. I’m not saying they are particularly fragile, just designed for the road. That being said, if you pick up road cycling as a hobby, you won’t blink at a 25 or 30 mile ride for fun, much less as a way home in an emergency.
Mountain
A mountain bike might seem like a better choice, and for most initially riding one is a lot easier. If you’re G.O.O.D plan is off the side of a mountain into the valley below, you can stop reading here and buy a downhill special. If crossing numerous unimproved sections of land is in order, this is your choice mode of transportation. But these bikes can be very inefficient on the road and can drain your energy much faster. Your level of comfort and durability go way up, and if the distance isn’t a factor, a mountain bike might be your choice. A general rule is the more suspension travel the more energy will be robbed from each rotation of the pedals. Also, picking an aggressive tread pattern increases the rolling resistance you’ll experience. Much like the road bike, if you’ve trained for it, this type of bike can do the miles.
Hybrid
The type of bike I ride is what’s considered a hybrid. This is a broad category. They can range from dual suspension to a rigid frame and forks. From a wider (not mountain wide) tire with 60 psi, to a slim road tire with 100+ psi. Many sport a flat style handle bar. It is the most identifiable feature, and a huge difference between it and the road bike. The other difference is that they usually sit more upright, making it a more familiar ride to beginners. Thinner tires and less suspension separate it from the mountain bikes. Commuter bikes fall into this category, and have some features that are attractive to someone who’s looking for all-weather reliability. Commuters don’t take days off just because the weather turns on them, and neither will you in an emergency situation. They can have better component sets, sealed bearings, and disc brakes for better performance in inclement weather. Hybrid and commuter bikes are often drilled out in places specifically designed for mounting racks for bags. This isn’t mandatory but will facilitate mounting these later.
As mentioned, tires for these semi-thin rimmed machines range from slick and stiff to knobbed and squishy. Depending on your planned route, road tires give you much less rolling resistance and more miles for your efforts. The tradeoff is in traction on any (and I mean any) dirt or gravel covered terrain. Also, durability is not their strong suit. If you do run road tires, you have to be careful of any debris or deformity in the road. Fortunately, there’s a whole sport based on good rolling and high traction tires. Cyclocross tires are perfect for both on and off road. They might not save you in an extreme downhill situation, but for general on and off road use, cyclocross tires are worth looking at.
Bug Out Cycling Gear
Safety
As with most of this paper, this is practical information for every cyclist, regardless of the situation. Number one: Do not ride a bike without a helmet. Bike helmets are very lightweight, and you won’t even notice it two minutes into a ride. Note: Cycling helmets are good for one impact. Get a new one if it ends up saving your skull from impact. Number 2: Lights should be used when cycling in any type of traffic or on public accessible roads. Unless you determine your bug out a “blackout situation”, a blinking red light to the rear and a blinking white light to the front should be flashing at all times. Work gloves and safety glasses are part of my B.O.B., and the ones I’ve selected to get me through Armageddon are just fine for commuting or escaping an urban disaster to get home. Glasses will help keep you in control if something hits you in the face. The gloves have a padded palm to give some comfort from leaning on the bars for prolonged periods of time. I have cycling gloves, but my mechanic style gloves get the call if I’m loading up my 72 hour bag and heading for safer ground.
Pedals/Shoes
Pedals come in three main flavors: platform, clips, or clipless. I’m going to eliminate clips altogether. I consider them the most dangerous of the three, and the least effective. I’m going to recommend cycling shoes and clipless pedals, because they put a lot more of your power to the ground and are safer than any other type of pedal. I’m not sure most who don’t use them would agree, but the ones who do will never, ever go back. If you plan on doing a “century” (cycle slang for 100 miles in a day), or just toolin’ around town, clipless pedals are head and shoulders above your other options. Conversely; platform pedals (the ones you’re used to from when you were a kid on your Huffy) offer you a shoe alternative that most clipless pedals don’t. The answer can be clipless pedals with a platform around them. That way, if you have to ride without your bike shoes, you can do so effectively. It’s the win/win situation we’re all looking for. They are available from different manufacturers.
Shoes for road bikes are once again designed only for riding, and walking in them can be kind of like walking in swim fins and sound like tap shoes. Shoes designed for mountain biking use the same pedal attachment (cleat) as the road shoes, but are designed to put your foot down when you need to, and walk around much better. When buying this combination, keep in mind that the cleat comes with the pedals, and not the shoes. There are a few different types of pedals with their own style cleat. Which of these styles is better is another subject for another paper. Most are great designs, but your familiarity with them is much more important than which one might have a slight advantage on the other. The cleat that comes with your pedals should bolt on to the bottom of whatever shoe you buy. If you buy both from a cycle shop (always recommended), they should make the whole shootin’ match work for you.
Self-Defense
If you are going to be out before the angry hordes are done looting and haven’t finished eating the majority of their own population, you can be a target for them. Much like settlers heading West, you’ll need a way of confronting the onslaught. Although you are going to want to give most of the carrying burden to the mechanical beast, some things might be better carried on your person. In fact, you might want to consider having to ditch the bike altogether if the scenario calls for it. Sure, this is a last resort, but so might have been bugging out in the first place. One thing I won’t be strapping on to my cycle is my primary firearm. This, a hydration system, and some other basic survival gear will be attached to me. I’ve worn plenty of MOLLE style vests in the past, and one that carries my sidearm cross draw in a retention holster is getting the call for this mission. Add some pouches for reloads and other must have stuff in just in case plan “C” is called into play. The rest can find room on the bike. Keep in mind that most panniers (a set of side bags) are designed to be removed quickly and have some sort of carrying handle. Loaded appropriately, and you could escape a situation quickly with quite a bit of your gear and leave behind the bike.
Other Gear
Two other parts of your body that touch the cycle the majority of the time are your hands and your derriere. Gloves we covered, so we’ll deal with your sit bones now. You can buy seats with as much padding as you’d like, then add a gel cover to it, and even find a seat post with a little shock absorber in it, but there’s no replacement for seat time. They have seats out there that look like the came off a tractor, but they’ll still more than likely hurt your butt at first. Seat time, measured in minutes, not miles, will make this pain bearable. I prefer to just log the seat time with the saddle that came with the bike. I pay good money (not too much money) for good bikes, and I find the seat that came on it plenty good for me. Cycling pants have a pad built in to them, and they are effective. Cycling pants are also shaped for being bent at the waist, making them comfortable for long rides, but not necessary option for your journey. You can wear them under loose fitting clothing so that you have your pocket knife right where you normally wear it. My tactical shorts usually ride over of mine.
Carrying Gear
Racks
This is the metal frame that attaches to your bikes frame, forks, or both. Racks are available in many different sizes and carrying styles. Some are clip-on, and some bolt on to the bike. I’m not a fan of the clip-on, and wouldn’t trust them in a heavy carry or rough terrain situation to lug what might be equipment and supplies that prolong my life. Some only carry loads on top, some on the sides, and some both. This is going to be a personal choice based on how much each person can carry safely for the distance and terrain they must cover. A general rule is that you’d rack and pack the rear of the bike first, then the front as needed. I have done both, and prefer to rack the front first. I don’t even notice moderate loads on the front of my commuter bike, and prefer the ride of the weight low and forward on my bike. I had to look for specific racks that work with disc brakes with my last purchase, as my newest cycle is equipped with them. Suspension laden cycles will have some restrictions on what racks they can accommodate. Again, a good cycle shop will be able to help you with selection, as well as proper installation.
Bags/Panniers
I’ll tell you right off the bat these things can get downright expensive. But like with most things, you get what you pay for. Since I’m guessing you’ll be (as I will) moving the heavier, if not all of, your B.O.B. to the bags, the light duty bags are not what you’re looking for. Water containers can be affixed directly to the racks if you wish. Practice riding with all the extra weight in its place before the need arises. The higher you make your center of gravity, the more unstable your ride will be. The other nugget I’ll share is that I prefer to buy the racks and bags from the same manufacturer. Not necessarily the same place, as shopping around can save you some dough. As mentioned before, many panniers slip on and lock to the racks for quick on and off convenience. A slight difference in design between the racks and the bags can lead to relying on duct tape (once again) to arrive with what you departed with. There are plenty of options of where you want to put bags, too. Handlebar, trunk, sides, seat, and frame bags are a few of the choices. I have a seat bag with an extra tube and the tools to change it, along with a cycling multi-tool. I prefer these items to be out separate so that I don’t have to look for it when needed. Changing a flat on a bike is very fast with some practice. Looking for the tools can take as long as fixing the flat if you have to dig for the stuff.
Trailers
Why not a bugout bag (B.O.B.) for your B.O.B.? Google up the B.O.B. (Beast of Burden, in this case) cycle trailer and I think you’ll be impressed. I’ve personally talked with people who have crossed the country pulling these things loaded down with gear, and they praise them. The only complaint is that they’re so popular that replacement parts can be hard to come by. Their single wheel design and slim profile make them very agile, able to scoot through small places (like between abandoned cars) and down narrow trails. This is the only individual product endorsement I’m including in this paper. I’m currently experimenting with a two wheeled trailer I picked up second hand. The primary use for the trailer will be our pet, which we’ve prepped for on all the levels in which we’ve prepped for ourselves. But I will also be testing this for the carrying of supplies. Water will be placed low and flat of the bottom of the cargo area. Other cargo will be placed around, and our small dog will be strapped in and sitting up in the middle. If you have a small child, this is also an option. I’m going to suggest, nay demand, the same safety equipment for the young passenger (helmet) and the same lights on the rear and far left and right of the trailer. A flag also accompanies most trailers for visibility.
Bike Maintenance and Repair
Professional Maintenance
After riding your bike the first hundred miles or so, it's time to take it back to the cycle shop for adjustments. I wouldn’t try this if you elected to buy from an individual or a big box store. New cables stretch and derailleurs will need tweaking. This is a service many bike shops offer for free. Unless you really want to learn a new skill (discussed later), I'd leave adjustments to the pros at the shop. They aren’t often necessary after initially tightening everything up. Just have it done occasionally and you’ll be ready when the ball drops.
Home Maintenance
Home maintenance is not too tedious. Cleaning and lubricating the chain is something you should do as necessary. A device to do this is about the only tool I have that is cycle specific. Keeping the bike clean, especially if you take it off road, is important to prevent unnecessary corrosion.
Repair
As for maintenance, I’d leave almost anything more complicating than flats to the cycle shop. One reason for this is the shop's mechanic can spot other things you might have missed that are askew with your scoot whilst repairing whatever it is you drug it in for. That is unless you’ve done your homework in cycle repair and equipped your tool arsenal with cycle specific implements. That being said, cycle repair could be a post catastrophic vocation that might be in demand. If you do choose to develop this skill set, it might be a bartering tool with others who now realize that a bike is their best transportation option. You might just find yourself fixing old bikes and trading/selling them, effectively starting your own “The Day After” bike shop as an income stream while saving time and money now by tuning your own.
Parts
Again, as long as you keep your bike in good working order, even if the cycle shop falls within the quarantine area, you should be able to get where you’re going on your well maintained bicycle. Tubes and the few tools you’ll need to change a road side flat are a must. A chain is a key component that can break without any real sign of abuse. An extra one might be a good idea along with a chain tool. Chain tools are small and fairly self-explanatory, and come as part of cycle-specific multi-tools. Stocking up on spare parts can be part of your plan if you’re considering the after world bike shop we previously mentioned.
Replacement
Some parts will need to be replaced, much like a car. Unlike a car that has a check engine light, sometimes bicycle problems don’t present symptoms as fast and can easily be missed. Having an inoperative bike can make your five mile bug out plan change drastically, and make a 50 mile bug out nearly impossible. Tire wear is more obvious, and you’ll be looking at them more than most other parts. Tubes, unless you really are lucky, will be replaced because of occasional flats before they wear out. The less obvious parts are the chain and coated brake cables.
Testing Your Gear
Just as with the waterproof matches, the dehydrated mac and cheese, and the portable water filter you bought for your B.O.B., every piece of prepper gear must be tested. Not only for operability, but for the confidence you need to carry this gear in to TEOTWAWKI. Your bike is no exception. Find the weak links, and squash them. You have to know that when this piece of equipment is supposed to get you home (or where you’re going to call home) that when you lean on the pedals, it’ll project itself forward just like it’s designed to do.
Cycling Lifestyle
Cycle shops
A good cycle shop will pay for itself in professional advice, proper fitting you to a bike, proper mounting accessories to your machine, and continual tuning. Picking a bike off the shelf of a super store is a recipe for disaster. I wouldn’t buy a bike from a box store as a present for a total stranger; much less trust my plans for the future to one. As with any good gun shop, you should feel comfortable asking questions about gear. If they don’t have the time to answer them, then Google up another bike store in your area until you find one that does. Make sure the owner and employees are cyclists. Their real life experiences with gear will be your first test, but not your last. It should be obvious that they’re cyclists, by the display of their own bikes in the shop. Ask them why they picked the gear they run, and then learn from their answers. They’ll also most likely be your first clue to where the good cycling clubs meet.
Cycling clubs
A lot of what we do as preppers is enhanced by like-minded people, and cycling is no exception. Getting into a cycling club can make your whole experience better. There’s seat time, and then there’s seat time combined with a little healthy competition and camaraderie. There are usually ability groups to match all levels, so you don’t have to be able to do 20 miles at 20 MPH on day one. But you will improve quicker than you think if you work at it.
If you really want to be prepared to bike thru the now third world country at the end of your driveway, take up a discipline called cyclocross. Cyclocross racing is a fairly new sport, but is catching on quickly as it brings the other types of racing together in a strange and fun environment. This type of event invites inclement weather, provides terrain that varies from road to mud, includes obstacles that will force you to carry your bike, and will abuse your body (as much as you want). It takes place on a closed course designed to tax your cycling skills as much as your endurance. The events can be more about finishing than time, and more about fun than trophies. You’ll better know what your body will put out, and what your gear will put up with in this kind of situation. Consider it the cycling equivalent to practical shooting.
Cycle commuting
If your plan includes cycling home from work, what better way to know how it'll go than riding to work? I know there are those commutes that just aren’t feasible, but don't count out 10 or 15 miles one way until you know what you're capable of. Commuting every day isn’t necessary. Maybe you save it for casual Friday. Your attention to detail is different on a bike, and this gives you the best view of what you'll experience when it's time to get home under adverse conditions. I’m not going into a tactical discussion here, but you’ll want to take note of choke points and back routes that will provide better cover or concealment. It also feels good to pass a few gas stations knowing you're not shelling out your hard earned money just to get to work. Plan your commutes by picking roads that are safe to ride on. Skip roads that don't offer you the room you need to bail out. You are considered a vehicle, and you have some right of way, but don't put yourself in a situation where you're trying to explain this to a Paramedic in the back of an ambulance. Review the cycling laws in your state, but realize you might be the only one out there who has. You will be able to pack almost anything you’d normally haul to work in the panniers that will carry your survival gear. My smaller front bags are all I usually need, and I’m much more prepared to work after getting the blood moving on a quick ride to work.
Healthy Lifestyle
Whether a quadruple bypass is in your past, or in your future, you won’t be overly welcome in a post-apocalyptic community if the procedure is imminent. Starting a physical training routine with cycling is easy and fun for almost anyone. After the initial investment, training is basically free and is as convenient as taking an afternoon bike ride. If the great outdoors doesn’t present many opportunities for pleasant riding, many indoor options are available. Adding cycling to a routine is a great idea if your joints are getting a little older. Even if you’re in above average physical shape, cross training on a bike is a great idea to change up your workout. Find a local spin class and see how fast you get into shape for miles of road. As preppers, if physical conditioning isn’t part of a routine, we won’t last long in the times we’re prepping for.
Conclusion
I’m hoping that by now you’re looking at this topic from a broader prospective by looking at the benefits of adding cycling to your lifestyle both before and after TEOTWAWKI. Most of the things I’ve mentioned here shouldn’t surprise you, but I hope were worth reading one more time. A few things worth repeating: You get what you pay for. Seat time, measured in minutes, not miles, is everything. Test all your equipment and strategies as with all survival gear. A great cycle shop will prove indispensable the same way a good gun store is for that type of gear. Last, a cycling lifestyle will benefit in more ways than one. If you live ten years longer because your heart doesn’t have to work as hard, you might just get to shoot some zombies that you would have missed if you flat line before they get here. Happy cycling.
Hi Jim,
To follow up on the recent letter on Commercial Storage Space Thievery, I had a very similar experience with my storage locker. I have a locker from Public Storage in Saratoga, California and had the very same thing happen. I checked out my unit one night and another lock was on the unit. I had the Sheriff come by and they did the usual. The problem I am having presently is the insurance company hasn't really done much and its been three months [since I discovered the theft.] I had all the receipts from Amazon.com and Costco.com so that isn't the problem. They keep dragging their feet while I still pay for insurance on the unit. To add injury to insult, Public Storage just raised my rent. Best Regards, - Martin in California
Mr. Rawles and Steve S.:
I am a Resident Manager of a storage facility. Many of my tenants are preppers. We have not had any trouble in the seven years that I have been manager.
The secret to having a secured facility is to ask questions. Here are some tips on selecting a safe place for your preps
1. Does the manager live on property and is the resident close to the gate.
2. Security – what form does it take
3. Are the camera recording 24/7 or are they for show
4. Entry into the facility – coded box and log
5. Own lock – case hardened – round locks are the best as it takes a long time to cut and usually requires some type of cutting tool
6. Limited Gate hours – 24 hour facility is just asking for trouble. Thieves come in the night
7. Fencing – easy or hard to climb
8. More than one gate – how is the second one monitored
9. Does the facility have alarms on the doors – newer places have this.
10. Not a lot of corridors as the turning can keep someone from seeing
11. Neighborhood/location –ask local police if there is a history of trouble.
12. How long has the manager been in charge – long term managers are usually the ones that have a secure facility.
When putting preps/guns or such make sure it does not look like you are placing important items inside the unit. If you are going to be out of the area find a family member or friend that you trust and have them check the unit at least once a month. Units that are visited by the people who rent them are less like to have trouble.
If you, personally, don’t feel comfortable then do not rent there.
Yes, both myself and my security/maintenance guy are preppers and we have learned many good lessons from this web site
Thank you for all you have taught us. - Texgalatheart
James,
I was dismayed to read Steve S.’s letter about thieves chopping locks off of multiple storage units. Like Steve, I chose a gated facility with cameras. However, there is an additional layer of security available at some storage facilities that your readers may wish to know about. The facility I chose has individually coded entry alarms. When I visit the facility, I must swipe an uniquely coded electronic key in order to open the gate. That key is coded to my individual storage units. If I do not unlock and open either of my specific storage units within ten minutes or so after entering the gate, an alarm goes off. Similarly, if either of my units are unlocked and opened without me first entering the gate, an alarm goes off.
Obviously one pays a price for the additional security (my facility also has on-site resident managers). However, my facility always has a waiting list so the price must be right (it was for me!). Just thought folks might want to know this technology is available and commercially feasible for storage facilities to implement! - David in Pleasanton
Dear Field Gear Editor:
I respectfully disagree with the use of the Deep Concealed Carry Holster for most people who carry concealed firearms. Gun fights happen in seconds and taking the time to rip open a shirt and cross draw may not be fast enough to survive. However, anyone carrying a concealed firearm should be well versed in the concept of situational awareness and be prepared well in advanced that the use of a weapon may be needed. Another problem with a cross draw in a highly stressful situation is the heightened possibility of muzzle flashing someone other that the threat.
I prefer and regularly use a Milt Sparks Versa Max 2 or Summer Special 2 inside the waistband holster, tucked slightly behind the hip. This allows for a fast draw with the muzzle pointing at the threat and the concealment is excellent. The other day I carried a full size 1911 for the day, wearing a T-shirt and loose un-tucked patterned shirt. I passed several police officers, private security and many people, and not one person appeared to notice I was carrying a weapon. I have in the past used only a T-shirt to conceal my 1911 using the Versa Max 2 with no issues, however the T-shirt needs to be on the larger size. Pat made a very good point in that it does take time for the body to get accustomed to a holster. There are those who do like a shoulder holster and for those who do, the Deep Concealed Carry Holster may work well for you. I believe a majority of the concealed carry users would be better off using a inside the waistband holster, tucked slightly behind the hip, like the Milt Sparks Versa Max 2.
Disclaimer, I do not work for or represent any company or person involved in any aspect of the firearms business. - Florida Dave
The latest coinage debasement news, this time from The Philippines: Coin hoarding soon a crime? JWR's Comment: With orchestrated currency inflation there comes the inevitable day when seigniorage costs advance to unacceptable levels, and the metallic value of any given coin greatly exceeds its face value. Rather than doing the honest thing--knocking a few zeroes off their paper currency--governments often resort to bans on coin melting and coin exportation. Anti-hoarding laws are much less common in First World countries as there are typically no limitations on the amount of a currency that someone holds in an ostensibly "sound" currency regime. The root of the problem is inflation. Honest money, pegged to--and redeemable on demand for--specie, is the solution. Debasement and the laws that go along with it, are just stopgap measures, designed to perpetuate larcenous governments. I use the word larcenous because inflation is a covert method of robbing us of the buying power of our savings. Currency inflation is effectively a hidden form of taxation.
B.B. sent this: Greek Depositors Withdrew $898 Million From Banks Monday
From J.B.G.: Moody‘s Investors Service has downgraded 26 Italian banks
Items from The Economatrix:
Jim Rogers: Get Out of Stocks; Buy Gold, Silver and Agriculture
A reminder that a Self Reliance Expo will be held in Colorado Springs, Colorado on May 18th and 19th. There should be a half dozen SurvivalBlog advertisers with booths there.
o o o
AmEx sent this: Science Journal Could Give Recipe For Deadly Avian Flu Virus
o o o
Kevin S. sent a link to an interesting fringe Libertarian "Second Realm" manifesto. ("Crypto-Anarchy, Tradecraft, TAZ and Counterculture.") Coincidentally, Kevin also sent this piece from The Von Mises Institute: The Philosophy of Ownership
o o o
Grace mentioned this over at Mac Slavo's SHTFPlan blog: Emergency Preparedness: How Horrific Will it Be for the Non-Prepper?
o o o
Ol' Remus has posted an astute essay on partisan guerilla warfare.
"This world is an uncertain realm filled with danger. Honor undermined by the pursuit of power. Freedom sacrificed when the weak are oppressed by the strong. But there are those who oppose these powerful forces; who dedicate their life to truth, honor, and freedom. These men are known as Musketeers". - Alexandre Dumas, The Three Musketeers, serialized March to July, 1844.
Tuesday, May 15, 2012
Today we present two more entries for Round 40 of the SurvivalBlog non-fiction writing contest. The prizes for this round include:
First Prize: A.) A gift certificate worth $1,000, courtesy of Spec Ops Brand, B.) A course certificate from onPoint Tactical. This certificate will be for the prize winner's choice of three-day civilian courses. (Excluding those restricted for military or government teams.) Three day onPoint courses normally cost $795, and C.) Two cases of Mountain House freeze dried assorted entrees in #10 cans, courtesy of Ready Made Resources. (A $350 value.) D.) a $300 gift certificate from CJL Enterprize, for any of their military surplus gear, E.) A 9-Tray Excalibur Food Dehydrator from Safecastle.com (a $300 value), and F.) A $250 gift certificate from Sunflower Ammo.
Second Prize: A.) A Glock form factor SIRT laser training pistol. It is a $439 value courtesy of Next Level Training. B.) A FloJak FP-50 stainless steel hand well pump (a $600 value), courtesy of FloJak.com. C.) A "grab bag" of preparedness gear and books from Jim's Amazing Secret Bunker of Redundant Redundancy (JASBORR) with a retail value of at least $300, D.) A $250 gift card from Emergency Essentials, and E.) two cases of Meals, Ready to Eat (MREs), courtesy of CampingSurvival.com (a $180 value) and F.) A Tactical Trauma Bag #3 from JRH Enterprises (a $200 value).
Third Prize: A.) A Royal Berkey water filter, courtesy of Directive 21. (This filter system is a $275 value.), B.) A large handmade clothes drying rack, a washboard and a Homesteading for Beginners DVD, all courtesy of The Homestead Store, with a combined value of $206, C.) Expanded sets of both washable feminine pads and liners, donated by Naturally Cozy. This is a $185 retail value, D.) A Commence Fire! emergency stove with three tinder refill kits. (A $160 value.), and E.) Two Super Survival Pack seed collections, a $150 value, courtesy of Seed for Security.
Round 40 ends on May 31st, so get busy writing and e-mail us your entry. Remember that there is a 1,500-word minimum, and articles that relate practical "how to" skills for survival have an advantage in the judging.
Food Storage has been talked and written at length, but equally important are the logistics of Food Usage when it comes time to break out that food and begin using it. To store the food that way that it will be used, I’ll put “A Week in a Bucket”. It takes some meal-planning and some smaller packages to be able to store “A Week in a Bucket”; but when it comes time to use these pre-planned, balanced diets, opening one bucket at a time is much preferred to opening a bucket of beans, a bucket of rice, a bucket of canned chicken, canned beef… you get the idea… plus it is easier to inventory as well as easier to “grab-and-go/ take a week” for shorter stints in case of temporary evacuation or trips to “the country”.
Those who store 45 pounds of wheat (or oats, or beans, etc) in mylar lined 5 gallon buckets may get very tired of that wheat (or whatever) before it gets used up or may not have a large enough pantry if several different buckets need to be opened at the same time to provide balanced meals at the point of use. I certainly do not want open food containers all around attracting bugs and rodents if I can pre-plan to get meal-sized portions into mylar and into the buckets, then open them when I need them. Then discard (or reuse) the mylar bags. For me, being a big fan of portion-sized packaging, I consider these “Week in a Bucket” kits to be like a “mega-MRE” with one bucket being opened at a time for an entire week. The “Week in a Bucket” also brings purchasing this food back to a manageable exercise instead of a daunting bulk-food acquisition and storage task. A “Week in a Bucket” can be assembled every week or two, or as often as finances allow, then put on the shelf… and rotated out because we all eat what we store and store what we eat, don’t we? Of course we do.
I have found that I can do some advance menu planning and get an entire week of meals for two (2) people or as many as four (4) people in one 5 gallon bucket depending on what is chosen for the menu and how it is packaged… cans, vacuum-sealed mylar bags, dehydrated portions, etc. So, a years worth of Food Storage will take up 52 of these 5 gallon sealed buckets… which is a little more than a single 40’ by 48” pallet that is 4 layers tall, three buckets wide by 4 buckets long (with 4 left buckets on top). Planning a menu is not difficult, but getting agreement on the menu is time consuming and takes some nutrition knowledge. One way to look at it is the way that my Mother planned menus, “This is what I am fixing, you can choose to eat it or not”, but a more agreeable method would be to get the group together and decide on a menu plan before the food is purchased and before it is placed in the buckets. Depending on your level of patience, somewhere in the middle may be the most realistic menu planning method. In any case, each bucket will have a variety of foods and will be readily marked on the outside for identification purposes. If you choose to cheat and open next weeks bucket because you like the jars of cinnamon applesauce better than mixing up the Jello pudding in this week’s bucket, well, you have a conscience… you can live with it.
- It is helpful to paste a list on the outside of each bucket telling exactly what is inside each of them, and the proposed week number. What I am going for is essentially like an MRE for 2-4 people for a week, in a single bucket. Example:
- WEEK 1
- BREAKFAST FOR A WEEK:
- 1 Box/ Bag Grape Nuts (or other choice) Cereal
- 1 unopened Plastic squeeze Bottle Honey
- 1 Box Powdered Milk
- 1 Box Powdered Eggs
- 15-18 Envelopes Instant Oatmeal
- 5# Hard Red Wheat (For grinding/ flour for a loaf or two of bread or biscuits). Add an envelope of yeast/ baking soda and other bread making ingredients, depending on your preferred whole wheat bread recipe.
- Don’t forget the little bottle of multiple vitamins and the extra dietary fiber pills or Metamucil (or equal).
- LUNCH FOR A WEEK:
- 1-2 Box Saltine Crackers
- 10-14 Cans assorted Condensed Soup or 14 envelopes Knorr (or equal) assorted dried soup mix
- 3-7 cans SPAM or DAK ham or equal sandwich/ seasoning meat, or envelopes of dried meats (to be reconstituted with water).
- 1 small jar peanut butter (with the bread made when the bucket was first opened)
- 1 small jar grape jelly
- 1 small can canned cheese or jar of Cheez Whiz or equivalent.
- DINNER FOR A WEEK:
- 3-4 boxes pasta, or hamburger helper, or bagged pasta meals (like Lipton or equal)
- 3-4 cans pasta sauce
- 6-10-12 cans tuna/ chicken/ beef/ salmon or cans of beef stew
- 4-6-8-12 cans green beans, peas, spinach, mixed veggies, or corn or dried varieties of these (to be reconstituted with water)
- 1-2 pound bag dried beans and bouillon cubes, dried onions, dried tomatoes, etc depending on your favorite bean recipe.
- 1-2 pounds bags of rice.
- 5-10 envelopes of Dried Mashed Potatoes (add water and heat)
- 4-6 envelopes of dried chili mix.
- 4-6 envelopes dried Gravy Mix (add water and heat)
- 10-12 cans assorted fruit or envelopes of dried fruit (to be reconstituted with water)
- 5-10 envelopes assorted pudding or gelatin mix for desserts (mix with water and heat, then let cool).
- Throw in some paper plates and bowls and plastic cutlery, and you have a week-long picnic in a bucket.
- Try for about four(4) to six (6) different weekly menus that can substitute different cereals, different soups, add the packaged red beans and rice instead of pastas, add macaroni and cheese in place of mashed potatoes, and be creative with the canned meats (like making fried salmon cakes). Hamburger helper comes in many flavors, bagged pasta meals as well, so do not forget those “pre-packaged” meals (and meat can be from canned or dried sources, or fresh. Also, do not forget seasonings like Tabasco, salt and pepper, garlic and onion powder or even Montreal Steak Seasoning and A-1, Asian or Mexican seasonings add spice to anything and break the monotony.
- The labor efficiency and space efficiency of only having one bucket open at a time, per week, shows itself by taking up much less room than having 6 or 7 buckets open at once, and the probability of attracting critters or infestations is less with only one open at a time, especially if the mylar bags are sized for a single meal at a time or if we buy the prepackaged dried pasta meals or Hamburger helper (or equal) varieties.
- Again, after the menus are planned, getting the ingredients is as simple as adding a week’s worth to your grocery list and putting it aside as soon as the groceries are unpacked. No more quizzical looks from piling multiple cases of canned goods in your cart all at once, just buy them an extra week at a time and nobody will be the wiser. OPSEC counts.
- Keep in mind the utility of being able to “grab a week” in one hand and skedaddle (that is a southern term for evacuate) for a short term relocation in case of acute threat where staying in the present location is not possible, say for a short-term chemical spill or gas leak, “fill in your own short term emergency here”, etc. It is also easy to pick up a bucket for a week-long camping trip to a nice alternate vacation location, if you so desire. It is also handy to have these kits assembled in case of “running out of paycheck before running out of month” situations.
- You notice that this plan does not include water, but much has been made of water storage as well as water filtering and catchment/ supplies already. The minimum is one gallon per day per person, and to sanitize it, add two (2) or three (3) drops of liquid chlorine bleach or equivalent per liter (quart) and let it sit for 30 minutes. A little more bleach if the water is still cloudy, or any other alternative treatments like UV disinfection if you like that. I am a chlorine bleach fan, personally.
- Okay, so how about the extra fresh things to round out the “Week in a Bucket”? We all need fresh vegetables or “greens”, so become familiar with what grows in your area and add that to the plan. Watercress, wild onions, dandelion leaves, even those cattails, duckweed, and other gathered greens will come in very handy… and are not in the buckets. We can all grow lettuce and arugula and onions beginning in March, and we can pack bean and broccoli and radish seeds to sprout for added greens.
- We have fruit trees and/ or nut trees someplace close, right? If not, find some or plant some. Fresh Apples, Peaches, Pears, Plums, Pecans, Hickory Nuts, even Walnuts will all be a welcome addition when the time comes. Find and use them now, since there is no need in being forced to learn new skills when we can learn them beforehand.
- Salt blocks to pull in wild game, of course! No need to stalk and track if the fresh game will come to you. And, learn to dress these animals too… without wasting parts. Use as much of the game as you can. It is the right thing to do.
- Compound Bow and arrows for silent harvesting, maybe even an air gun for squirrels, rabbits, doves or pigeons? That is handy.
- Casting nets for bodies of water… yes please, I’ll take a couple if there is a suitable pond or lake nearby… and learn to use them. Or, use hook and line… or even use the compound bow for fishing. That takes some experience and practice, but that is what we like to do. Fish traps in flowing water…if it was good for the Native Americans it can be good for us.
“A Week in a Bucket” is in essence the step between individual MREs and bulk/ mass storage, and possibly will work better for your situation. Give it some thought and evaluate its utility and advantages for yourself.
Location is the most important thing to consider when developing a plan for long-term habitation in a TEOTWAWKI setting. Of primary concern are Community, Safety, Water, Food, Sustainability, and Natural Resources. It is absolutely imperative to find a locale with a well or fresh water spring. You will need fertile ground that is within distance of easy irrigation. The safest places will be those that are away from major highways and population centers; however, these small rural communities are typically suspicious of outsiders. You will need certain natural resources available as well to guarantee you are not reliant on trading or the good will of your neighbors to survive.
My plan involves getting back to the family farm in East Texas and away from the chaos that is going to ensue in the Dallas-Fort Worth area where I currently live. I have multiple routes highlighted on maps to get to my destination with detours marked for crossing major highways along the route. I have insured that I have enough fuel to reach my destination along with enough of a buffer in case I spend an extended period of time in traffic or want to help a stranded motorist who is out of fuel. I will never take main roads like an Interstate unless I am 100% sure that I am leaving ahead of the horde and even then I know that it is a risky proposition because those are the routes that will either fall under tight government control, or more likely, will have “survival of the fittest areas” where those who are not prepared prey on those who have anything of worth. I have all of my survival gear and supplies staged in specific areas to allow for rapid loading and a timely departure. My SUV has a roof rack, trailer hitch cargo carrier and enough space to carry my wife, kids, and all of my necessary supplies along with the family picture albums.
In selecting a location for your retreat there are several considerations to take into account. First, Who are your neighbors going to be? It is all well and good to select a remote location in a farming community to set up your retreat but these communities are typically very close knit and do not trust or welcome outsiders quickly. You should insure that you have a solid relationship with at least one and preferably multiple families in the area you have chosen so you can integrate seamlessly into the community. You will have to bring skills or goods that will enable you to be accepted in the community as an equal in the long-term survival quotient. Expect that you will have to pitch in and work hard with the rest of the community in one of several areas like food production, land and home maintenance, as well as security. Just because you bring enough food for yourself does not mean that you will be able to opt-out of the hard work necessary to support an agrarian community. If you are accepted into the community there will be plenty of people who will be willing to show you how to do any number of things since areas like this tend to have numerous older individuals who will have grown up as subsistence farmers. These people will be familiar with making clothes, caring for livestock, gardening, canning, trapping, hunting, and fixing just about anything with some bailing twine and duct tape. Just do not expect that you will be able to show up in a rural community with a truckload of gear and convince them that you will be an asset. Even in a community that you have someone to vouch for you expect to spend at least a year proving that you can be a worthwhile addition to their group.
Second, you need to consider how safe is the location you desire. You will want to be away from highways that will have any traffic. An excellent choice is a Farm to Market Road at least one to two miles away from the nearest highway. Most houses have been built close to the road and this is not an ideal situation since you will want to have a location that is not obviously inhabited if there is traffic on your road. Try to find a location that is out of sight and hearing, don’t want someone walking by to hear you chopping firewood, and close to where your garden will be located to maximize your ability to keep your home and garden safe with the minimum amount of security resources.
Third, you need to find land that will be able to support the members of your family for an extended period of time. Things to consider when choosing a location are: fresh water and arable land. Is there a source of unpolluted, fresh water on the property that can be accessed by digging a well? Is there a stream on the property that can have water diverted for gardening irrigation? Is there a pond on the property that can be stocked with fish? Are there trees on the property that will keep you supplied with firewood and lumber for building? You will need a clean source of water that you have easy access to that can keep your family supplied with a sufficient amount water for drinking, cooking, cleaning, and washing. Also, take into consideration the number of livestock that you will need and check with the local agriculture office to see the recommended acreage per cow, horse, etc… If you can find a location with a creek on the property it will be very advantageous in keeping your livestock watered and your garden irrigated. When you go to lay out your garden choose land that is downhill from the water source so your irrigation channel will be fed without additional effort. Another advantage of a running water source is the ability to build a dam to create a pond. Having a pond for raising fish and as a large storage location for water in case of drought could be vital to your survival. Not only are trees useful for the firewood and building supplies that can be taken from them but it is also an excellent buffer to shield your home and garden from the sight of people that might pass by. Wild game also tends to be more plentiful in forested areas and that will supplement your fish, livestock and garden. Trapping small game is an excellent source of daily meat and will not require extensive time spent on hunting or drying large game meat, so make sure that you have traps to lay out on game trails.
Fourth, dedicate some time to retrofitting your home to the standards that were in use before electricity, running water, and central heat and air conditioning came along. This means building an outhouse downhill in the direction your well water is flowing and far enough down that the bacteria will not enter the ground water that flows into the well. You will want large windows with screens to capture any breeze during the summer months and shutters to cover the windows in the winter months to preserve as much heat as possible. If possible, it would be ideal to have a windmill that can be used to charge a battery bank to provide power to convenience appliances and perhaps to power an exhaust fan that will keep your house cooler in the summer months. My philosophy is that if having one of a certain item is good having two is even better. Spare parts for your important machinery will pay for itself many times over. An enclosed wood-burning firebox will help you to use your firewood judiciously while still heating your home. Since propane is very inexpensive it would be a great idea to buy a very large propane tank and get it filled so you can add a nozzle to recharge cooking and lantern tanks for yourself and as a trade good. A root cellar is perfect for storing food and other temperature sensitive items in a cool location. Since you will need to have a steady supply of vegetables you might want to build a greenhouse to supplement your canned vegetables from your garden with fresh vegetables. It will also allow you grow other plants that may not be suited to your location. This will enable you to grow exotics that other people are unprepared to grow like tea, coffee, or cocoa, which will give you little tastes of luxuries that will dwindle quickly. Also, consider growing medicinal plants that can replace the current dependence on prescription and over-the-counter drugs.
These are some of the main points that you will need to consider in choosing and preparing your retreat. This is by no means a complete list of what will be needed but it is intended to get you thinking about more than just the stuff you will need to buy but how to create a place with as many comforts as can be provided with the limited resources that will be available. There are so many things that need to be prepared for a long-term survival situation you could write a book about it.
Several readers have written me to mention the trailer for the upcoming NBC (US television network) post grid-collapse TEOTWAWKI series: Revolution. ("After 15 years of darkness, an unlikely group sets out to save the world.") The four-minute trailer was interesting. Watching it felt like a count the memes and homages contest. Predictably, "militias" are made out to be the bad guys. There are far too many reminders of both S.M. Stirling's Dies the Fire sci-fi novel series and the movie The
Postman
in the trailer for me to think that NBC's screen writers hadn't been influenced by them.
The editors of io9 describe the show:
"In this footage, a mysterious blackout knocks out the world's power grid and renders all of civilization's car batteries completely kaput. Some sort of über-electromagnetic pulse, perhaps? Anyway, the scenes then fast-forward 15 years. The globe has taken a turn for The Postman, but at least we have Giancarlo Esposito as Gustavo Fring, Wasteland Warlord. NBC executives, you really should be calling this show Gustavo Fring: Wasteland Warlord, as I would panel every surface of my house with flat-screen televisions to watch that. (The title Revolution sort of evokes a new brand of antiperspirant or low-calorie carbonated limeade.) Quibbles with nomenclature aside, this could be fun, not unlike The Road [except] with no cannibals and more swashbuckling. "
And here's a synopsis from NBC's web site:
"Our entire way of life depends on electricity. So what would happen if it just stopped working? Well, one day, like a switch turned off, the world is suddenly thrust back into the dark ages. Planes fall from the sky, hospitals shut down, and communication is impossible. And without any modern technology, who can tell us why? Now, 15 years later, life is back to what it once was long before the industrial revolution: families living in quiet cul-de-sacs, and when the sun goes down lanterns and candles are lit. Life is slower and sweeter. Or is it? On the fringes of small farming communities, danger lurks. And a young woman's life is dramatically changed when a local militia arrives and kills her father, who mysteriously – and unbeknownst to her – had something to do with the blackout. This brutal encounter sets her and two unlikely companions off on a daring coming-of-age journey to find answers about the past in the hopes of reclaiming the future."
Well, at least they got our dependency on electricity right.
So how would The Hollywood Reporter sum up this show? Perhaps: "Fifteen years in the future, Dies The Fire meets The Postman, gets Lost on The Road, engages in some Hunger Games short range archery and some Crouching Dragon swordplay." Bows and swords, are de rigueur you see, because combat up close and personal seems quasi-chivalrous and it has a higher quotient for drama than getting drilled through the chest at 300 meters. I assume that the scriptwriters will employ either the premise that cartridge ammunition has been expended or that 15 year old ammunition is no longer reliable. (For the record, I'm presently in the middle of a batch of .30-06 from the Lake City Arsenal, vintage 1942. Every round still goes bang, and it is still quite accurate.)
One thing is almost certain: With the combined effects of Revolution and The Hunger Games, there is bound to be a nationwide shortage of light draw-weight archery equipment before next Christmas, as nearly every teenage girl in the country sets aside her iBook and picks up a recurve bow.
According to the NBC network's official web site for the series, it will begin airing in the Fall Season of 2012, on Monday evenings at 10 p.m. ET/PT.)
Sir:
I enjoy your blog and support you in a small way with the 10 Cent Challenge. After reading your response to the Battery-Powered House Interior Lighting letter, I want to add some information that I learned at a FAA seminar that I attended. The FAA is now endorsing blue or green lighting in the cockpit of all aircraft (general aviation and commercial). The green and/or blue takes less energy output for the eyes to see details. Also, red lighting can be seen from further away than blue/green (red is used to designate towers and tall buildings at night, where blue is used for taxiway lights because it stands out less at a distance). I would strongly advise the use of controlled blue or green lights for interior lighting and keep the bulbs/LEDs out of direct line of sight of windows. - Carl
JWR:
I wanted to add a few tips.
We recently purchased a set of low-voltage,solar-powered LED string lights from a Target chain store. They are similar to Christmas lights, but the bulbs are of various shapes/designs (we opted for a set that looked like little snow globes or disco balls.)
These lights don't have any sort of connector (12 VDC nor 110 VAC.) Instead, they only have a small solar panel, that's [directly] attached to a sealed battery pack.
During our first camping/outing with the lights, we read the instructions, which said that they required five hours of full sunlight before they would be ready for use. (We had arrived at our campsite about an hour before sunset, so we had no hope that they would work...)
Much to our surprise, they worked perfectly. Initially, their light source seems pretty weak. But, as the skies grow dark,and your eyes adjust, they actually begin to seem pretty bright. We strung them above/around the opening of our tent, and they functioned like some sort of "street light" of sorts (making entry/exit of our tent safe & sure.
We attempted to sleep with the lights still on, to see how long they would last. (A mistake.) At 2 a.m., they were still so bright, that we were having trouble sleeping. So, I turned them off.
The next day, we angled the solar panel to face the sun. (The panel/battery has a clip,which we attached to an external tent pole on our dome-style tent.) We then departed for the day (which turned out to be a windy day.)
When we returned,the little solar panel had spun on the pole (due to the winds,) and was now face-down in the tent (instead of facing the sunshine.) We still had an hour of sunlight before sunset, so there was still hope...
After sunset, when we turned the lights on, they (again) worked like champs. We wondered, though, if they would still hold-up as long as the night prior?...
About an hour later, as we were building our campfire, they died... (We assumed they just didn't get enough sunlight, and we were regretting that they didn't have a 12-volt plug or alligator clips.)
Later, however, as the fire dimmed, the little lights sprung back to life!!!
Go figure -- they also have a built-in light sensor/switch. They automatically turn off, when there is sufficient light (to save their battery.) We had light from them all night (again.)
I have been disappointed by so many "solar yard/path lights" in the past. I almost didn't buy these. But, their LED functionality got the best of me -- and I'm so very glad that I bought them!
Granted, they are not "high beams." These are essentially "super" night lights (or minimalist emergency lighting.)
They are enough light to "get the job done" -- and not much more. But, they are kind of cute, too!
As outdoor lights, they are also water-resistant. As low-voltage, they are also safe to the touch (even if/when wet.)
This essentially-free lighting was enough for 90% of our tasks in/around our tent and camp site. Only a few times did we need to turn on a lantern, or flashlight for specialized tasks (like cutting in our kitchen area.)
On that note, this was also the first time we tried using one of the new LED-style Coleman lanterns. We still brought our Coleman-fueled lanterns, as well as our propane lanterns along, too. We are life-long campers,and Coleman-powered lamps just seem to be as natural as S'Mores over a camp fire. But, the sensitive mantles, and glass lenses, plus the Coleman white-fuel cans, and the propane bottles, and the small funnels, and such add up to a lot of possible "points-of-failure." I was pleasantly-surprised by the amount of zero effort light that our new battery-powered LED Coleman lanterns provided!
One of them was powered via a pack of four D-cell batteries. The other had an integrated battery pack, which you could wall-charge (or hand-crank!!!) I'm somewhat sorry to say, that our old-school lanterns will be moved to the bottom/back shelves of our garage now -- because we now favor the newer, lighter-weight, easier & safer to operate LED lanterns.
We have also purchased a roll-up solar panel to charge any/all of our batteries, too.
Granted, there isn't always a sunny sky. But, one full charge of these little lights, seems to last for multiple nights.
We also bought a hand-crank handheld LED flashlight, too. Again, it's not as powerful as our Mag-Lites. (I think someone on the Moon could see our Mag-Lites!) But, they are much lighter and a quick crank of the handle for 30-60 seconds or so, provides us with hours of lighting. (Whereas dead batteries in the Mag-Lites provides zero light.)
Peace & Preparedness, - J.H.
James:
Another option that has worked well for me is the use of marine-type [low votage DC lighting in the house.
I have a LED chart light set up as a reading light on the back of the head board that I use day to day for my reading and as a bed side lamp. It is powered off of a deep cycle battery in a battery box under the bed. (Yes batteries make hydrogen gas while charging and anyone who is not a big boy and understands this should probably not do it.)
This combo will run many days without a charge and makes a great bed side light as well. One of these days I am going to run the numbers and see exactly how many hours this thing will run, but the battery is so ridiculously over-sized for this application I have not bothered yet. - S.D. in W.V.
Dear JWR:
The writer about traditional projectile weapons seems to have missed the most used feather for fletching arrows. The best ever used that I am aware of is the turkey feather.
They are known to stop 12Ga. birdshot pretty successfully. That is why turkey loads are more powerful, and contain larger shot sizes. Lesser pellets flatten out and fall off the bird.
Good fletching. The American Indians then used a fiber (perhaps of hemp?) to wind them to the shaft of the arrow, after splitting and shaping, of course. Not sure if there was any other kind of adhesive used at that point...wouldn't be surprised. The American Indians (at least in my area) used fairly low-power bows. They used shafts of reeds for arrows, and this was made up for by using obsidian or flint arrowheads. We still can't make a blade sharper than a properly knapped piece of flint. Another skill to learn!
Thanks for keeping all this going! - Sid C.
Several readers sent this: Merkel tells Greece to back cuts or face euro exit Here is a sobering quote: "What will prevail are armed gangs with Kalashnikovs and which one has the greatest number of Kalashnikovs will count … we will end up in civil war."
G.G. sent this: 49% of Americans saving zilch for retirement
Also from G.G.: 50-State Small Business Tax Friendliness Survey
Michael H. spotted this: California facing higher $16 billion shortfall.
Items from The Economatrix:
Stocks Close Down 1% on Bank, Europe Worries
Gold Drops to 4.5-month Low as Euro Sinks
Texas 11-year-old shoots back at home invasion robbers. (Thanks to Randy in Maine for the link.)
o o o
My recent interview on The SGT Report video blog has now been archived.
o o o
Prepper Central reviews the RIBZ Front Pack
o o o
A recommmnended post, over at Modern Survival Online: Imagine for a Moment – The Reality of an EMP Event Part One
"It is not the goal of the Fed or the politicians to pump up the prices of real economic goods of any description. Since "inflation" is conventionally held to be rising prices of the essential goods which make or break real economies, the prices of these essential goods must be held down by any and all means. And foremost amongst these goods is anything that can or has been used as a medium of exchange in the past. Gold (and to a lesser but still considerable extent, Silver) are the curse of all interventionists. They are the alternative to the command economy and the eternal brake on the accumulation of the political power which those who command the economy lust after." - Bill Buckler, Gold This Week, April 7, 2012
