


I was given an 80% build kit from 80 Percent Arms just a few week before Joe “Non-Absolute” Biden announced new rules that will seek to put companies like 80 Percent Arms out of business. So, I offer this review, and encourage you to take advantage of the rules as they now stand, and support them and other companies that support our God-given rights to manufacture our own tools and weapons.
With the Biden/Harris Regime poised to issue rules requiring an FFL to buy or sell “ghost guns” such as bananas and partially-eaten Poptarts, now may be an excellent time to invest in aluminum.
As of April, 2021, 80 Percent Arms was accepting orders for 80% lower blanks, jigs, and kits. But this may change in the near future. They are currently listing their billet 80% lower blanks as shipping in 3-to-5 days, while their AR10 80% lower blanks are back-ordered 11-to-13 weeks, and orders on their multi-cal jigs are 4 weeks out.
The Product
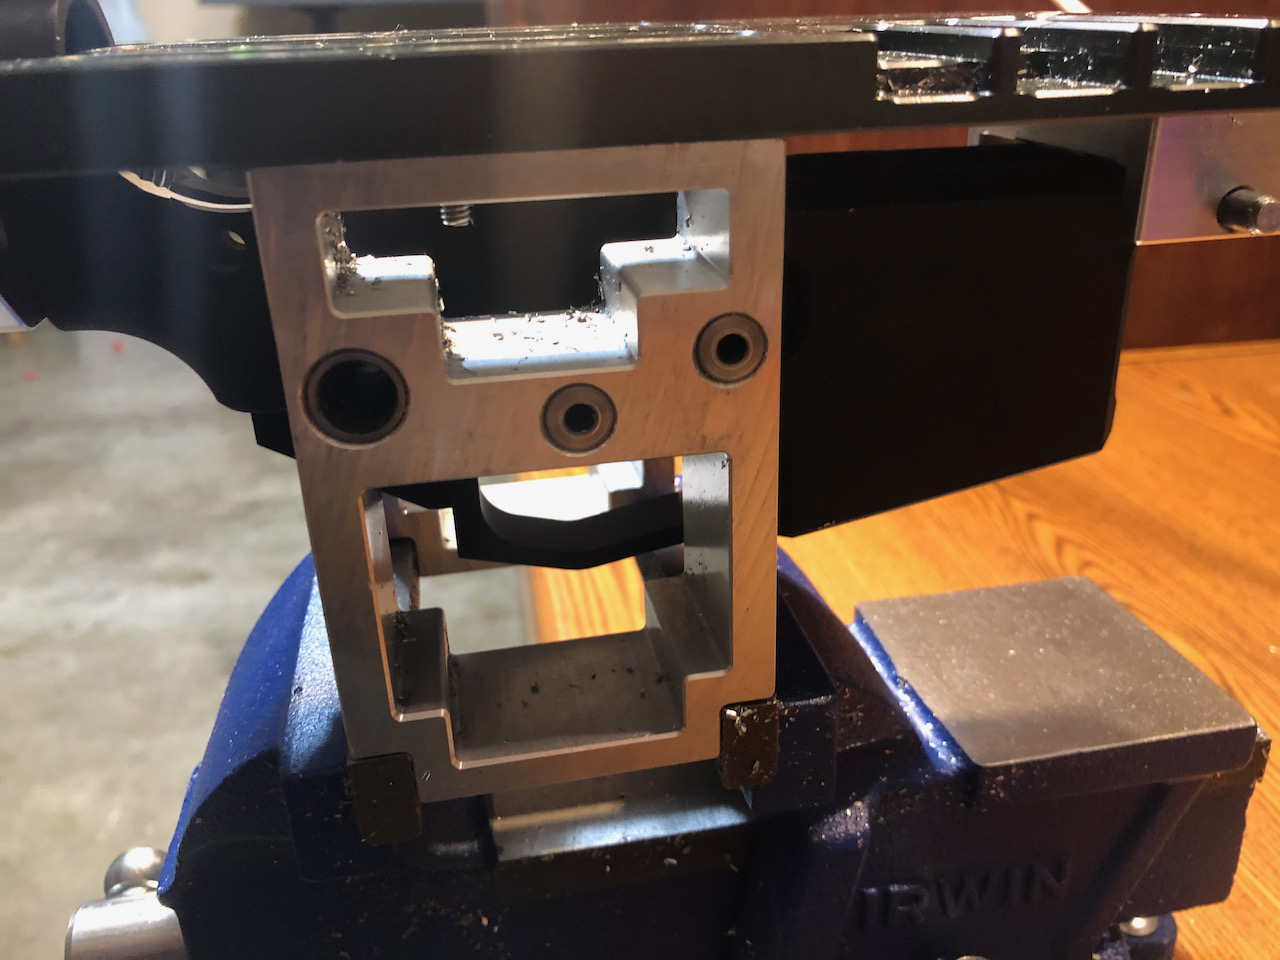
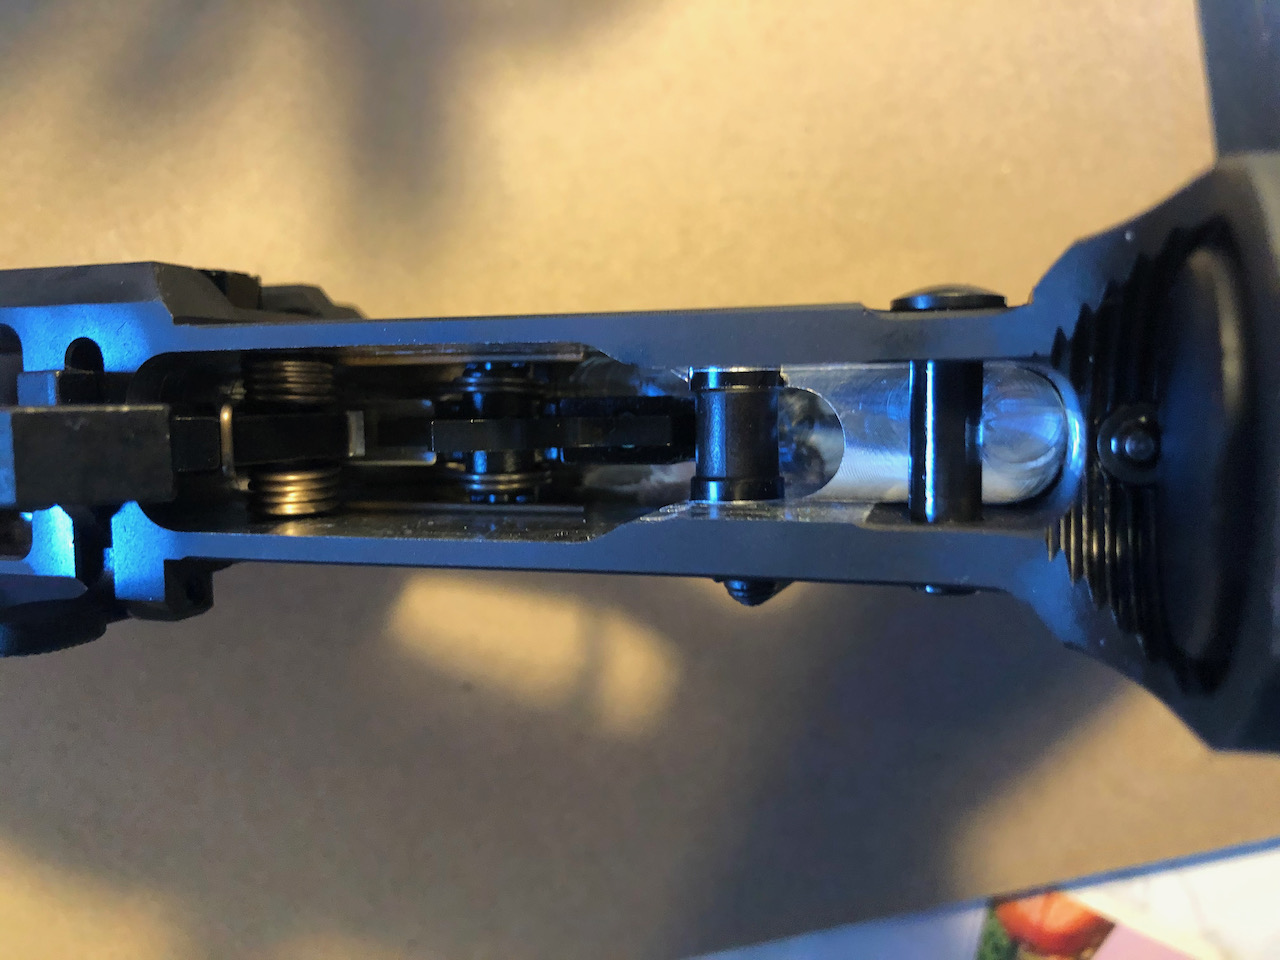
 The Easy Jig Gen 3 includes a guide plate with cutouts to guide the router in the milling operations. The guide plate also features a depth gauge to help adjust the router depth for a consistent cutting depth. The guide plate screws onto the side blocks which serve to secure the jig in the vise, and which also contain the drill bushings for the fire control pocket. The blank is secured in the easy jig at two points–with the pivot pin providing 5 degrees of constraint and the primary datum, and the buffer tube adapter providing the final degree of constraint. The jig strikes a reasonable compromise between cost-effective design, flexibility for “AR-10” and “AR-9” pattern lowers, and overall rigidity. When fully assembled, the blank feels very secure, and the jig provides a consistent and repeatable result.
 I used an unbranded router that was loaned to me by 80 Percent Arms. I also used their supplied endmill and drill bits, along with their router adapter plate. The adapter features two guide pins, which can be switched out to follow the guide path for each of the three milling steps. I used 80 Percent Arms billet black AR-15 80% lower blanks. Quality seemed good, and comparable to most other manufacturers. I also had the opportunity to see a lower made with one of their FDE Cerakote lower blanks, which looked excellent.
UPDATE: The folks at 80% Arms wrote me to mention:
“Our router is actually designed and sold by us, though manufactured overseas. It’s model name is the FST-1. It hasn’t been discontinued. We plan on selling more in the near future but are simply waiting on supply lines to fill up our inventory. “
Process
The jig can be assembled and the 80% blank inserted with an Allen wrench and Phillips screwdriver. The process is largely self-explanatory.
A drill guide attaches to the top of the guide plate to allow the pilot hole to be completed. This hole is drilled all the way through the lower, and allows the end mill to start and function smoothly. (The cutting tool is designed for side milling, not drilling.)
 The milling of the fire control pocket is completed in three sets of incremental milling, removing around a 1/16″ of material on each pass. In each step, the router depth is set using the depth gauge, the router is started in the pilot hole, and then runs within the guides to mill out the pocket profile. The recommended pattern of clearing material with a clockwise spiral motion, followed by a clockwise traverse of the outer profile seemed to produce good results.
Some Operator Error
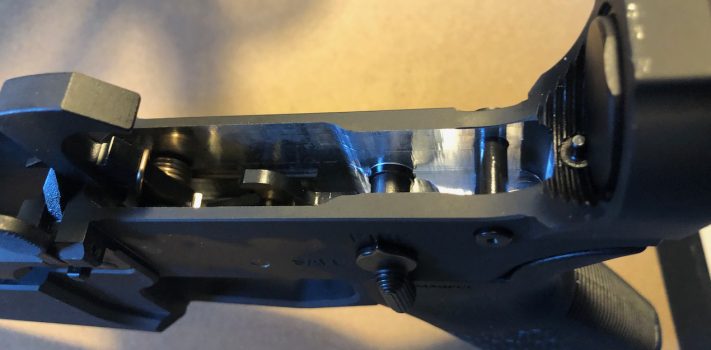
 This was the one step where I learned an important lesson. On my initial passes, I had carefully aligned the endmill in the center of the pilot hole, and had no problems. Unfortunately, this provided a false sense of assurance, and I underestimated the torque produced by the router on startup. On the next pass, the cutter was off-center in the pilot hole, and caught the edge of the hole immediately. I was not holding the router securely enough, and the endmill jumped out of the pilot hole. From there it ricocheted around the fire control pocket before I could remove it, cutting deep gouges into the sidewalls.
This impact also broke the cutting teeth off of the endmill, ruining it. This is all attributable to operator error, and my laxity in careful handling of the router. Lesson learned: Apply firm pressure to the router before turning it on and beginning your cut.
 The milling is a messy process, and produces an abundance of small aluminum chips. Safety glasses are essential, and earplugs will reduce the strain on your hearing. I used WD-40 as a lubricant for the drilling and milling processes, and it seemed to work well at lubricating the cutting surfaces and reducing heat. An old paintbrush worked well to brush chips away from the work area and out of the pocket. If I were doing more, I’d try to set up my Shopvac to capture the spray of chips, and reduce the overall mess.
After the milling is complete, the jig is rotated 90 degrees in the vise, and the holes for the safety selector and trigger & hammer pins are drilled. I used a hand drill and the bits provided by 80 Percent Arms. The drill bushings in the jig made this quite quick and easy.
The finished lower is then removed from the jig and cleaned–first brushing away any loose chips, and then washing away any remaining cutting fluid and aluminum powder still adhered with hot soapy water.
Finished Product
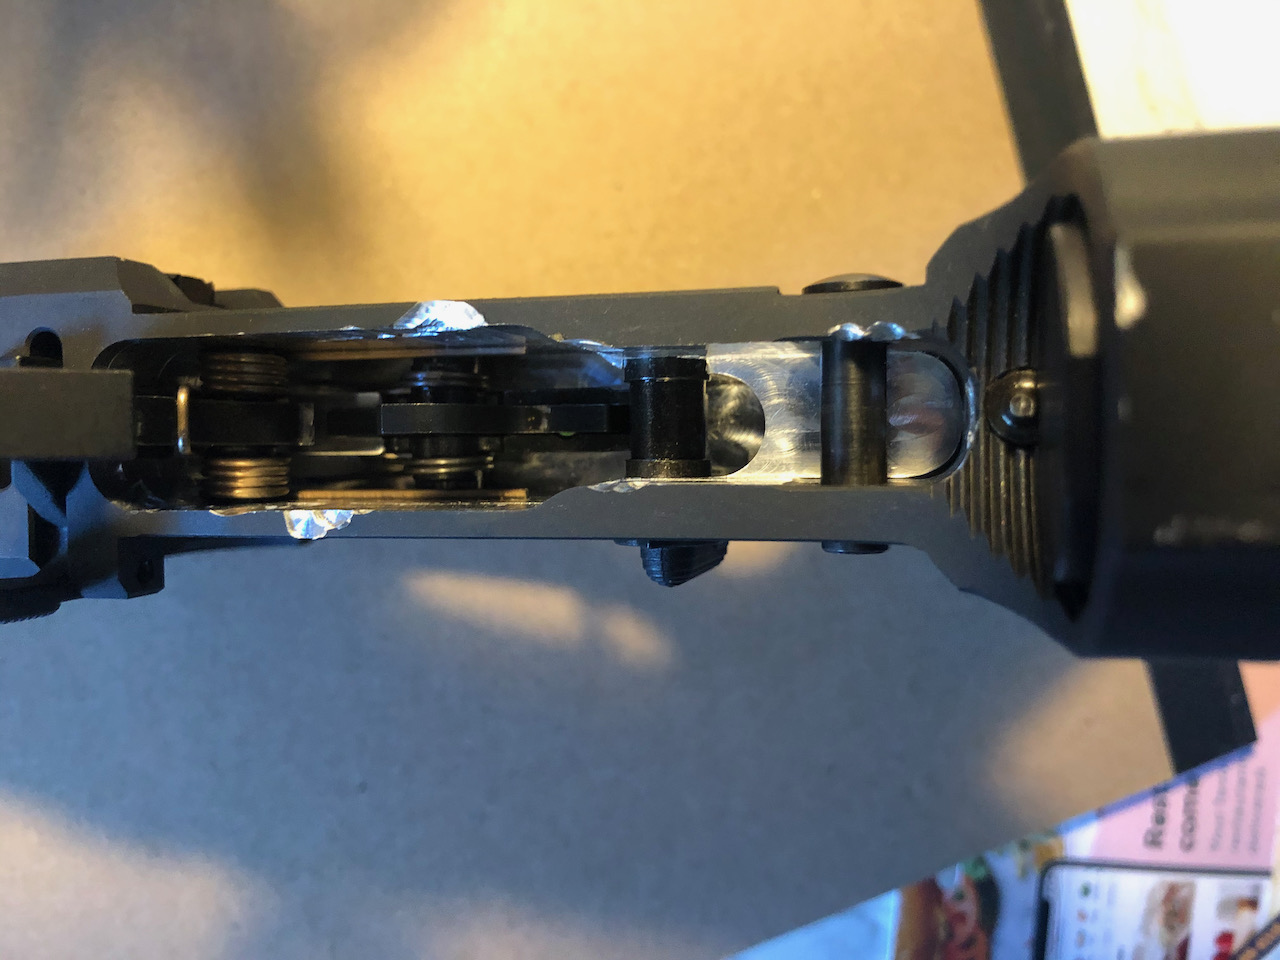
 On the first lower, the finish was disappointing, due to the aforementioned operator error. On the second, the finish was excellent. At this point the cutter had been used on three lowers, and seemed to show no decreased cutting ability, and I am confident that it could complete a couple more without significant deterioration. The milled finish shows some roughness on the interior sides of the lower and tool marks on the floor of the lower. This could likely be reduced by more deliberate machining–while I attempted to complete it accurately, I did not “baby” it and try to get the optimal finish. Overall, the finish on the milling was very satisfactory. Being an interior surface with no functional effects, I am confident that even the major gouges from the first broken cutter will have no adverse effects on the rifle’s long-term operation.
 The weakest point in the process was the drilling of the fire control group holes. Using a hand-held drill and the bits provided, the holes were functional, but not as nicely finished on a commercially-produced lower. Notably, the exit hole for the safety selector was slightly out of round, and all the holes showed some burrs and deterioration of the finish at the edges. But for all that, as a process that is completed with hand tools, the result was fully acceptable. I do wonder whether a drill press might obtain better results, but did not have the facilities to try it myself.
If you want the optimal finish, you’re probably better off buying the raw aluminum blank, and having the finished lower Cerakoted or anodized after you complete the machining and carefully deburr and clean up. In that case, it would likely be very hard to distinguish the outcome of the homemade lower from an off-the-shelf product.
There were a few burrs at the trigger and hammer pins, the safety selector, and takedown pin. Most of them were easily filed down, or simply stripped away when the pins were first inserted.
Completion
The lowers were both completed as AR-style pistols. I used a Palmetto State Armory build kit with an SBA arm brace. Assembly went smoothly, and I appreciated the improvements that 80 Percent made on the process.
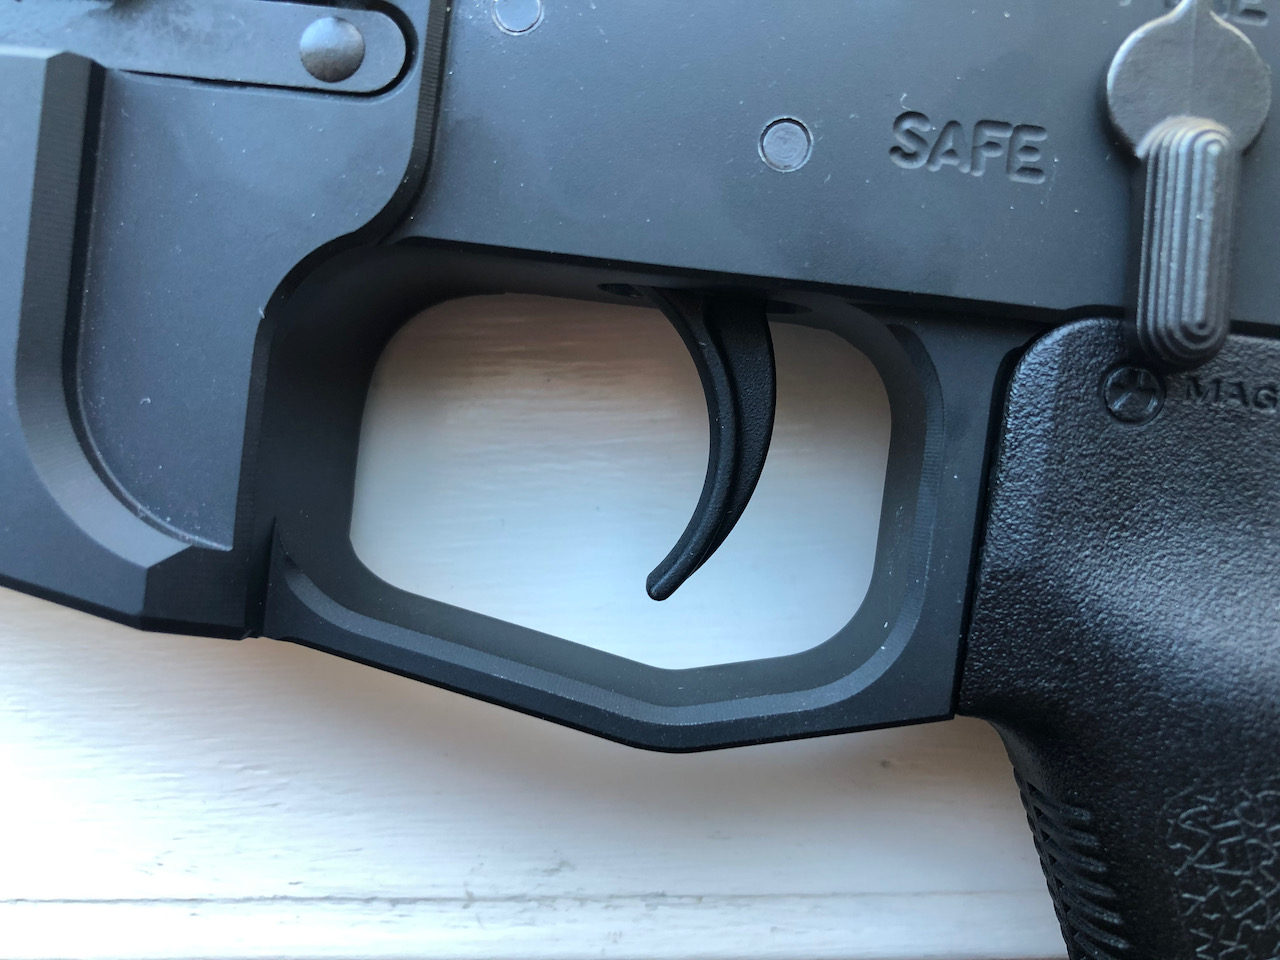
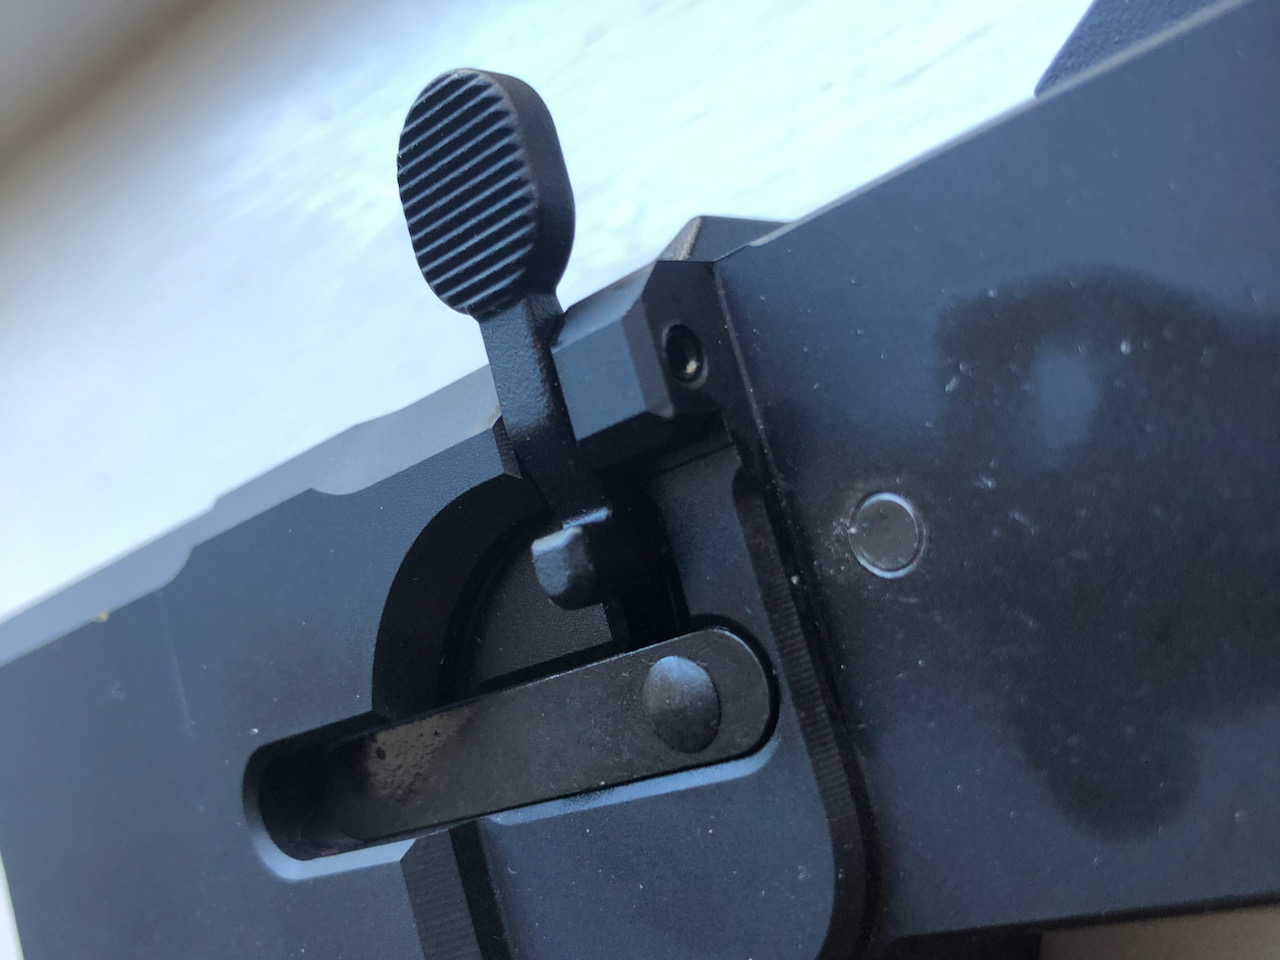
 With the integral trigger guard and threaded bolt catch, they have eliminated roll pins from the lower, greatly simplifying assembly. The integral trigger guard is robust and roomy. The bolt catch pocket is machined a bit deeper than some lowers I’ve seen, allowing it to be depressed further. Instead of a roll pin which results in scratches and marring of the lower when installed by a novice, they have substituted a small set screw. Installation was easy, although I plan to add a drop of Loctite once I’m comfortable with the build to
eliminate any concerns about it backing out. (To be fair, I’ve seen bolt catch roll pins drift out as well.)
 One of the two lowers assembled with a standard PSA trigger group experienced a sticky disconnector hook, which prevented the trigger from resetting consistently. This improved significantly with some polishing of the hook on the disconnector and hammer, and better lubrication of the trigger group pins. I had no issues with the trigger on the 2nd build. It could be possible that there’s a tolerance issue due to the drilling process for the holes, but overall I’d attribute that to my being too thrifty to buy a good trigger for the build.
I haven’t yet had a range day, but as far as all functional checks go, the completed lowers are fully functional, and have no problems fitting an upper and feeding well. I look forward to breaking them in at the range.
—
About The Author: Jonathan Rawles holds a B.S. degree in Mechanical Engineering. He operates the real estate advertising site SurvivalRealty.com and is a partner of Survival Realty Brokerage Services.